Last updated: May 20, 2026
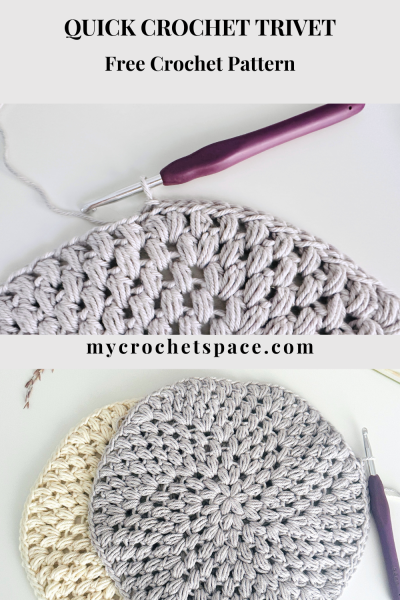
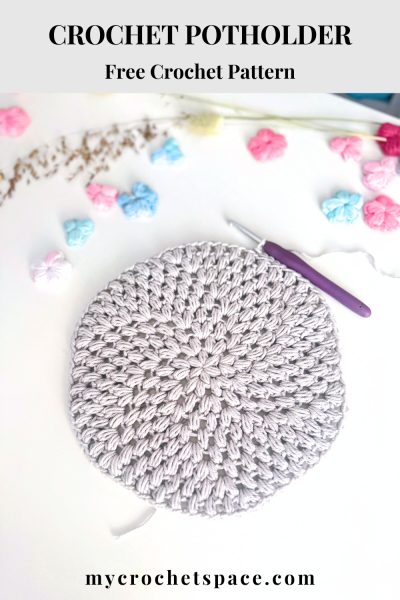
If you’ve been looking for a crochet potholder pattern that’s functional, beautiful, and – if you want to learn something new – a great excuse to try the puff stitch, you’ve found it!
This free round crochet potholder pattern uses the puff stitch to create a gorgeously textured hot pad that does its job AND looks beautiful doing it. 😊
This pattern sits at an easy intermediate level. It’s the perfect next step if you are a beginner, know basic stitches and are ready to try something new. A couple of hours is all you need.
For your convenience, you can get the ad-free PDF version with step-by-step photos and written instructions from my Etsy or Ravelry stores.
Why You’ll Love This Round Crochet Potholder Pattern
- Puff stitches create gorgeous texture and thickness, perfect for protecting your table from hot pots and pans
- Worked in the round for a beautiful finish
- 100% cotton yarn keeps it safe near heat (no acrylic near your stove!)
- Perfect for beginners who want a challenge – ready to level up your skills? This is the project
- Ready in an afternoon – a couple of hours, and you have a finished, functional piece you’ll actually use
- Perfect stash buster – great for using up cotton yarn scraps
A Note on Heat Protection
This potholder is designed as a trivet. It protects your table and surfaces from hot pots and pans beautifully. Because it uses puff stitches, there is some air space within the fabric, which means it is not recommended for picking up hot pots with your hands.
For hand use, you’d want a solid, tightly-worked fabric such as this thermal potholder. As a trivet on the table or countertop, though? It’s wonderful.
A note on yarn: Always use 100% cotton for potholders and trivets. Cotton is naturally heat-resistant and machine washable. Avoid acrylic yarn for these projects, as it can melt when exposed to very high heat, may release fumes, and tends to transfer heat quickly, which could burn your hands – and we definitely don’t want that!
How to Crochet a Round Potholder – Step-by-Step
This pattern is also available as a printable PDF in my Etsy and Ravelry shops.
Share or pin this pattern to your Pinterest crochet board for later!
Difficulty
Easy / Intermediate
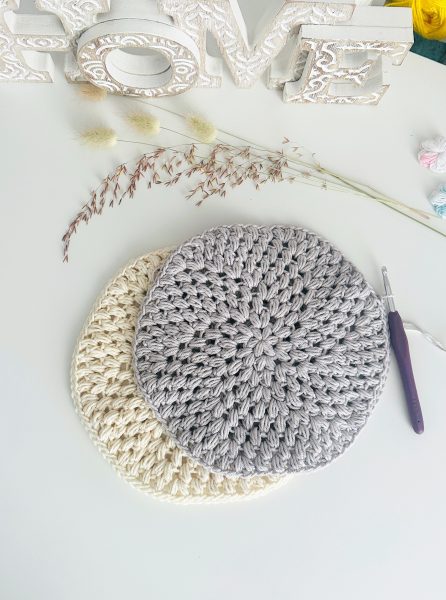
Finished Size
8.5″ in diameter (22cm)
Abbreviations (US Terms)
- YO = yarn over
- Ch = chain
- St(s) = stitch(es)
- Sl st = slip stitch
- Pf st = puff stitch
- Inc = increase (2 pf sts worked in the same st)
Special stitches
Puff Stitch (Pf): YO, insert hook into the specified stitch, YO and pull up a loop. You should have three loops on your hook. YO again, insert the hook into the same stitch and pull up another loop. You should have five loops on your hook now. YO and pull through all five loops. Ch 1 to complete the puff stitch.
Increase: 2 pf sts worked in the same stitch
Materials
- Yarn: Dishie, 1 skein (you’ll need around 100yds/91m) Pictured colour: Light Gray
- Crochet hook: 5 mm
- Scissors and a yarn needle for weaving in the ends.
Pattern Notes
- The trivet is worked from the centre out in the round, without turning.
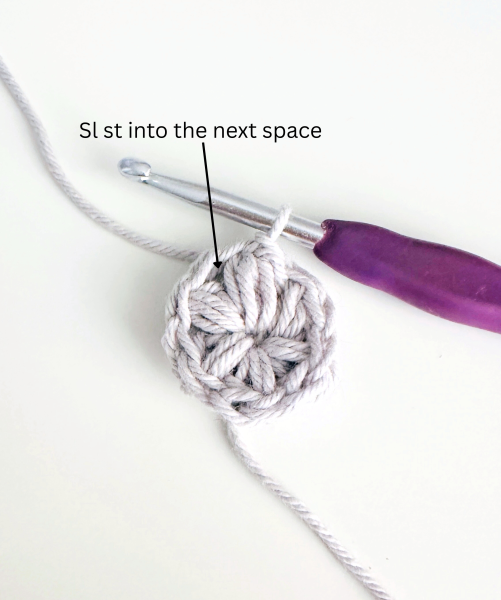
- Every puff stitch round, starting from round 2, begins with a slip stitch into the first space between the puff stitches.
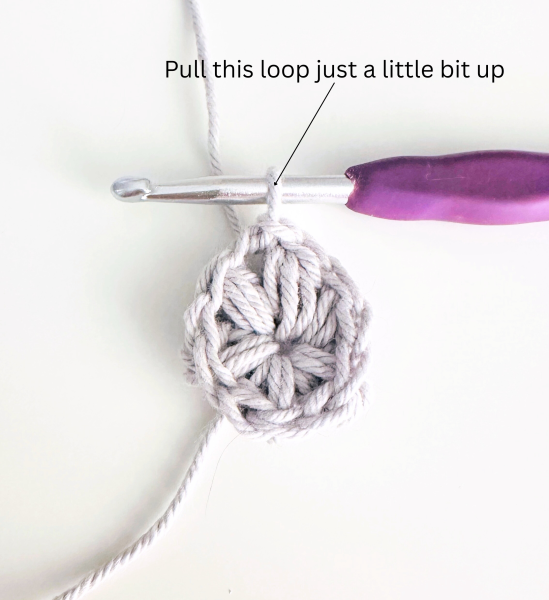
- Instead of chaining one at the beginning of each round, simply pull up the loop on your hook slightly taller before starting your first puff stitch.
- A number before Pf means to work one puff stitch in each of the next indicated number of spaces.
- The number in parentheses () at the end of each round indicates the total number of stitches in that round.
Instructions
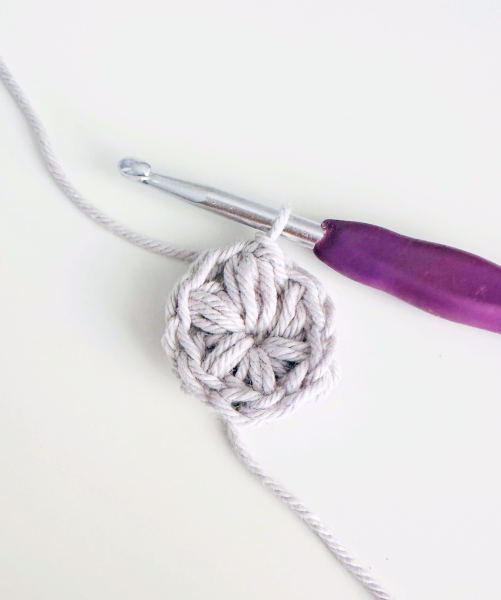
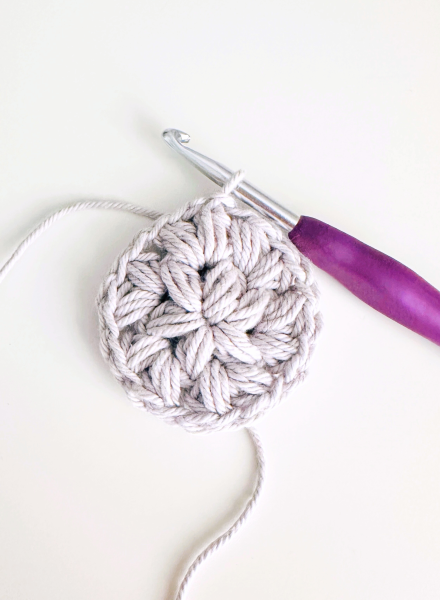
Round 1: Start with a magic ring, Ch 1 and work 6 Pf sts into the ring. Connect the round with a Sl st.
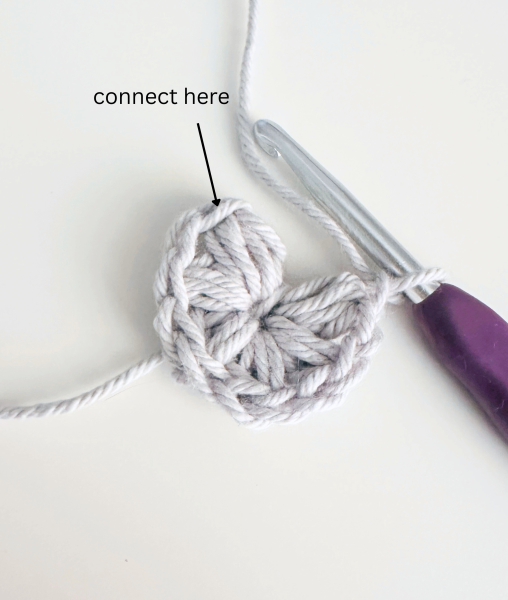
Round 2: Sl st into the first space between the Pf sts. Instead of chaining one, slightly pull the loop on your hook a little taller. In this round we increase (Inc) in each space, meaning we work 2 pf sts in each space around, so we’ll have 12 stitches at the end of this round. See photos below. Sl st to join. (12 sts)
Round 3: Sl st into first space. *1 Pf st, Inc in next space, repeat from * around. Sl st to join. (18 sts)
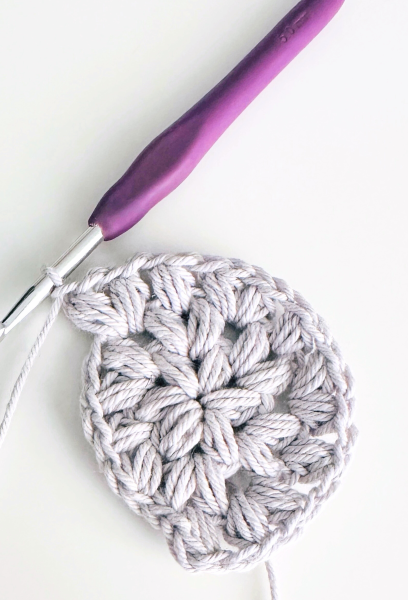
Round 4: Sl st into first space. *2 Pf st, Inc in next space. Repeat from * around. Sl st to join. (24 sts)

Round 5: Sl st into first space. *3 Pf st, Inc in next. Repeat from * around. Sl st to join. (30 sts)
Round 6: Sl st into first space. *4 Pf st, Inc in next. Repeat from * around. Sl st to join. (36 sts)
Round 7: Sl st into first space. *5 Pf st, Inc in next. Repeat from * around. Sl st to join. (42 sts)
Round 8: Sl st into first space. *6 Pf st, Inc in next. Repeat from * around. Sl st to join. (48 sts)
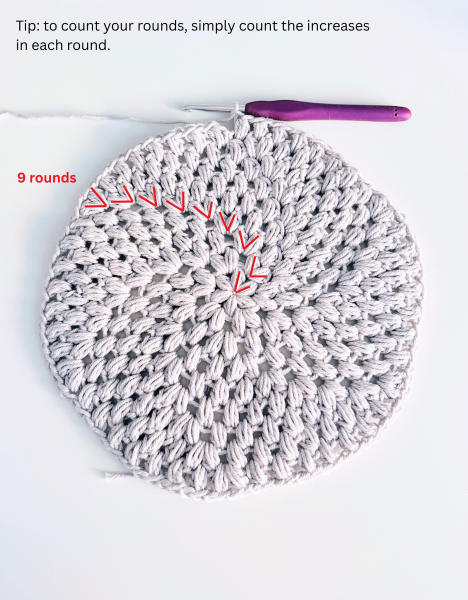
Round 9: Sl st into first space. *7 Pf st, Inc in next. Repeat from * around. Sl st to back loop only of the first Pf st. (54 sts)
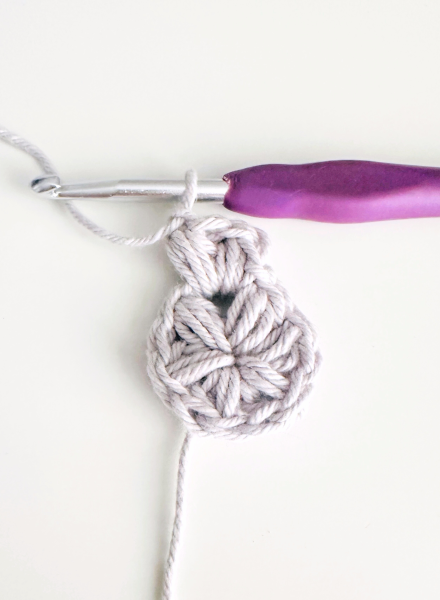
Tip: Instead of counting the puff stitches in each round before increasing, simply look at where the increases were in the previous round. When you reach them, work your increase one stitch later so they are offset rather than stacked on top of each other.
To know how many rounds you made, count the increases from the centre, see photo below.
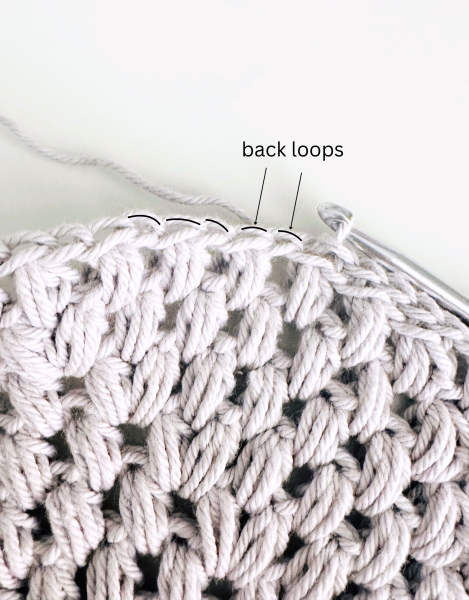
Border
Work a slip stitch in the back loops only of the first stitch and in each stitch around. Join the round with a slip stitch.
Fasten off, weave in all ends!
Blocking
To make your trivet nice and flat without curling, it’s important to block it once you’re finished. Simply give it a good spray with water and pin it to a blocking board or any clean, smooth surface like a table and let it dry completely before unpinning.
I know, this part isn’t the most exciting, and sometimes we want to start using it right away. But it really is worth it. You’ll end up with a more polished, even and nicely symmetrical trivet 😊 Perfect for gifting or for using in your kitchen straight away.
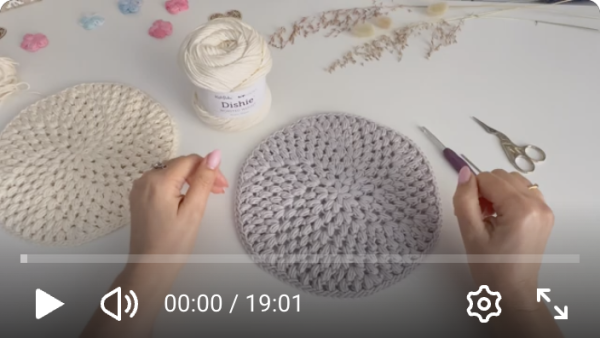
Watch the Full Step-by-Step Video Tutorial
Tips for the Perfect Crochet Trivet
1. Tension matters
Consistent tension across your puff stitches gives you an even, beautiful result. Take your time with each puff, they’re satisfying once you get the rhythm!
2. Don’t skip blocking
Blocking is highly recommended for this pattern. Once finished, wet your potholder, pin it out to its final circular shape on blocking mats, and let it dry completely. This is what gives you that crisp, professional finish and perfect round shape.
3. Play with colour
This round potholder looks beautiful in two or more colour combinations, or you can use variegated or self-striping yarn for easy colour changes without having to switch colours yourself.
5. Scale it up
Love the design and want something larger? Use this easy pattern to scale this up to a placemat size. If you use bulkier yarn and a larger hook you’ll get a bigger version.

How to Care for Your Cotton Crochet Potholder
- Machine wash on a gentle/cool cycle
- Lay flat and block to dry. Blocking is highly recommended to keep the perfect circular shape. Pin it on a blocking board while still damp and let it dry completely before unpinning
- Blocking also relaxes the puff stitches beautifully and gives you that crisp, polished finish
- No ironing needed
With proper care, your cotton trivet will last for years and keep looking beautiful.
Frequently Asked Questions
What is the best yarn for crochet potholders?
100% cotton yarn is the best choice for crochet potholders and trivets. It’s naturally heat-resistant, durable, and machine washable. Avoid acrylic yarn near heat – it can melt. Worsted weight (#4) cotton is the most popular choice.
Is this potholder pattern suitable for beginners?
This pattern works at an easy intermediate level – it’s ideal for crocheters who know the basics and are ready to challenge themselves and learn something new. The puff stitch is a beautiful technique to learn, and this project is a very achievable way to do it. You’ll finish with a new skill and a gorgeous piece for your kitchen!
Is this potholder safe to use with hot pots?
This round potholder is designed as a trivet – perfect for placing on your table or counter to protect surfaces from hot pots and pans. Because it uses puff stitches (which have a little air space between them), it’s not recommended for picking up hot pots directly with your hands. For hand use, you’d want a solid, tightly-worked design such as the thermal potholder.
How long does it take to crochet a round potholder?
This pattern works up in an afternoon, typically 1–2 hours once you’re comfortable with the puff stitch. It’s a satisfying, quick make with a beautiful result!
How do I keep my round crochet potholder in shape?
Blocking is the key! After washing, pin your potholder out to its final circular shape on blocking mats while it’s still damp, and let it dry completely. This keeps the shape crisp and the puff stitches looking their best.
I hope you like this pattern! You can get a printable ad-free version of this pattern from my Etsy or Ravelry store.
More Crochet Potholder Patterns You’ll Love
If you enjoyed this round crochet potholder pattern, here are more kitchen crochet projects from the blog:
- Square Puff Crochet Trivet
- Snowdrift Crochet Pattern
- Winter Spruce Crochet Trivet
- Trellis Mosaic Potholder Trivet
- Everyday Thermal Potholder
- The Ultimate Thermal Potholder
Don’t forget to save this pattern to your favourite crochet Pinterest board so you can find it again easily!