Last updated: May 13, 2026
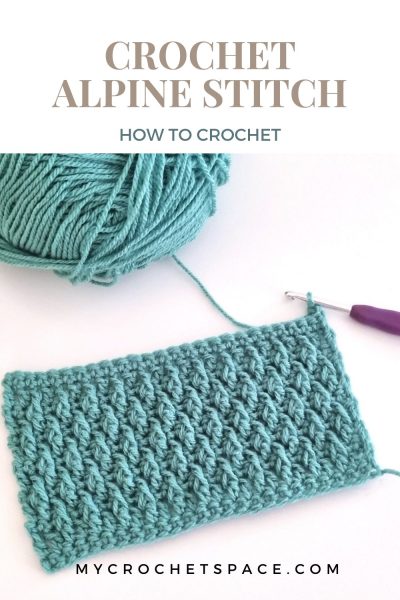
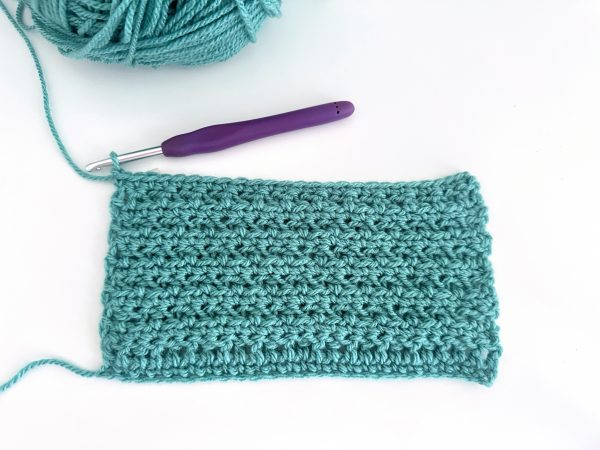
The crochet Alpine Stitch is a beautiful stitch that creates a textured, raised fabric. It is often used in various crochet projects, including blankets, scarves, hats, and even garments. Here’s a basic explanation of how to work the Alpine Crochet Stitch.
Alpine Stitch uses single crochet, double crochet and front post double crochet stitches to create this stunning texture. It’s a 4-row-repeat pattern, where two of the rows are single crochet rows and the other rows are double crochet and front post double crochet stitches.
Alpine Stitch Crochet Overview
When I first learned how to crochet the Alpine Stitch, I found it a little confusing. Being someone who prefers seeing and understanding the bigger picture before delving into the details, I needed a clear summary of the stitch. I needed to remember the order of rows and what stitches are involved. So, if you’re like me and find it helpful to have an overview first, here’s a brief summary of how the Alpine Stitch goes.
The 4-row-repeat pattern goes as follows:
- Row 1: single crochet row
- Row 2: alternate double crochet and front post double crochet stitches
- Row 3: single crochet row
- Row 4: alternate front post double crochet and double crochet stitches
As you can see, the first and the third rows are single crochet rows. The second and the fourth rows are almost identical, with a slight difference. In the second row, you start with a double crochet and in the fourth row, you start with the front post double crochet.
So, that’s a quick overview of the crochet Alpine Stitch, which I found easy to remember. By the way, when you begin, you can switch the second and fourth rows around if you prefer, as it doesn’t make any difference. But, once you start, maintain the order of rows consistently.
You can repeat this four-row-repeat pattern as many times as necessary to achieve your desired size. But before you dive into the Alpine Stitch pattern repeat, there are a few rows you should complete beforehand.
So, in order to start working on the Alpine Stitch, you need to make one row of single crochet and one row of double crochets. This is how I like to start, but there are other versions. I find that starting with a single crochet row creates a nice edge, similar to what you’ll have at the end. After you’ve completed those two rows, you start with the 4-row-pattern repeat. So, to summarize the Alpine Stitch pattern, see a quick overview below.
Start:
- Row 1: single crochet row (my preferred way to start, but you can skip this row and start with the second row)
- Row 2: double crochet row
Alpine Stitch four-row-repeat:
- Row 3: single crochet row
- Row 4: alternate double crochet and front post double crochet stitches
- Row 5: single crochet row
- Row 6: alternate front post double crochet and double crochet stitches
- Row 7: repeat rows 3-6
The detailed written pattern with photos on how to do the double crochet and front post double crochets are below. So, let’s go step-by-step so you can experience the Alpine Stitch Crochet for yourself!
Crochet Alpine Stitch Tutorial
Difficulty
Intermediate
Materials
- Yarn: any type of yarn. I’m using worsted weight #4 / Aran / 10ply
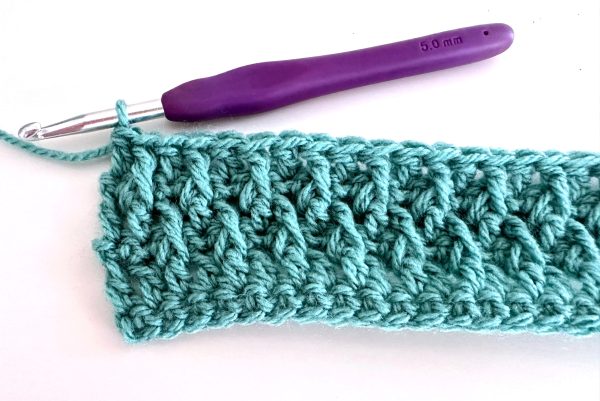
- Crochet hook: I’m using a 5mm hook
Abbreviations (US Terms)
Ch = chain
St = stitch
YO = yarn over
SC = single crochet
DC = double crochet
FPDC = front post double crochet
To create the Alpine Stitch pattern, the Front Post Double Crochet (FPDC) stitches are worked two rows below, as follows:
- YO and insert your hook from front to back between the DC stitches two rows below, going behind and around the DC, see photos below for each step.
- YO and pull up a long loop (to the height of DC), you’ll have three loops on your hook.
- YO and pull through the first two loops on the hook.
- YO and pull through the remaining two loops on the hook.
Notes:
- Ch any even number of chains
- Ch 1 at the beginning of single crochet rows does not count as a stitch.
- Ch 2 at the beginning of double crochet rows counts as the first DC stitch.
- Make sure to count your stitches so you have the same number of stitches in each row.
Alpine Stitch Crochet Written Pattern and Photo Tutorial
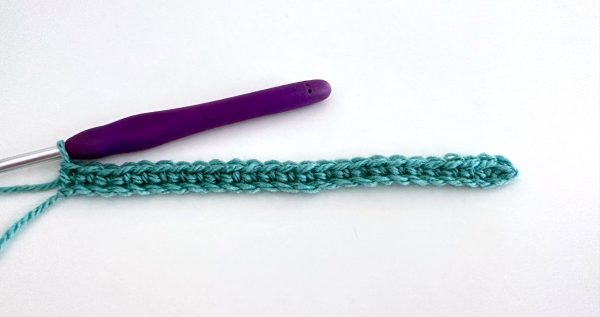
Chain any even number of chains. I chained 26 for this sample.
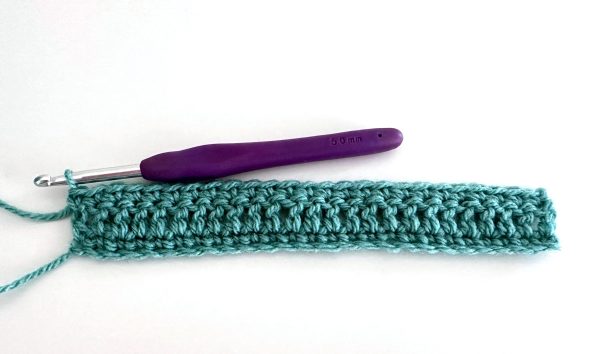
Row 1: SC in second Ch from hook and every St across the row. (total 25 stitches)
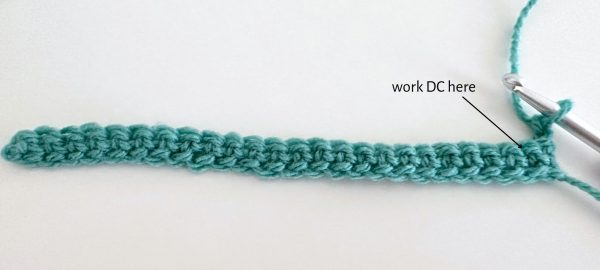
Row 2: Ch 2 and turn. The Ch2 counts as the first DC stitch. DC in next St and each St across the row. (25)

Row 3: Ch 1, turn. SC in first St (base of Ch 1) and each St across, last stitch in the turning ch. (25)
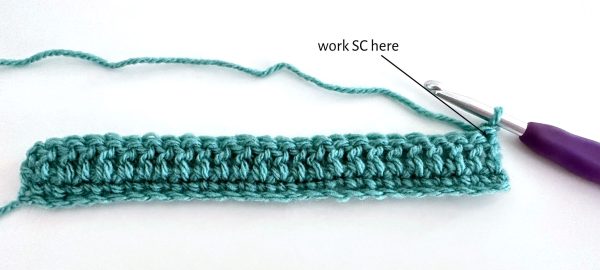
Note: When working single crochet rows, don’t forget to work your last stitch in the turning chain. Make sure it’s 25 stitches in each row. If you notice your rows are getting shorter, then it’s either you’re skipping the last stitch or the first stitch.
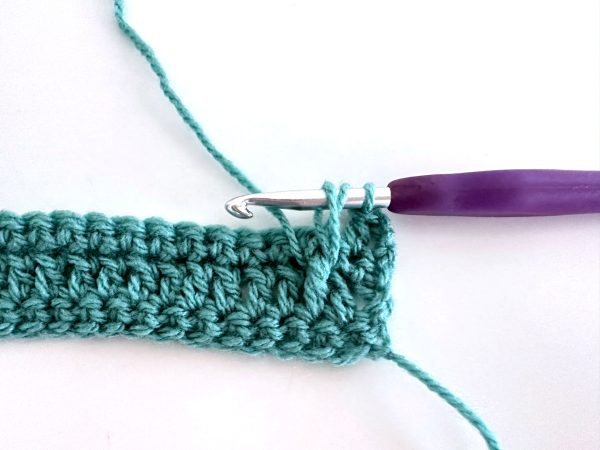
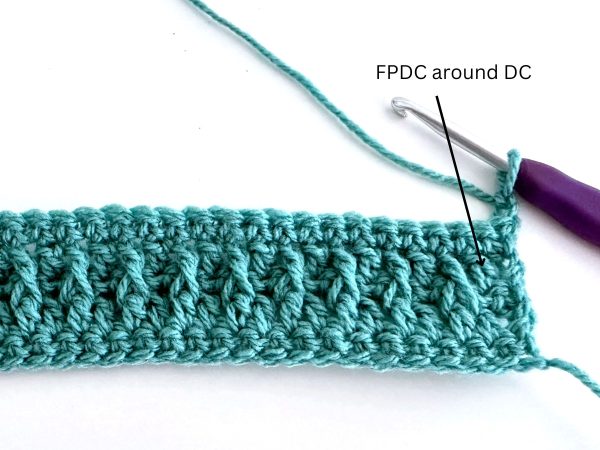
Row 4: Ch 2, turn. DC in next St, FPDC in next (two rows below), DC in next, alternate FPDC and DC across the row. DC in last St.
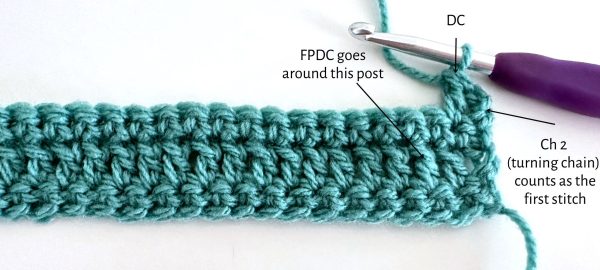
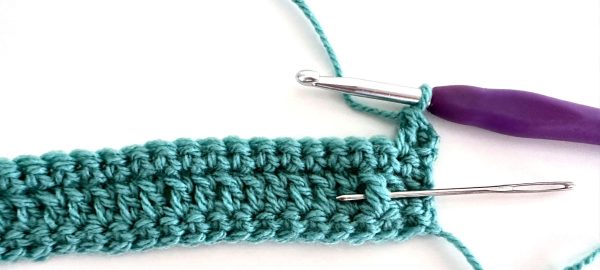
Insert hook front to back and around the post two rows below.
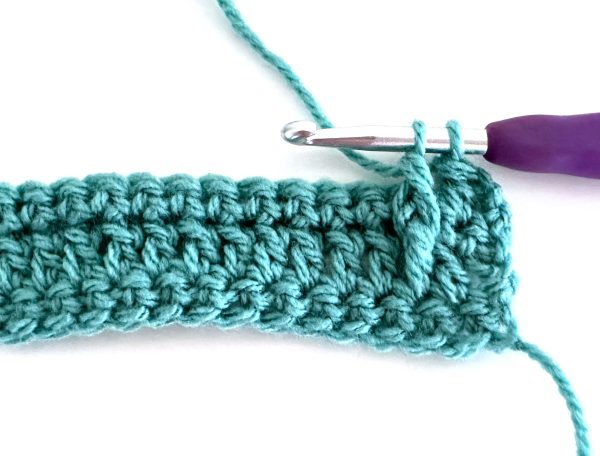
Pull up a long loop, to the height of a DC.
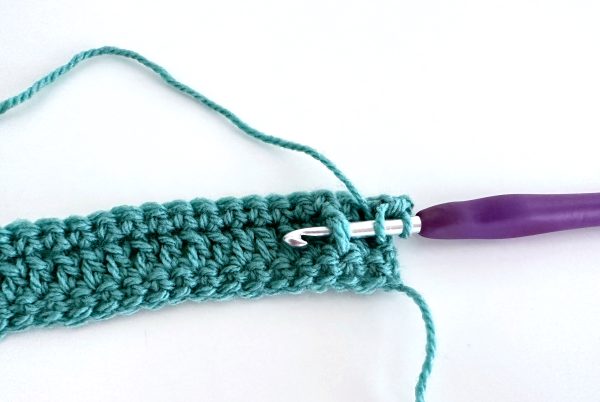
YO, pull through two loops (two loops on hook remaining)
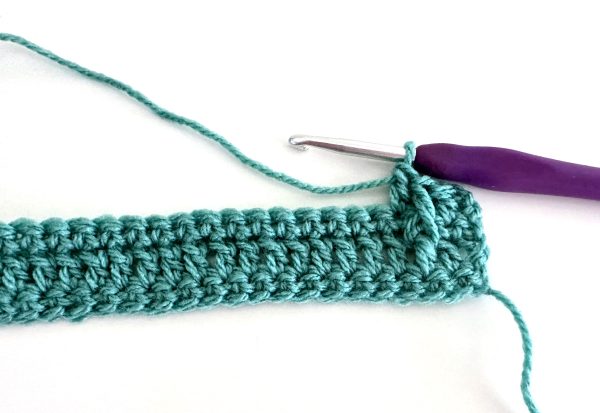
YO and pull through all loops. That’s one front post double crochet.

Skip the stitch behind the FPDC and work a DC in the next St.
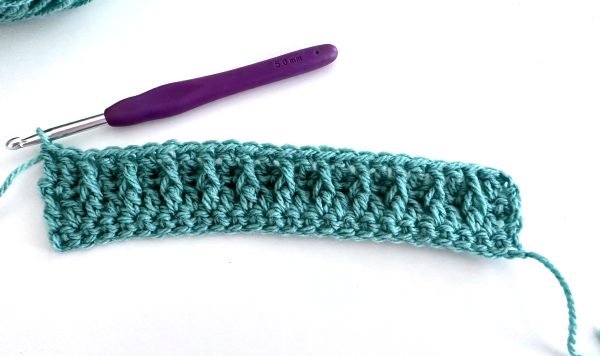
Alternate FPDC and DC across the row. DC in last St.
Row 5: repeat row 3.
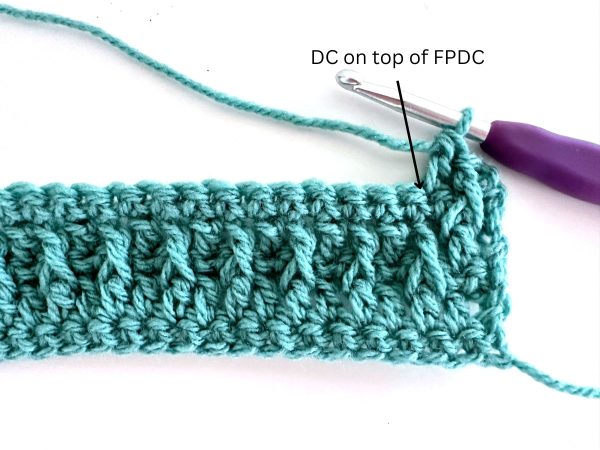
Row 6: Ch 2, turn. FPDC in first St, DC next, FPDC in next, repeat alternating DC and FPDC across the row. DC in last St.
Note: to make it easier to remember, always work a FPDC around the DC two rows below and a DC on top of FPDC.
Row 7: repeat rows 3-6. These are your 4-row-repeats.
Remember, when working single crochet rows:
- Ch 1 does not count as a stitch
- The first SC stitch goes in the base of Ch 1.
- The last SC goes in the turning Ch.
When working DC rows: Ch 2 does count as the first stitch.
Alpine Stitch Crochet Video Tutorial
Is Crochet Alpine Stitch a Yarn Eater?
The simple answer is yes, although not to the same extent as, for example, Puff stitch or Thermal stitch. To create this gorgeous Alpine Stitch texture, you’ll need some extra yardage. Stitches that create substantial thickness and raised texture typically consume more yarn compared to regular stitches. But the end result is so worth it!
Alpine Stitch Crochet Uses
- Blankets (most common)
- Table runners
- Scarves
- Hats
- Cardigans
- Sweaters
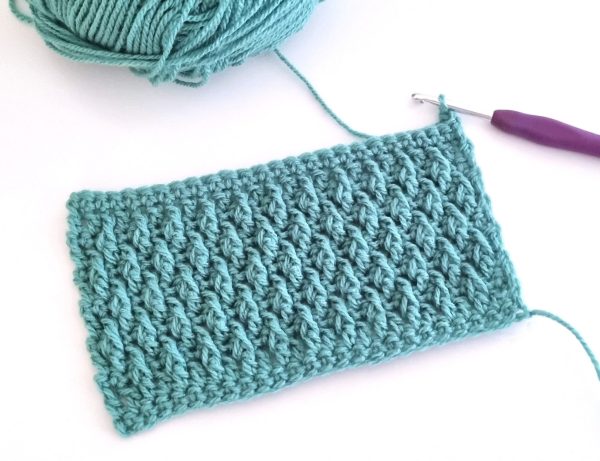
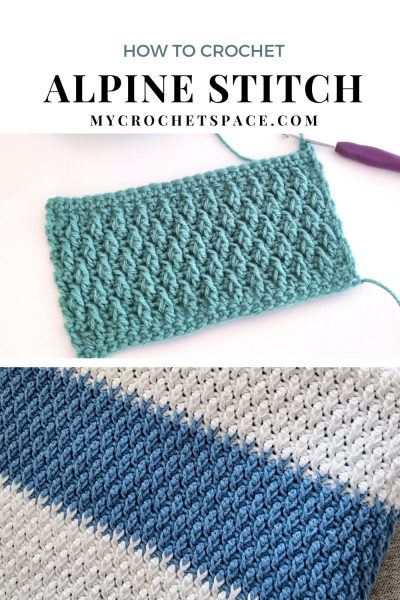
The Alpine Stitch produces a distinct texture reminiscent of little mountains or V clusters. It’s important to note that the stitch pattern is not reversible, meaning that the right and wrong sides of your work will have a different look. However, this is totally fine when creating projects where the back side will not be visible.
Example crochet Alpine Stitch texture – right side
Example crochet Alpine Stitch – reverse side
I hope you like this tutorial for the crochet Alpine Stitch! Below you can find more textured stitch tutorials and free patterns. 🙂
More Textured Crochet Stitch Tutorials
- Even Moss Stitch Crochet Tutorial
- Suzette Stitch Crochet Tutorial
- How to Crochet the Crumpled Griddle Stitch
- Crochet Lemon Peel Stitch – Quick Tutorial
- Crochet Thermal Stitch