Last updated: May 19, 2026
If you ask me what the best stitch is for making a crochet potholder, I’ll definitely say it’s the Thermal stitch. Thermal stitches create that beautiful double-thickness potholders need to provide proper protection from heat.
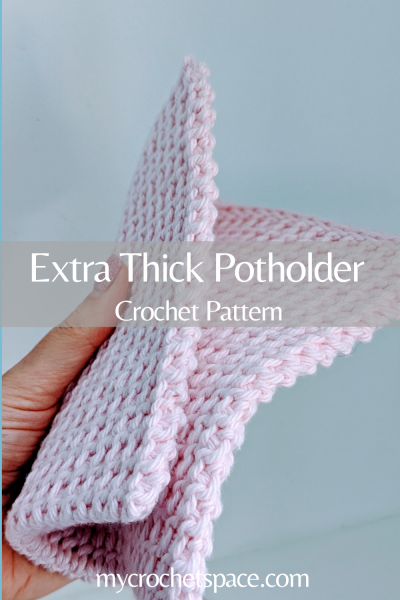
This double-thick crochet potholder would be fantastic as a trivet to keep your table safe from hot pots and oven trays. It’s also perfect for safely removing hot trays from the oven.
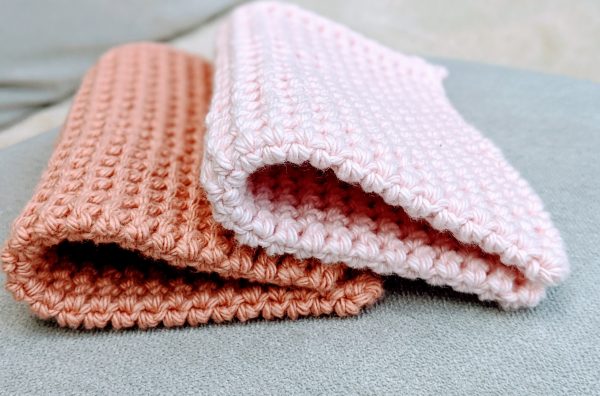
The nature of the Thermal stitch is that it is worked on two rows at the same time, which creates a double thick crochet potholder. It’s like making two squares and joining them together, but with this technique, you’re doing it all in one go.
There are a few versions of the thermal stitch that I know of, using single crochets, double and half double crochets. And there may be even more.
This post may include affiliate links; view my disclosure policy for details.
Difficulty
The skill level for this pattern is Intermediate. Thermal stitches are easy, but you’ll need to pay extra attention to the stitches you work into. It’s easy to make mistakes at the beginning as you need to work into the stitches on the current row and on the row below at the same time. But once you know how to do that, it’s super easy.
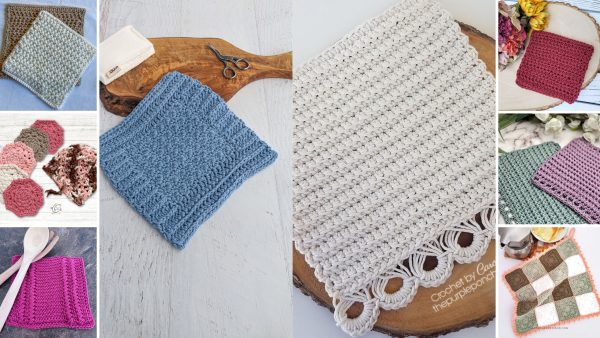
The Ultimate Washcloth Crochet Pattern Bundle
Looking for an exciting new project? Then you’ll love this unique collection of 31 Crochet Washcloth Patterns!
If you are a beginner or trying thermal stitches for the first time, I would recommend starting with this single crochet thermal stitch tutorial first. The thermal single crochets are easier, in my opinion, as you have fewer loops on your hook to deal with. Once you get a feel for how the thermal stitch works, you’ll know that you can use it with other basic stitches too.
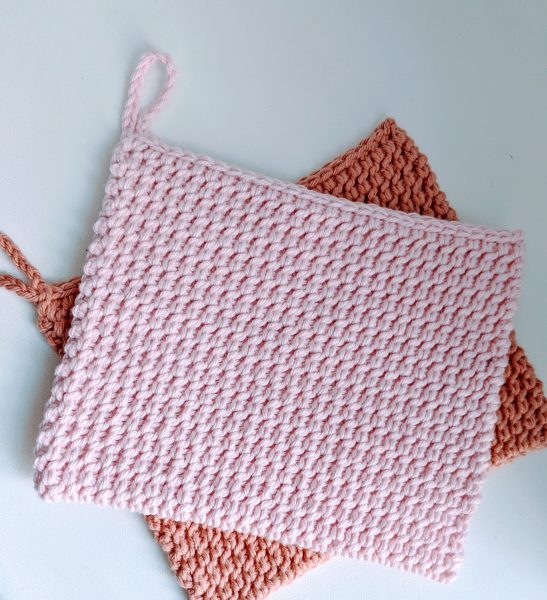
The Extra Thick Crochet Potholder pattern uses thermal half double crochets. I made some tweaks and ended up with a really gorgeous texture. Now, I didn’t exactly invent this stitch. I’m sure someone else has done it before me. But I haven’t come across the exact version online, and I’m not sure if it even has a specific name. Anyway, just thought I’d share my version with you! 🙂
There is also a more common version of the thermal half double crochet like in this potholder, with a slight difference that creates a more ridged texture.
About the Yarn
I believe 100% cotton yarn is the best choice for crochet potholders. It is low maintenance, durable, heat-resistant, and absorbent. And most importantly, it won’t melt when exposed to heat.
I went with Fiddlesticks Finch cotton yarn (#4 medium worsted weight/10ply) from a local store, but feel free to use any medium worsted cotton yarn you love. The most important thing is that it’s 100% cotton.
You can also use light worsted (#3/DK/8ply), which will produce slightly lighter, more flexible potholders. I’ve used it in my single crochet thermal stitch potholder, and it works great! It still offers enough thickness to use as a trivet or potholder.
The Thermal stitch naturally creates double thickness, and using half double crochets in this pattern makes it seem even thicker than the single crochet thermal stitch. Or maybe it just appears chunkier because the textured surface created by the half double crochets is different from the smooth surface of the single crochet thermal stitch. Either way, why not give both versions a try and see which one you prefer? It’s all about finding what works for you! 🙂
Crochet Thick Potholder Free Pattern
Please scroll down for the free pattern or get the ad-free & print-friendly version with step-by-step photos and written instructions for a small fee from my Etsy or Ravelry stores.
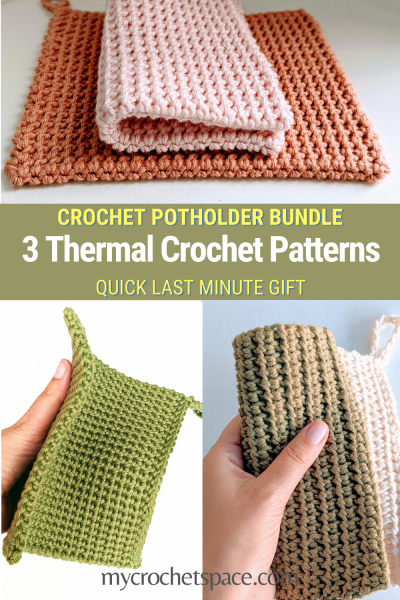
Or get the Thermal Crochet Potholder Bundle (includes three thermal stitches) from Etsy here.
Skill Level
Intermediate
Material
Yarn: Any 100% Cotton medium worsted/weight #4/10ply. (I used Fiddlesticks Finch 100% cotton, 10ply, 119yds/109mts, 2.5 oz/71g. Colours Pink and Rose)
Alternative 100% cotton yarn options: Lion Brand Pima Cotton Yarn or 24/7 Cotton yarn.
Hook: 5mm (H-8)
Yarn needle (for weaving in ends)
Dimensions:
8” x 6.5” (20cm x 16cm)
Gauge:
15 stitches x 22 rows* in Thermal HDC = 4″ (10cm)
*Rows are counted as worked. Only 11 will be visible on one side as the other 11 will be on the other side of the potholder.
Abbreviations:
Ch = chain
St = stitch
Sl St = slip stitch
HDC = half double crochet
Th HDC = Thermal half double crochet. Yarn over, insert hook into the back loop plus into the back loop (unworked) stitches on the row below, yarn over pull through 3 loops on hook, yarn over pull through all loops on hook. You can find a more detailed explanation of this stitch in the video demonstration below.
Double Thick Crochet Potholder Written Instructions
Ch 28 (or chain more or less if you like your potholder bigger/smaller)
Row 1: HDC into the second Ch from hook and across the row (total 27 throughout the pattern).
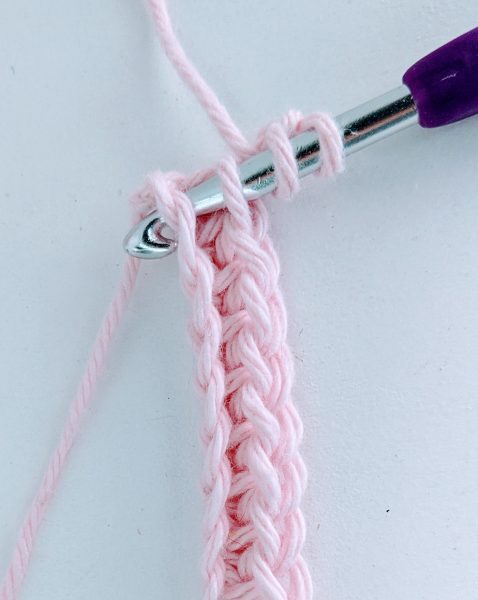
Row 2: Chain 2 and turn your work vertically as pictured below. Th HDC into the first st and across. (Th HDC = yarn over, insert your hook into the back loop only of the first stitch plus the first chain loop (or both unworked chain loops) below. See the picture below or watch a video demonstration for more visual guidance.
Note: It’s easier if you turn your work the way it’s in the picture below so that you can see the stitches better. It’s important to work into the right stitches so that all stitches on both rows match up at the end of the row.
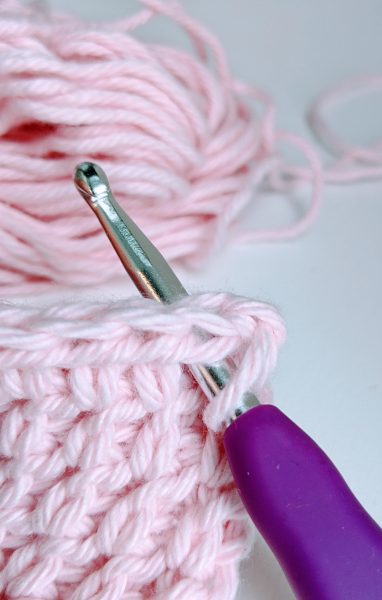
Row 3-35: Ch 2, Th HDC into the first stitch and across.
Note: From this row on – insert your hook into the back loop and the back loop + third loop of the row below, as you see in the picture below. It looks like the letter V.

After making a few rows, the stitches on both rows will be much easier to see!
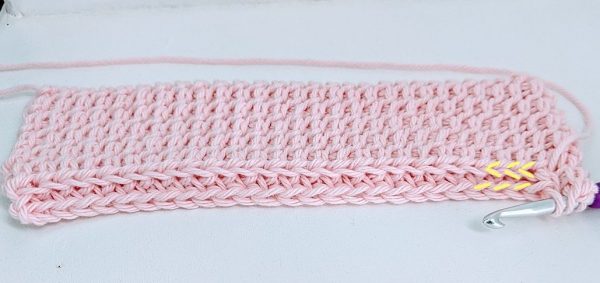
It may seem that the stitches in the row below are slightly behind the current one. Best to double-check by turning your work so that you can see them better. I frequently count the top and bottom stitches, especially in the beginning to make sure they match up.
LOOP (optional):
Ch 15 to make a loop and continue to LAST ROW.
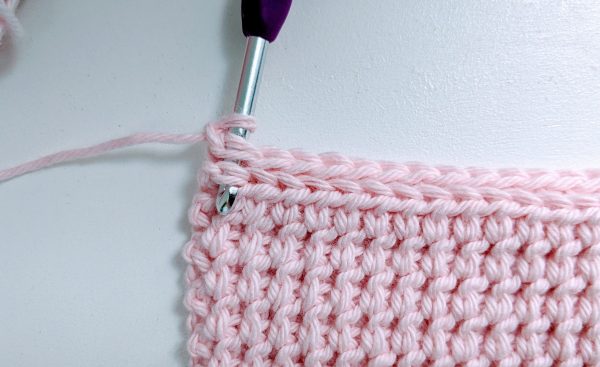
LAST ROW:
After you’ve chained 15 for the loop, instead of working into the back loop only, insert your hook under the third loop (as in the picture below) and into the ‘V’ (back loops from the row below as you did all the previous rows). Slip stitch through all the loops and across the row.
Fasten off and weave in all ends.
Double Thick Crochet Potholder Video Demonstration
If you like this pattern and want a nicely formatted version to print or save for later, check out the printable PDF of this pattern on Etsy. I’ve also bundled all three versions of the Thermal Stitch Potholder patterns together to make it even easier for you. You can find that bundle here.
More Kitchen Related Free Crochet Patterns
- Crochet Easy Washcloth – Free Pattern
- Textured Washcloths – Free Crochet Pattern
- Easy Crochet Dishcloth Pattern
- Crochet Kitchen Towel Pattern
- Crochet Tea Towel – Free Pattern
- Free Crochet Coasters / Mug Rugs
24 replies on “The Ultimate – Extra Thick Crochet Potholder – Thermal Stitch”
Olga – love this pattern!
Have you ever thought of using this thick half double crochet stitch in, say charcoal gray, to make a cross body purse? You could line it with a gray plaid fabric, or a super bright pattern =) They sell 1.5″ cross body straps that could hook on. I have seen purses that are 11″ wide and about 7″ tall, with a zip top. The straps attach on each end of the zipper. The texture could be super cute!
Hi Susan, that’s an awesome idea, I think it will look great! The stitch is super thick, so it’s perfect for purses and bags. I made a laptop cover for my husband using single crochet thermal stitches, and it worked well. But haven’t made a bag using the hdc stitches.. yet 🙂 Something to think about. If you make one, please share! 🙂
Love this stitch. Going to give it a try for sure
Glad to hear you like it! Have fun giving it a try! 🙂
LOVE this stitch! And, your instructions and video and background music are great! 😄. Thanks so much. I was looking for an option to the traditional crocheted potholder
Thank you so much! ❤️ I’m glad you like it!
I absolutely love this pattern! I’ve already made two of these and I’ve been using them in my kitchen for a couple of months. They’re absolutely great. Very fun to make, too. Thank you so much for sharing this pattern with us <3
That’s awesome, Michelle! So happy to hear that you love the pattern! 🙂
Thank you so much for doing this pattern! I’ve made several and love the potholders. They are modern and work better with hot items than I expected. You did a perfect job explaining on the videos – I do so much better following a pattern when there is a video attached.
Hi Dana, I’m so glad you like this pattern! Thank you so much for your kind words, it’s good to know that the videos are helpful! 🙂
For the life of me I can’t seem to get mine straight! I’m diligently counting stitches but looks like it’s decreasing at the turns even though the stitch count is correct. I’ve tried 3 different yarns. It’s an easy, great stitch and I can’t wait to complete a project but can’t figure out what I’m doing wrong!
Hi Carolyn, if the stitch count is correct then it shouldn’t be decreasing. The only thing I can think of, without seeing it, is that perhaps you’re not working into the corresponding stitch on the bottom row for your first or last stitches? The edges are the trickiest since the stitches there are usually a bit tighter and tend to hide under the turning chains. I would try a thicker yarn that doesn’t split, that way the stitches are easier to see. I hope you figure it out! 🙂
Thank you, Olga, for this lovely pattern, and for the accompanying video, which explains the different stitches so well. I found it very easy to follow. Having not done any crocheting for many, many years, I was searching for a relatively easy, yet a little out of the ordinary pattern for pot holders, and this one fitted the bill perfectly. It has certainly rekindled my love for crocheting. Thank you!
You’re so welcome, Anne! I’m happy you like it and find it easy to follow. 🙂 Enjoy making your potholder!
Not sure if it’s just me, but I’m following the video, yet my potholder is not growing in length and one side looks different from the other. ☹️
Is there maybe another video that shows how to do this? Maybe I’m supposed to be turning it, and missing that?
Hi Shannon, I have a video on how to crochet the thermal single crochet, and you might see it better there. It’s the same principle (thermal crochet), but working with single crochet instead of half double crochet. It’s easier to learn if it’s your first time trying the Thermal stitch. Once you’ve got the hang of the single crochet, it will be easier to do the half double crochet. I hope this helps you to see what you’re doing differently! 😊 🌸
Here ist the link to the video tutorial for thermal single crochet: https://www.youtube.com/watch?v=VfwpXwnYUL0&t=381s
Thank you so much Olga! I can see what was confusing me now. 🙂
Olga, thank you for your generosity in sharing this pattern. do you have any tips on making the edges, right and left, so perfect? yours are perfect. mine are wonky.
Hi Margaret, you’re welcome! 😊 Keeping the edges straight usually comes down to the first and last stitches in each row. If the edges start looking a bit wobbly, it might be that one of those stitches got skipped—or maybe the tension just needs a tiny bit of tightening. Hope that helps!
Approximately how many skeins are needed for each extra thick potholder?
I used one skein per potholder, which is 119 yds / 109m 🙂
Brilliant! The thermal stitch looks so cozy and dense – exactly what you want in a potholder. Your pattern is featured on Crafts on Display today, hope you like it! https://craftsondisplay.com/crochet/double-thick-crochet-potholder-196204/
Question about Yarn Quantity: Does the reply posted to Roades (see above) apply to both the Thermal Half Double Potholder and the Ultimate – Extra Thick Potholder? I haven’t decided which pattern to use and I have a limited quantity of the colors for my project.
Hi Cathy! Yes, you’ll need at least that amount of yarn for any of the thermal stitch potholders. I made the Extra-Thick Potholder a little larger (I actually prefer the bigger size), so it does use a bit more yarn 😊