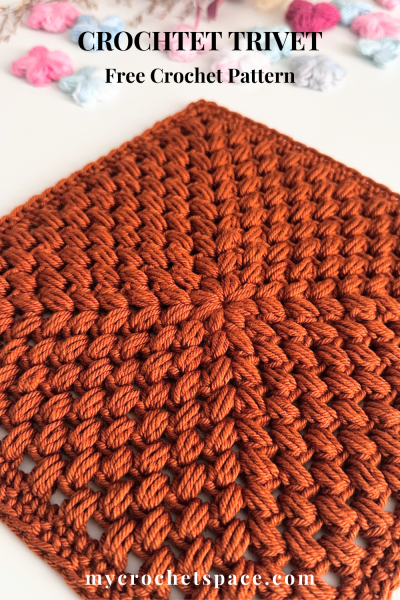
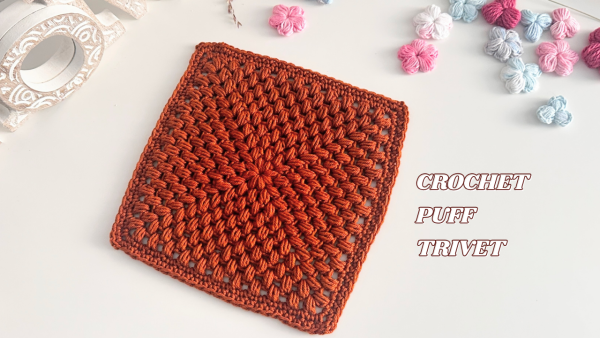
I love making small projects that are both pretty and practical. The Puff Crochet Trivet has such a lovely texture, and it’s a quick little make you can easily finish in an afternoon.
For your convenience, you can get the ad-free PDF version with step-by-step photos and written instructions from my Etsy or Ravelry stores.
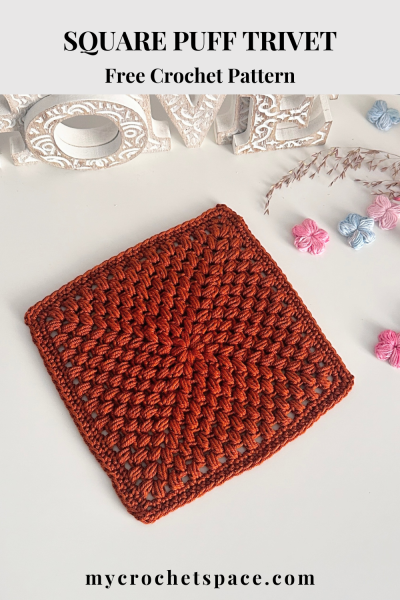
I designed this crochet trivet pattern as a square with a clean, textured look in mind. The puff stitches create a beautiful, slightly raised surface that not only looks lovely but also helps protect your table or countertop.
It’s worked from the centre out in the round, gradually forming a square as you go. It’s one of those relaxing little projects you can easily finish in one evening and enjoy using right away.
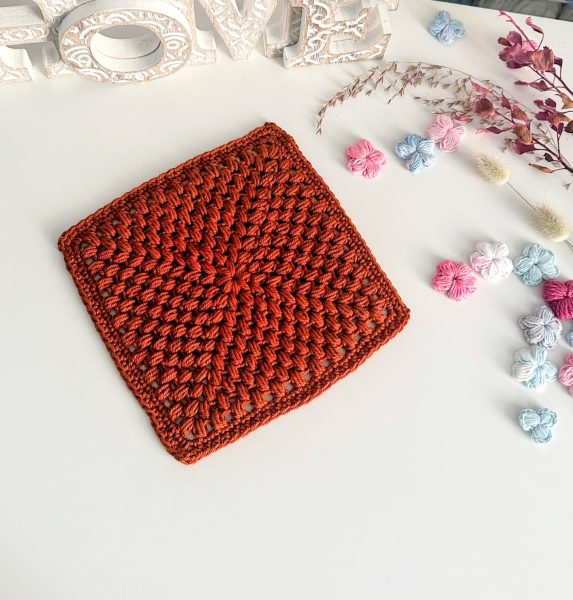
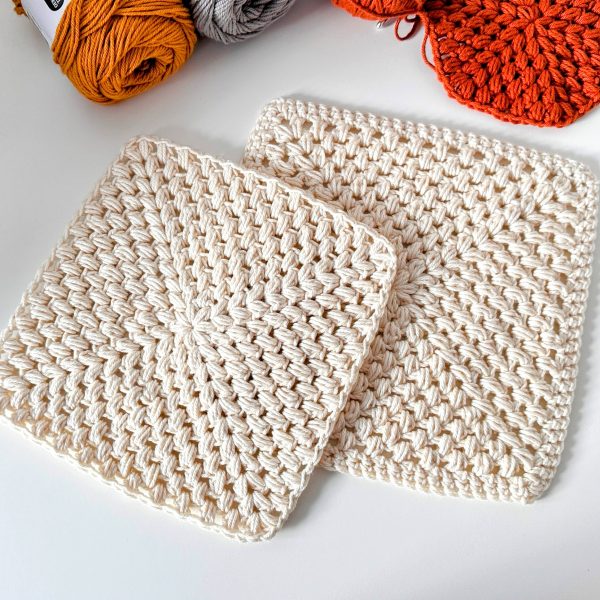
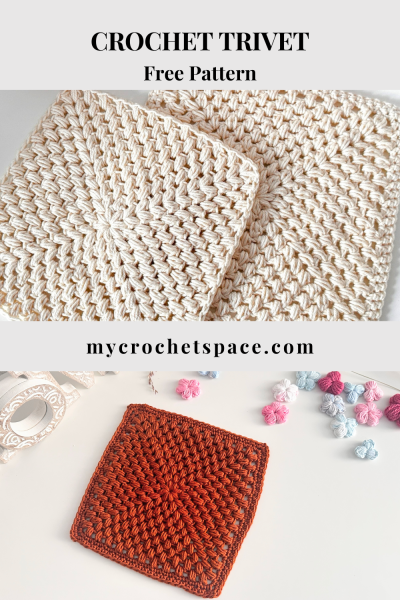
I made one version with a simple border and one without, and you can see both in the photos below. In my opinion, it doesn’t really need a border; it just depends on the look you prefer in the end. I honestly like both versions 😊
To get a really nice square with straight sides without curling up and straight 90-degree corners, you’ll need to block your trivet once it’s finished. It’s one of those steps many crocheters skip, me included sometimes 🫣 But if you want your crochet pieces to look that little bit more polished and beautiful, blocking really makes a difference.
Puff Crochet Trivet Pattern
Get the ad-free PDF version with step-by-step photos and written instructions from my Etsy or Ravelry stores.
Share or pin this pattern to your Pinterest crochet board for later!
You can watch a video demonstration of this crochet trivet here.
Difficulty
Easy / Intermediate
Finished Size
8.5″ x 8.5″ (22cm x 22cm)
Abbreviations (US Terms)
- YO = yarn over
- Ch = chain
- St(s) = stitch(es)
- Sl st= slip stitch
- Pf st= puff stitch
Special stitches
Puff Stitch (Pf): YO, insert hook into the specified stitch, YO and pull up a loop. You should have three loops on your hook. YO again, insert the hook into the same stitch and pull up another loop. You should have five loops on your hook now. YO and pull through all five loops. Ch 1 to complete the puff stitch.
Corner Stitch: Pf st, Ch 1, Pf st worked all in one space.
Materials
- Yarn: Dishie, 1 skein (you’ll need around 100yds/91m) Pictured colours: Swan and Sunbaked
- Crochet hook: 5 mm
- Scissors and a yarn needle for weaving in the ends.
Pattern Notes
- The trivet is worked from the centre out in the round, without turning.
- Every Pf st round (from round 2) starts with a slip stitch into the first space between the puff stitches.
- Every round starts with a corner stitch
Instructions
Round 1: Start with a magic ring, Ch 1 and work 8 Pf sts into the ring. Connect the round with a Sl st.
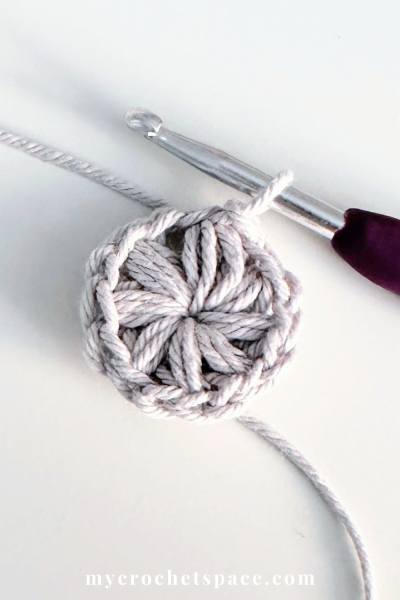
Round 2: Sl st into the first space between the Pf sts. Slightly pull the loop on your hook up to the height of a Pf st and work a Pf st. Ch 1, work another Pf st in the same space (this is a corner stitch. There will be four corner stitches in each round to create a square).
Then work a Pf st in the next space (this is one of the four sides. Each side will increase in the number of stitches in each round on each side).
Then work: *Pf st, Ch 1, Pf st in the next space. Pf st in the next space. Continue from * around. Sl st to first st to join the round (12 Pf sts).
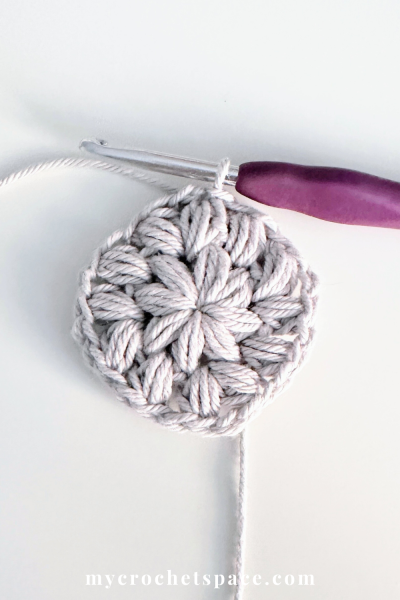
Round 3: Sl st into the first space between the Pf sts. Gently pull the loop on your hook up to the height of a Pf st, then work a corner stitch (Pf st, Ch 1, Pf st).
Work 1 Pf st in each of the next spaces until you reach the next corner. You’ll recognise the corners because there are two stitches worked into the same space.
Continue around the trivet, working the corners (Pf st, Ch 1, Pf st) and 1 Pf st in each space along the sides. (16 sts)
Tip: After this round, the square shape will start to become more visible. From time to time, gently straighten the sides to make the corners easier to see. Once the trivet is finished, block it to help define the square shape.
Round 4: repeat round 3 (20 sts)
Round 5: repeat round 3 (24 sts)
Round 6: repeat round 3 (28 sts)
Round 7: repeat round 3 (32 sts)
Round 8: repeat round 3 (36 sts)
Round 9: repeat round 3 (40 sts)
Round 10: repeat round 3 (44 sts)
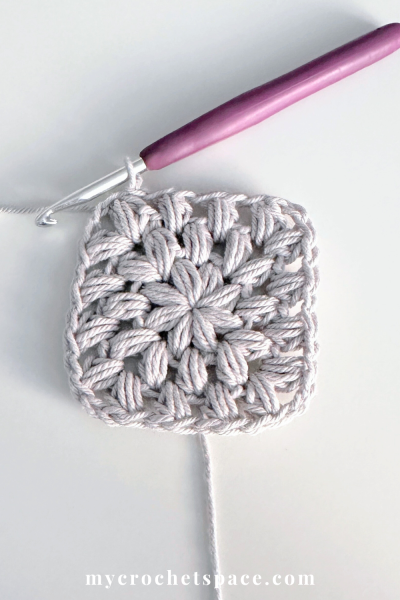
Border
Round 1: Ch 1. Work 1 SC in the first st and in each st around the trivet, placing 1 SC in each Pf st and in each space between the Pf sts. In each corner, work (SC, Ch 2, SC) in the same corner stitch. Sl st to join at the end of the round.
Round 2: Ch 1. Sc in each st around, working (SC, Ch 2, SC) in each Ch-2 corner space. Sl st to join.
Fasten off, weave in all ends!
Blocking
To make your trivet nice and flat, it’s important to block it once you’re finished. Simply give it a light spray with water and pin it to a blocking board or any clean, smooth surface like a table. Gently adjust the corners, shape it into a neat square, and let it dry completely before unpinning.
I know, this part isn’t the most exciting, and sometimes we just want to start using it right away. But it really is worth it! You’ll end up with a more polished, even and nicely symmetrical trivet 😊 Perfect for gifting or for using in your kitchen straight away.
Crochet Puff Trivet – Video Demonstration
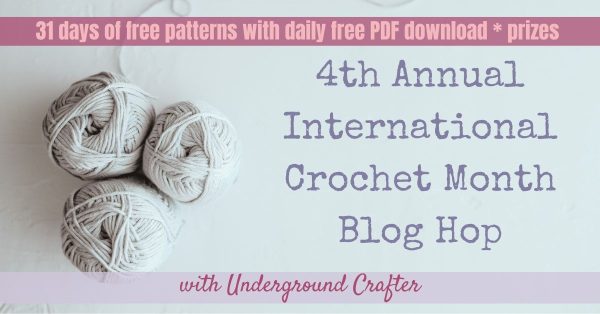
International Crochet Month Blog Hop 2026
The Square Puff Crochet Trivet pattern is featured in the International Crochet Month Blog Hop, hosted by Marie from Underground Crafter. On March 7th, you can download the premium PDF version for free for 24 hours, starting at 10 am Eastern.
Get the free PDF from my Ravelry store here using the coupon code MARCH26.
Visit the International Crochet Month blog hop page to learn more about the generous giveaways and discover more free crochet designs.
I hope you like this pattern! You can get a printable ad-free version of this pattern from my Etsy or Ravelry store.