Last updated: May 19, 2026
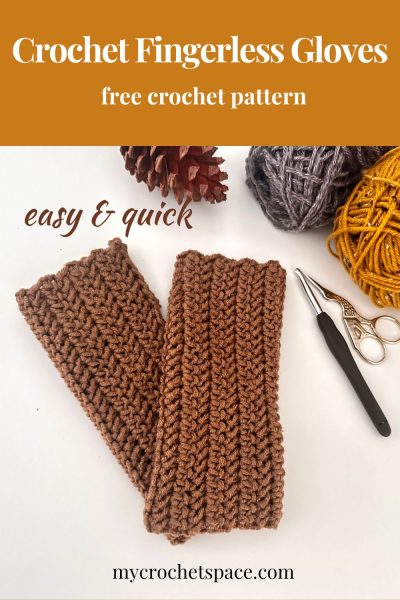
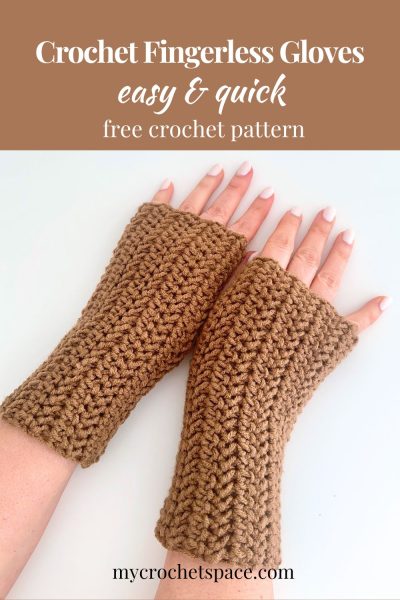
These Herringbone Crochet Fingerless Gloves are all about keeping it simple and stylish. They’re comfy and add a bit of flair, making them perfect for cooler fall weather. So, whether you’re just starting out or you’ve been crocheting for a while, they’re a fun project you can totally make your own.
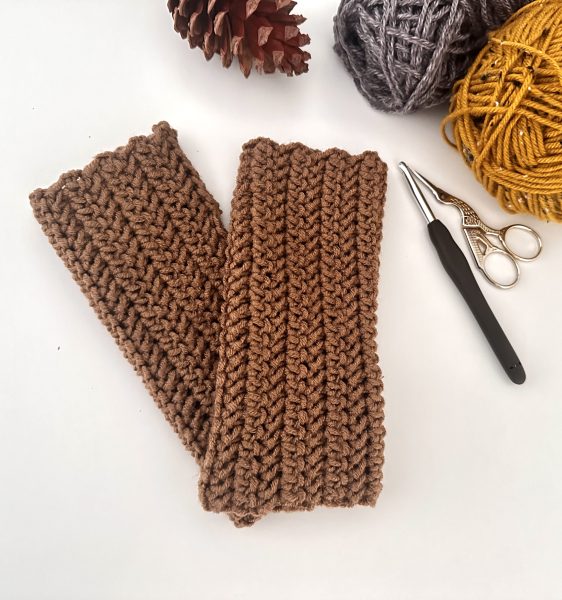
The herringbone stitch gives these gloves a sleek and modern texture, making them a great addition to any fall accessory collection. Let’s get started!
Difficulty level
It’s an easy crochet pattern, suitable for advanced beginners or intermediate-level crocheters. The herringbone stitch is the star here, and it’s the only stitch you’ll need. The design is simple too: create a flat rectangle with back-and-forth rows, then sew the sides for your glove. Super easy, right?
About the Yarn
I used Lionbrands Two of Wands Color Theory in Nutmeg. (100% Acrylic, 246yds/225m). I love working with this yarn. It’s incredibly soft and just right for making warm, cozy fall and winter items. My fingerless crochet gloves turned out wonderfully cozy and soft. To give you the details, it’s an Acrylic yarn, falls into the 4 Medium / worsted category, and offers a generous 246 yards (225 meters) to work with.
There are plenty of colours to choose from, so pick something that speaks to you!
Herringbone Fingerless Gloves Crochet Pattern
Scroll down for the free pattern, or get the ad-free & print-friendly version with step-by-step photos and written instructions from my Etsy or Ravelry stores.
Herringbone Fingerless Gloves Crochet Pattern PDF
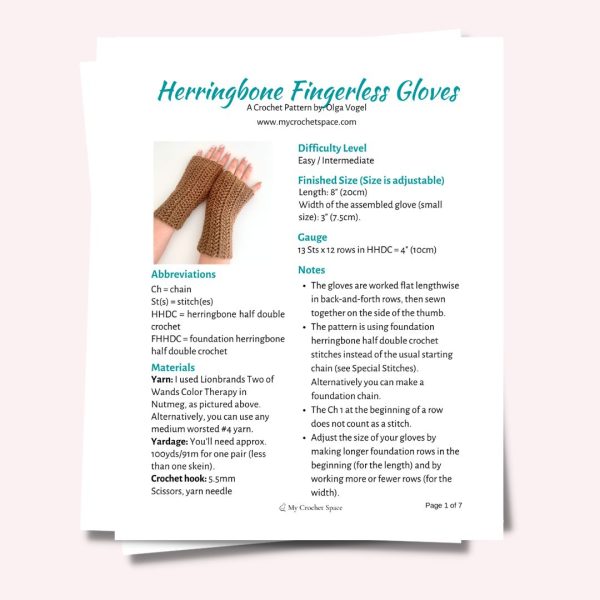
Skill level
Easy / Intermediate
Finished Size
Length: 8″ (20 cm)
Width of the assembled glove (small size): 3″ (7.5cm)
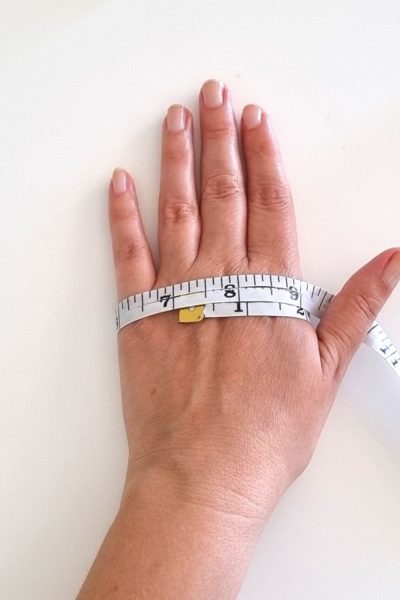
To find out your glove size, measure around the widest part of your hand (excluding the thumb) with a tape measure.
Small = 7″ (18cm)
Medium = 8″ (20cm)
Large = 9″ (23cm)
Make the width approx 1.5″ (4cm) less than your actual hand measurement. E.g. If your hand measures 8″ around (excluding the thumb) until you reach 6.5″ before you stitch the sides together.
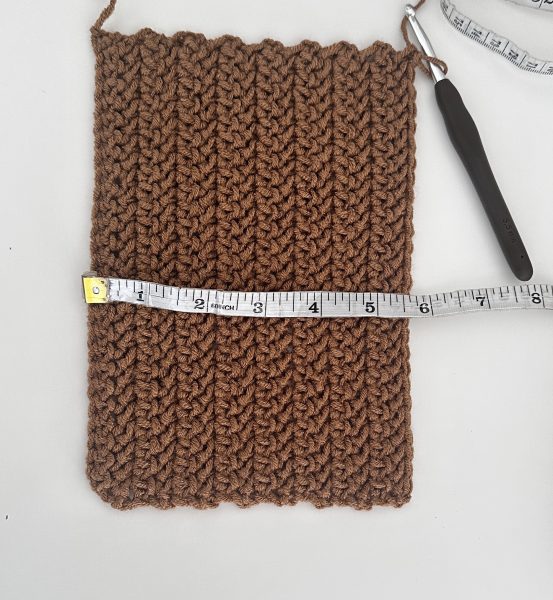
Gauge
13 Sts x 12 rows in Herringbone Half Double Crochet = 4″ (10cm)
Materials
Yarn: I used Lionbrands Two of Wands Color Theory in Nutmeg. (100% Acrylic, 246yds/225m).
Yardage: You’ll need less than one skein, approx. 100yds/91m for one pair.
Alternatively, you can use any medium worsted #4 yarn.
Crochet hook: 5.5mm
Scissors, yarn needle.
Abbreviations (US Terms)
Ch = chain
St(s) = stitch(es)
HHDC = herringbone half double crochet
FHHDC = foundation herringbone half double crochet
Crochet Pattern Notes
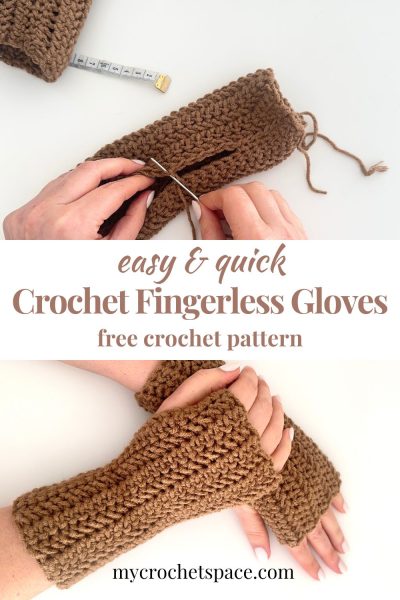
- The gloves are worked flat lengthwise in back-and-forth rows, then sewn together on the side of the thumb.
- The pattern uses foundation herringbone half double crochet stitches instead of the usual starting chain. Alternatively, you can make a foundation chain.
- The Ch 1 at the beginning of a row does not count as a stitch.
- Adjust the size of your gloves by making longer foundation rows in the beginning (for the length) and by working more or fewer rows (for the width).
Sizing
Measure around the widest part of your hand (excluding the thumb) with a tape measure. Make the width 1.5″ (4cm) less than your actual hand measurement. For example, if your hand measures 7″ around (excluding the thumb), work the pattern until you reach 5.5″.
- 7″ (small) – width of glove 5.5″
- 8″ (medium) – width of glove 6.5″
- 9″ (large) – width of glove 7.5″
Herringbone Crochet Fingerless Gloves Written Instructions
Row 1: Make 26 foundation herringbone half double crochet stitches
(Alternatively, you can start with a chain: Chain 28. Row 1: Starting from the third chain from your hook, work a HHDC in each chain across the row. (total 26 stitches). Continue to Row 2.)
Row 2: Ch 1, turn. Work a HHDC in first St and each St across the row (26).
Repeat row 2 until you reach: 5.5″ (small), 6.5″ (medium) and 7.5″ (large).
When you reach your desired width, fasten off and cut the yarn, leaving approx. 25 inches tail for sewing the sides together.
Assembling:
Sew the two sides together with the yarn needle, leaving a hole for your thumb.
Begin sewing 2 inches down from the top. Leave about 1.5 inches for your thumb and continue sewing the remaining part.
Note: When you reach the thumb hole, keep sewing on one side only (not too tight) for the length of the thumb hole (about 6 stitches). This way, you won’t need to cut the yarn.
Make both gloves exactly the same way; there is no left or right.
Fasten off and weave in all ends. Done!
I hope you like this simple & easy design and enjoyed making these fingerless gloves with me!
Get the ad-free printable PDF version of this pattern from my Etsy or Ravelry stores.
2 replies on “Cozy Up for Fall – Herringbone Crochet Fingerless Gloves”
Hi Olga! These herringbone stitch gloves are perfect for fall! They will also make a fantastic beginner crochet project. Thank you for linking up at our weekly Link Party! You are being featured at our Wednesday
Party #522 this week. Here’s the direct link to the post in case you’d like to share your feature:
https://oombawkadesigncrochet.com/cozy-toe-slippers-herringbone-gloves-crochet-llama-all-free-crochet-patterns-at-link-party-522/
Hope to see you again next week! Rhondda
Thank you so much, Rhondda! 🙂