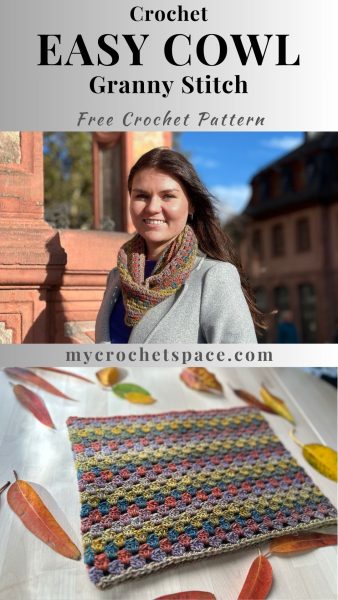
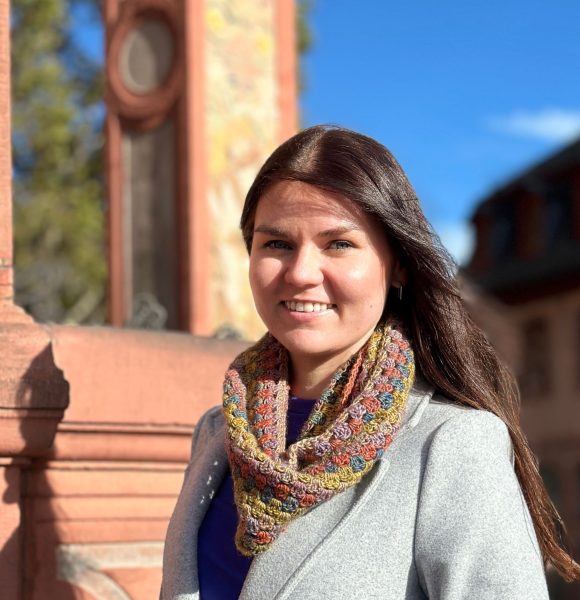
This granny stitch crochet cowl pattern is super easy and works up in no time! It’s cozy, stylish, and the perfect addition to any outfit. Plus, it makes a thoughtful, handmade gift that anyone would love to receive!
Scroll down for the free pattern, or get the ad-free & print-friendly version with step-by-step photos and written instructions from my Etsy or Ravelry stores.
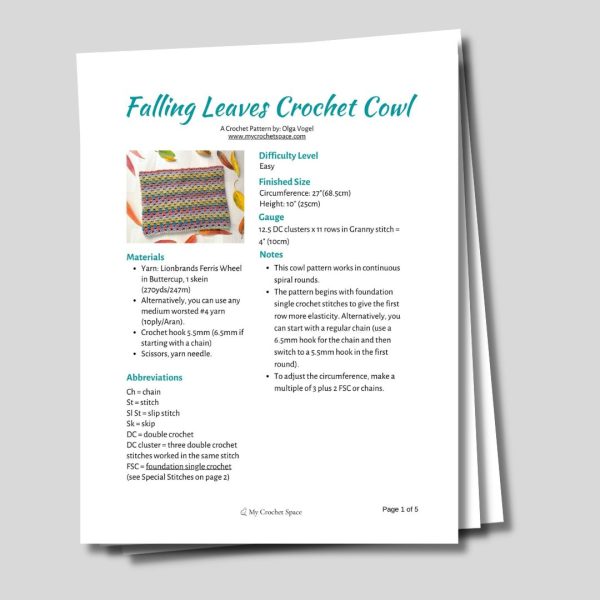
Falling Leaves Crochet Cowl Pattern PDF
Or pin this crochet pattern to your Pinterest Crochet Board for later!
This post may include affiliate links; view my disclosure policy for details.
About the yarn
For this pattern, I used one skein of Lion Brand’s Ferris Wheel in the Buttercup colourway. It’s a #4 medium worsted acrylic yarn with a total of 270 yards (247 meters). I just love how the colours blend together in this yarn, it adds such a beautiful touch!
About the Stitch
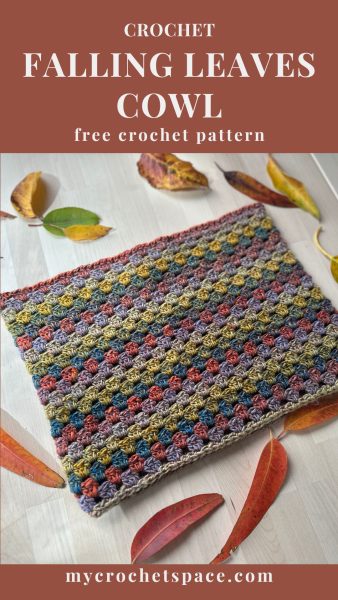
To really highlight these gorgeous colours, I went with the Granny stitch for this pattern and worked it in spiral rounds. This way, the colour transitions flow smoothly without any seams, letting the colours truly shine!
At first, I tried working in flat rows, going back and forth, but I noticed the colours tended to form little blocks. The same colour would run in one direction, then stack on itself when turning to start the next row, gradually shifting to another colour, and so on. While this creates an interesting effect, I prefer the spiral method for a smoother, more seamless look where the colours blend effortlessly!
Working in spiral rounds allows the colours to flow naturally and blend together in a more harmonious way, which I think really enhances the overall look. Of course, this is just my personal preference—working in rows can create a beautiful effect, too!
Difficulty level
Easy. Special skills required: foundation single crochet.
The foundation single crochet row at the beginning might be a bit tricky if you’re new to it. But don’t worry! If you’re not familiar with this technique, you can learn it right here.
You can also start with a traditional chain if you prefer instead of the foundation single crochet row. Just check the instructions in the pattern for details!
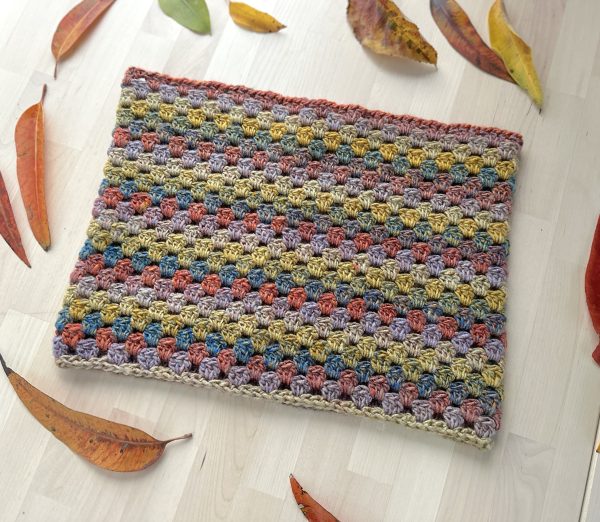
Crochet Cowl Free Pattern
Skill level
Easy
Dimensions
Circumference: 27″/68.5cm
Height: 10″ (25cm)
Gauge
12.5 DC clusters x 11 rows in Granny stitch = 4″ (10cm)
Materials
- Yarn: Lionbrands Ferris Wheel in Buttercup, 1 skein (270yds/247m)
- Alternatively, you can use any medium worsted #4 yarn (10ply/Aran).
- Crochet hook 5.5mm (6.5mm if starting with a chain)
- Scissors, yarn needle.
Abbreviations (US Terms)
Ch = chain
St = stitch
Sk = skip
DC = double crochet
DC cluster = three double crochet stitches worked in the same stitch
FSC = foundation single crochet
Granny Cowl Crochet Pattern Notes
- This cowl pattern works in continuous spiral rounds.
- The pattern begins with foundation single crochet stitches, giving the first row more elasticity. Alternatively, you can start with a regular chain (use a 6.5 mm hook for the chain and then switch to a 5.5 mm hook in the first round).
- To adjust the circumference, make a multiple of 3 plus 2 FSC or chains.
Pattern Instructions
Make 86 FSC or any multiple of 3 plus 2 FSC for your desired circumference.
Note: If you prefer to start with chains instead of foundation single crochet stitches, use a larger hook (6.5mm) and chain 86 (or a multiple of 3 plus 2 chains to reach your desired circumference). After that, switch to a 5.5mm hook.
Join with a DC in the third stitch to form a circle (refer to the picture below). Make sure it’s not twisted. Work two more DC stitches into the same stitch. *Skip 2 stitches and work a DC cluster into the next stitch. Repeat from * around.
Note: The photos below are shown in a smaller size and with a different yarn for demonstration purposes.
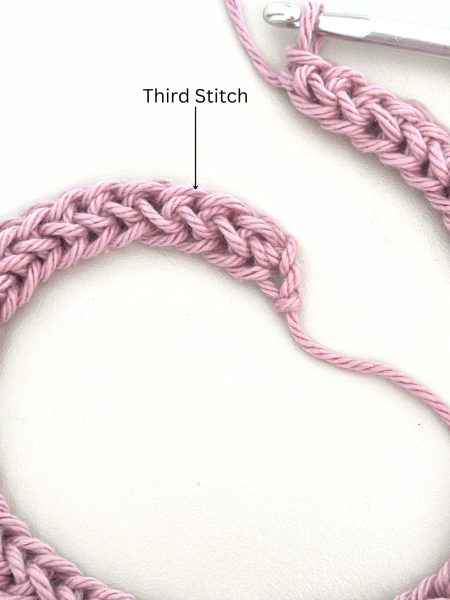
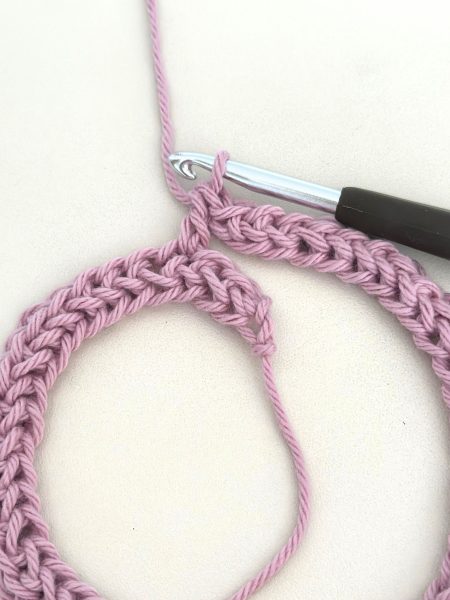
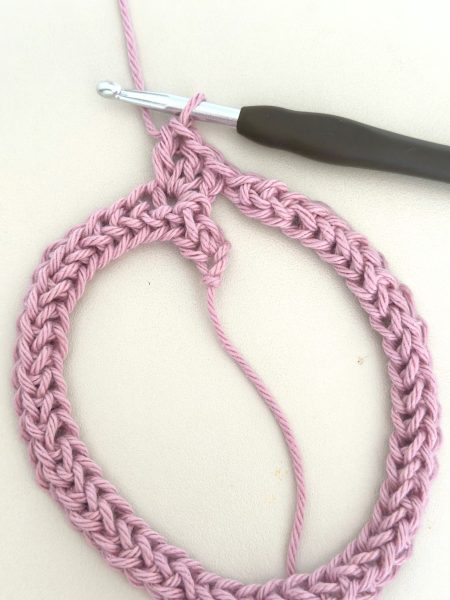
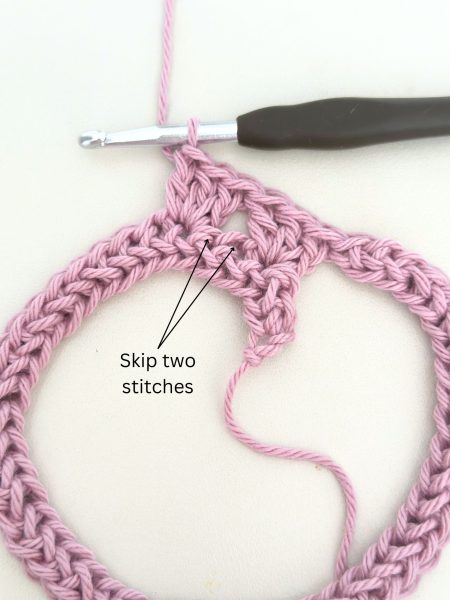
Note: I connected in the third stitch instead of the first because we’re working double crochets directly on top of the first round without joining with a slip stitch. As double crochet is a tall stitch, this method helps to even out the join, and the two skipped stitches at the beginning will be connected when we weave in the ends.
At the end of the first round, work a DC cluster in the stitch above the first DC in the previous round; see photos below. Then, continue working DC clusters into each space between the clusters in continuous rounds until you have approx. 6m (6.5 yards) of yarn left.
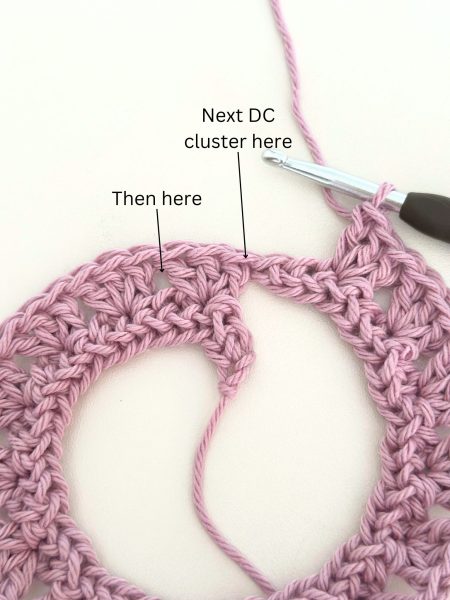
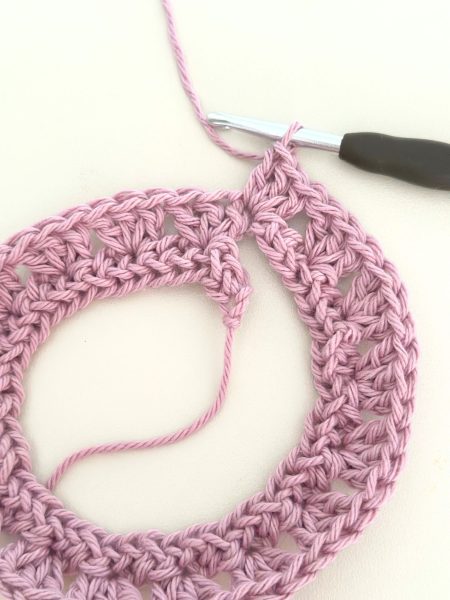
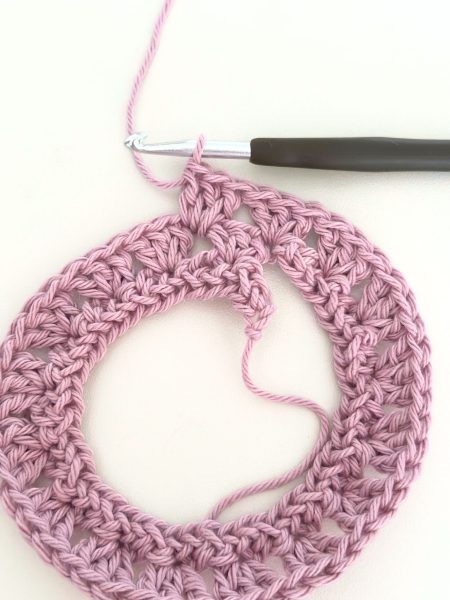
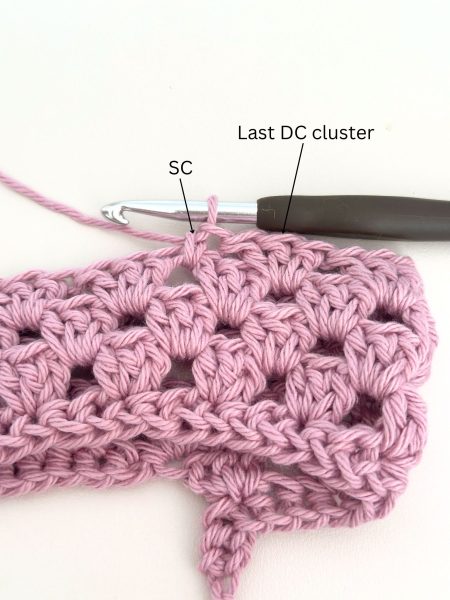
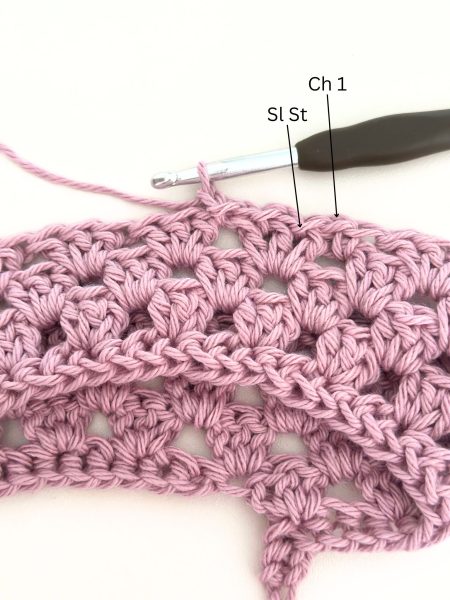
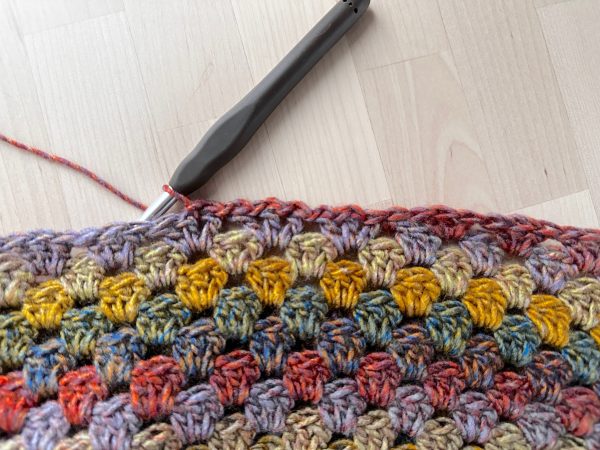
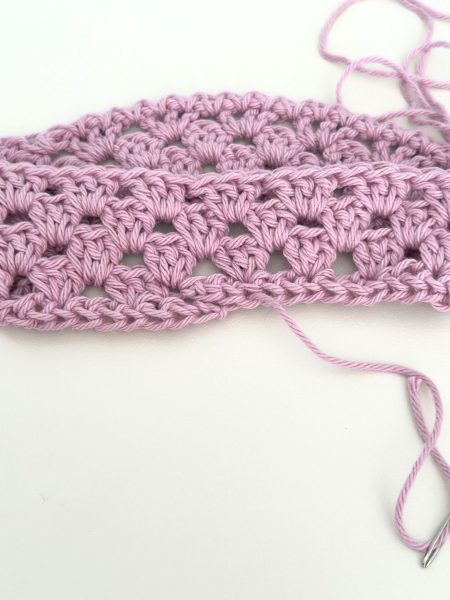
Final Row: To even out the height, after the last DC cluster, work a SC in the next space between the DC clusters. Ch 1, then Sl st into the gap between the first and second DC of the cluster, working under the stitches instead of into them. Ch 1, Sl st into the next space between the second and third DC of the same cluster. Ch 1, then Sl st into the next space (between the clusters). Repeat this pattern of Sl st and Ch 1 in each space between each stitch all the way around. Fasten off and weave in the ends.
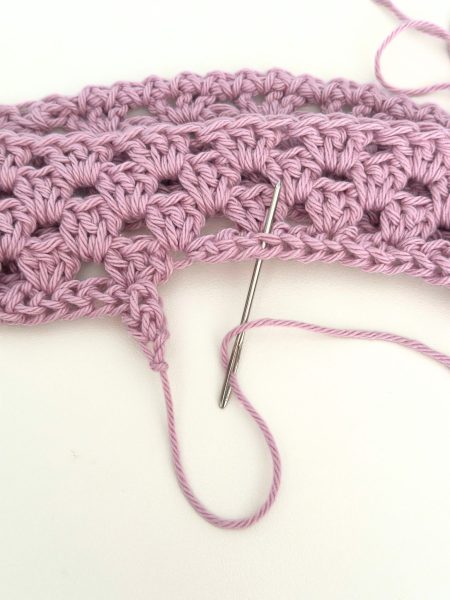
When weaving in the ends from the foundation row, insert the yarn needle into the bottom stitches of the next cluster. That way it helps even out the bottom row a little more, see picture below.
I hope you enjoyed making this crochet cowl with me!
I love seeing your beautiful creations using my patterns! Make sure to tag me on Instagram @my_crochet_space to show off your makes!
Get this pattern’s ad-free & premium version with step-by-step photos and written instructions from my Etsy or Ravelry stores. Happy Making! 🙂
