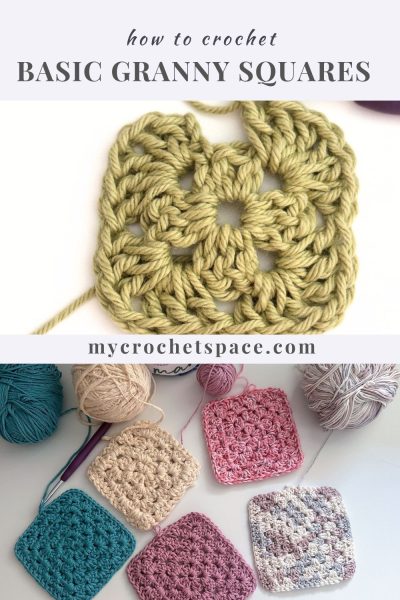
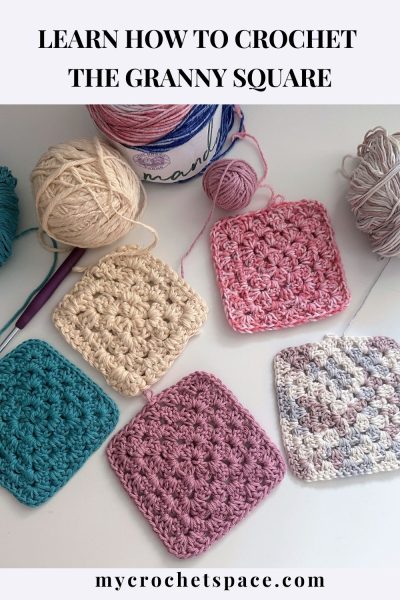
Granny squares are one of those things that never get old. They’re fun, easy, and a great way to use up yarn scraps. If you’ve ever wanted to try making something colourful and cozy without overthinking it, classic granny squares are the way to go.
What I like about traditional granny squares is that you can make a bunch of them and turn them into a blanket, a bag, or even a cute top.
Granny squares are simple and relaxing to make, using basic crochet stitches – mostly double crochet – which makes them perfect for beginners. Each square works up quickly, and it’s so satisfying to finish one! Plus, their small size makes them ideal for on-the-go projects. Just pop some yarn and a hook in your bag, and you’re ready to crochet anywhere, if that’s what you like to do.
Can you use scrap yarn?
Yes! Granny squares are perfect for using up small bits of leftover yarn. Since each square is small, you can easily work with whatever yarn you have on hand. Just keep in mind, if you plan to join all the squares into one big project like a blanket or a bag, it’s best to stick to yarns that are similar in weight and type so everything looks and feels consistent.
For example, I wouldn’t mix cotton and acrylic, they stretch differently and feel quite different, too. But if you have some cotton scraps of the same weight, you could turn them into a bag, a wall hanging, or even a towel! Cotton is great for projects that need to be sturdy and hold their shape, like bags, because it doesn’t stretch much. Acrylic, on the other hand, is perfect for blankets or anything that’s meant to be soft and cozy.
There are so many ways to make a simple granny square, but here I’ll show you a super simple and easy version. Some patterns include a chain 1 between the double crochet clusters on the sides, but not this one. By skipping that extra chain, the holes are slightly smaller and the square comes out a bit denser, which I personally love. The only place we’re adding a chain 1 is in the corners.
Scroll down for the free granny square pattern or get the ad-free & print-friendly version with step-by-step photos and written instructions from my Etsy or Ravelry stores.
Pin this to your Pinterest Crochet Board for later!
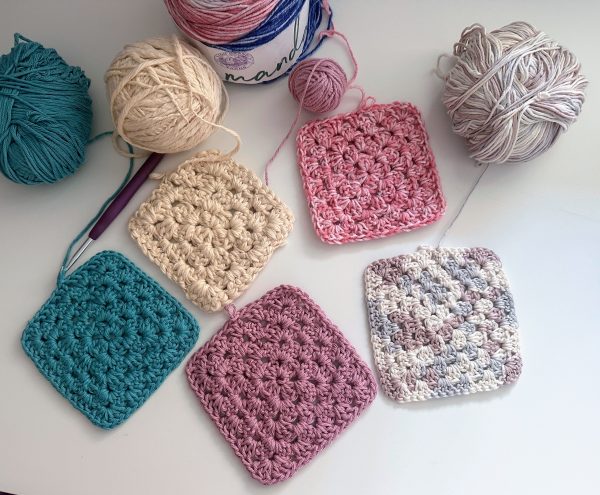
I have included a lot of photos below that will help you to follow along and see exactly what needs to be done in each step when making a basic granny square. It’s a step-by-step pattern.
Tip: Mix and match colours! Traditional granny squares are a great way to play with colour combos. Don’t be afraid to get creative.
Common mistakes: it’s easy to miss a corner or forget to either add another DC cluster in the corner or to separate them with a Ch 1. Remember: corners in this granny square pattern have 2 DC clusters, separated by a Ch 1 and worked into the same space.
Basic Granny Square Pattern
Skill level
Easy / Beginner-friendly.
Materials
- Yarn: any type of yarn – I’m using medium worsted weight #4, cotton
- Crochet hook: match the hook size to your yarn – I’m using 5mm / H
Abbreviations (US Terms)
Ch – chain
St – stitch
DC – double crochet
DC cluster – three double crochet stitches worked in the same stitch
Finished Size
5″ x 5″ (12.5cm x 12.5cm)
Pattern Notes
- To make your crochet granny square bigger, work more rounds as described in the pattern.
- Always start with a Ch 2 at the beginning of a row.
- Ch 2 at the beginning of the row counts as the first DC stitch.
Instructions
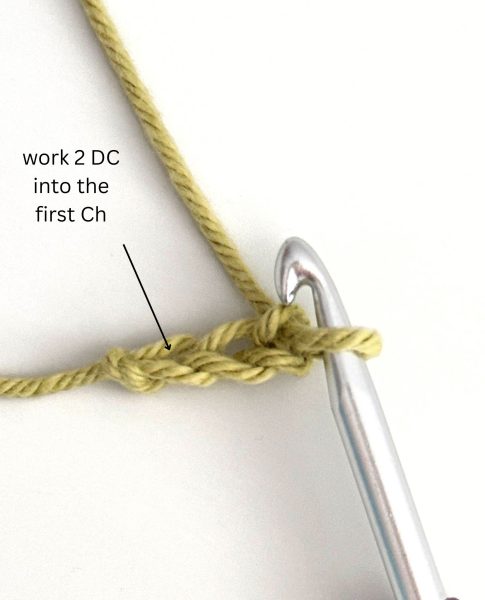
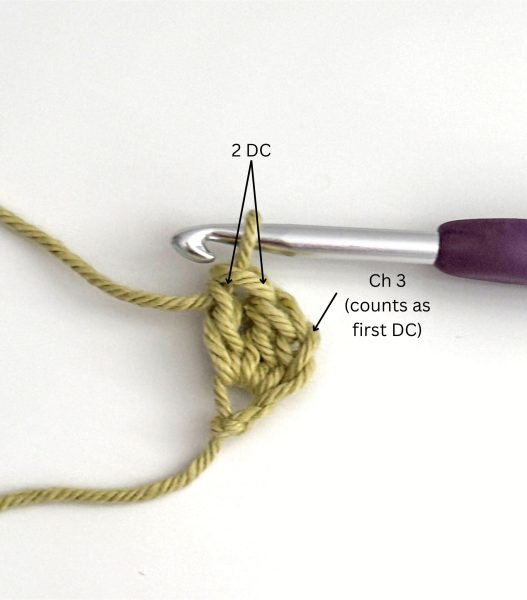
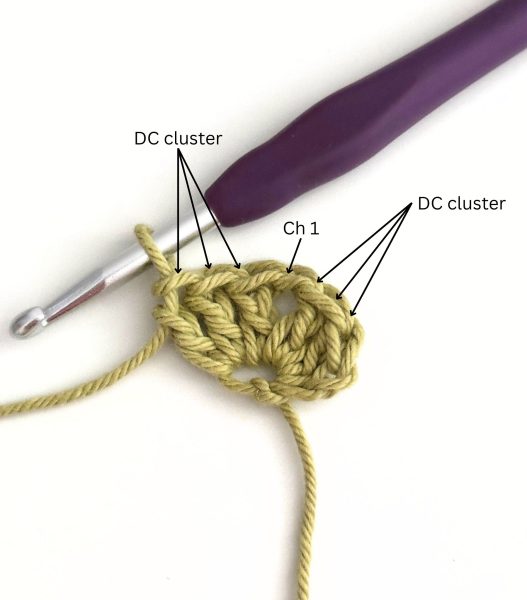
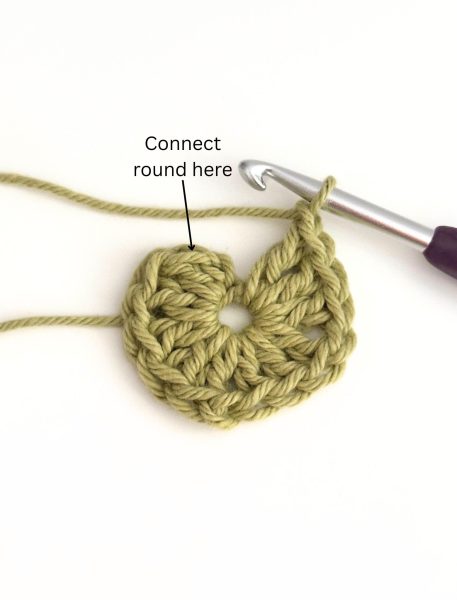
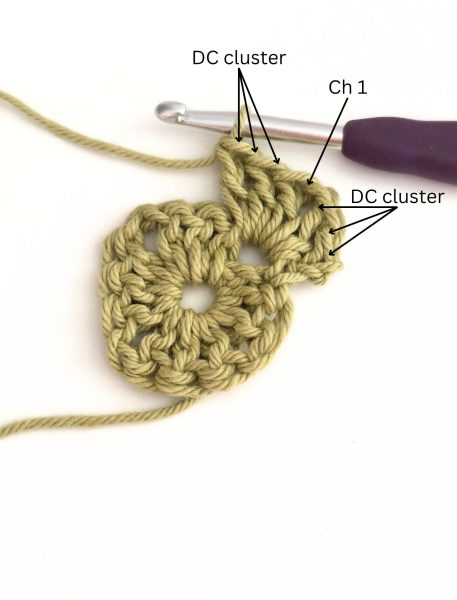
Round 1: Chain 3 and work a DC into the first Ch you made (which is also the third Ch from the hook). Work another two DC into the same Ch. Then, *Ch 1 and work another DC cluster (three double crochet stitches) into the same stitch. Repeat from * two more times. You should have four DC clusters in this round. Ch 1 and Sl st to the top of the first St in this round.
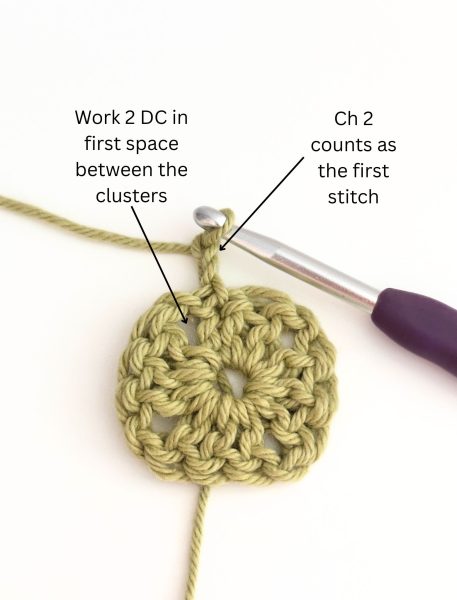
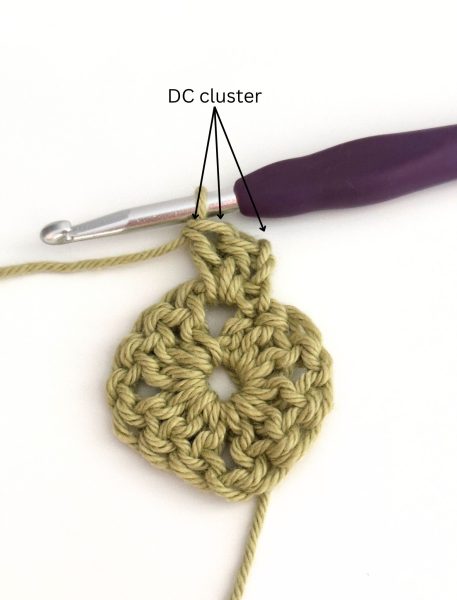
Round 2: Ch 2 (counts as the first stitch), turn. Work two DC stitches in the first space between the DC clusters. Ch 1, and work another DC cluster into the same space. Then, *work a DC cluster into the next space, Ch 1, and another DC cluster into the same space. Repeat from * around. Sl st to top of first St. (8 clusters)
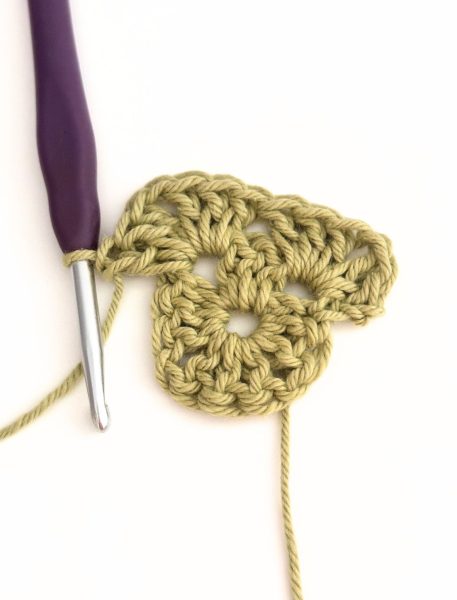
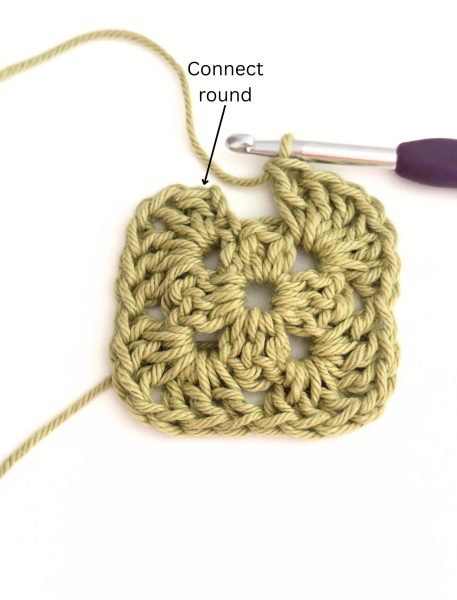
Round 3: Ch 2, turn. Work two DC stitches in the first space between the DC clusters. Work a DC cluster into the next space, Ch 1, and work another DC cluster into the same space. Then, *work a DC cluster into the next space, DC cluster into the next space, Ch 1, DC cluster into the same space. Repeat from * around. Sl st to top of first St. (12 clusters)
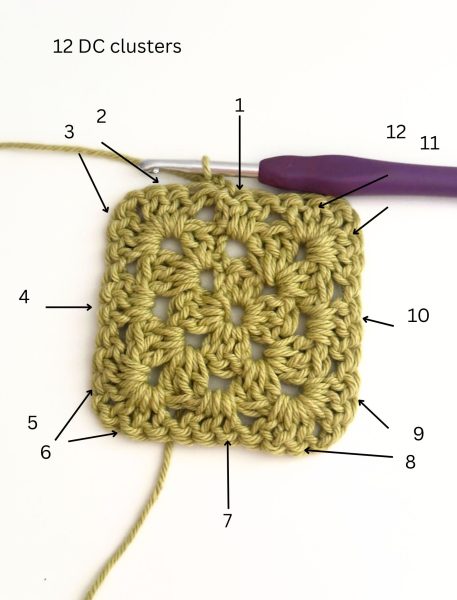
Round 4: Ch 2, turn. Work two DC stitches in the first space between the DC clusters. Work a DC cluster into the next space, Ch 1, and work another DC cluster into the same space. Then, *work a DC cluster into the next space, DC cluster into the next space, DC cluster into the next space, Ch 1, DC cluster into the same space. Repeat from * around. Sl st to top of first St. (16 clusters)
Round 5: Ch 2, turn. Work two DC stitches in the first space between the DC clusters. Work a DC cluster into the next space, Ch 1, and work another DC cluster into the same space. Then, *work a DC cluster into the next space, DC cluster into the next space, DC cluster into the next space, DC cluster into the next space, Ch 1, DC cluster into the same space. Repeat from * around. Sl st to top of first St. (20 clusters)
Note: Each round is worked the same way. In the corners, make two DC clusters with a Ch 1 between them, all in the same space. Along the sides, just work one DC cluster into each space, no Ch 1 needed between them.
That’s it! You can make your granny square as big as you like, just keep working those corners the same way as described above.
I’m curious if you’re planning to turn your squares into something fun? Let me know in the comments below – I’d love to hear what you’re making! 😊
I hope you like this basic granny square pattern! If you share your makes from my patterns on Instagram, don’t forget to tag me @my_crochet_space, I would love to see them!