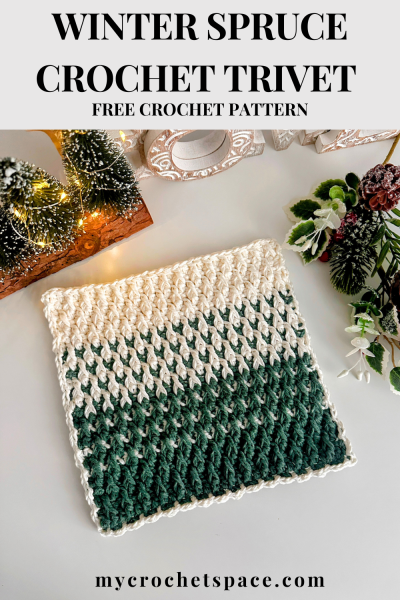
There’s something about Christmas that makes me want to bring a bit of that cozy, festive feeling into every corner of the house, especially the kitchen. That’s what inspired the Winter Spruce Crochet Trivet!
Get the ad-free & print-friendly version with step-by-step photos and written instructions from my Etsy or Ravelry stores.
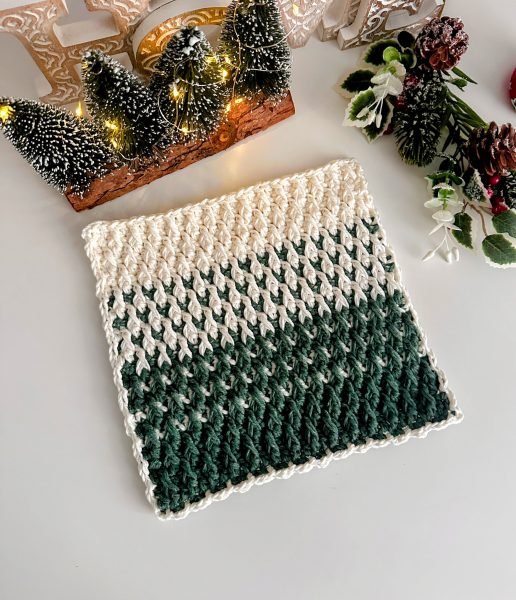
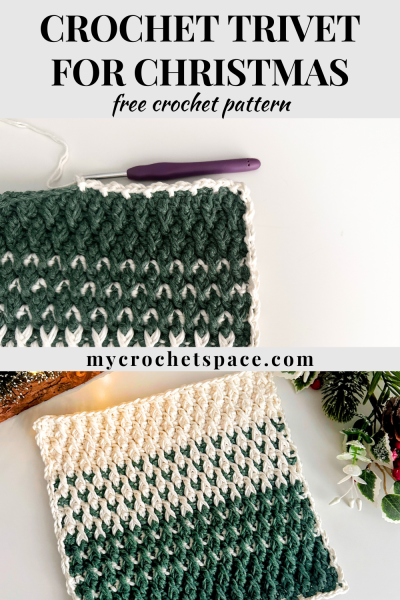
I wanted to design something simple and practical, with just the right hint of holiday cheer. The thick texture is perfect for serving up warm dishes, and the classic spruce green and snowy white make it feel right at home on a Christmas table. A little seasonal joy, handmade and functional.
The pattern is a simple 4-row repeat, and the colour changes are given for each row in the instructions below.
To give you a quick overview, it starts with green for the first five rows. Then white is added and used for the single crochet rows, alternating between green and white each row. In the second half, the colours are reversed, green is used for the single crochet rows, and it finishes off with just white.
When working with two colours, always carry the yarn you’re not using within the stitches all the way to the end of the row, so it’s ready for the next colour change. This way, there’s no need to cut the yarn each time, and it keeps everything neat and tidy as you go.
Yarn and Texture
I used a light worsted 100% cotton yarn, one skein in green and one in white. The pattern is worked with two strands held together, and I really love how that turned out. It gives the trivet a rich texture and a nice sturdy feel, with just the right thickness without needing to make it double.
If you want to make it thicker, you can either use medium worsted weight (#4) yarn or make two in light worsted and sew them together. It’ll be chunkier and offer more protection. Plus, when working with two strands, the stitches are thicker, and it works up a bit faster, too. Use your judgment based on what you need!
Tension and Stitch Detail
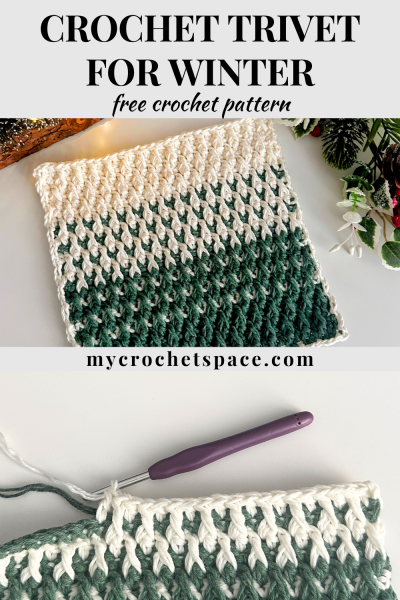
It’s important to keep a fairly dense tension for this pattern to help minimise the gaps between stitches. The front post double crochets create a lovely raised texture, which gives the trivet enough thickness to protect your table from warm dishes and serving trays.
How to Use the Trivet
This trivet is designed to protect your table surface and isn’t intended for carrying hot dishes, as fingers may poke through the stitches. Always use common sense when making and using crochet items. If you need extra thickness for handling hot items, you can make two and sew them together.
If you want to make super dense crochet potholders with no holes, check out these popular potholders.
Get the ad-free, beautifully formatted PDF with step-by-step photos and written instructions from my Etsy or Ravelry stores.
Winter Spruce Crochet Trivet
Difficulty
Intermediate. You need to know how to switch between colours and carry the non-working yarn.
Finished Size
9.5″ x 9″ (24cm x 23cm)
Materials
- 100% cotton yarn, light worsted weight (#3 / 8ply / DK)
- Yardage: Green – approx. 100 yds (91 m), White – approx. 100 yds (91 m). Total – 200 yds (182 m).
- You’ll be working with two strands held together throughout. For each colour, you can use a single skein by pulling one strand from the centre and one from the outside.
- You can also use #4 worsted weight, also two strands held together, which will create a slightly thicker and denser trivet.
- Crochet hook: 5mm and 6mm for the foundation chain
- Scissors, yarn needle (for weaving in the ends), tape measure.
Abbreviations (US Terms)
- Ch = chain
- St = stitch
- Sl st = slip stitch
- YO = yarn over
- SC = single crochet
- DC = double crochet
- FPDC = front post double crochet
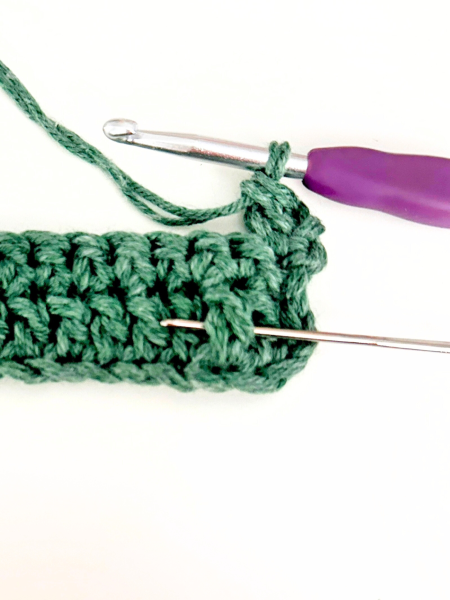
Special Stitches – Front Post Double Crochet: a DC stitch worked around the DC stitch (post) two rows below. Step-by-step instructions: Insert hook front to back and around the DC post two rows below. Pull up a long loop, to the height of a DC. YO, pull through two loops (you’ll have two loops on hook). YO and pull through the last two loops.
Notes:
- The trivet is worked with two strands of yarn held together to create a thicker fabric. For each colour, you can use a single skein by pulling one strand from the centre and one from the outside.
- Ch 1 at the beginning of single crochet and Ch 2 at the beginning of double crochet rows do not count as a stitch; they serve as turning chains only.
- Ensure that you count your stitches so that you have the same number of stitches in each row.
- Make a smaller or bigger version by chaining any odd number of chains. You may need to adjust the number of rows in each colour section to make it look proportional.
Pattern Instructions
Start with the green colour (two strands held together) and a 6mm hook, chain 31 or any odd number of chains.
Row 1: with a 5mm hook, DC in third Ch from hook and every St across the row. (total 29 sts, the turning chain doesn’t count as a stitch)
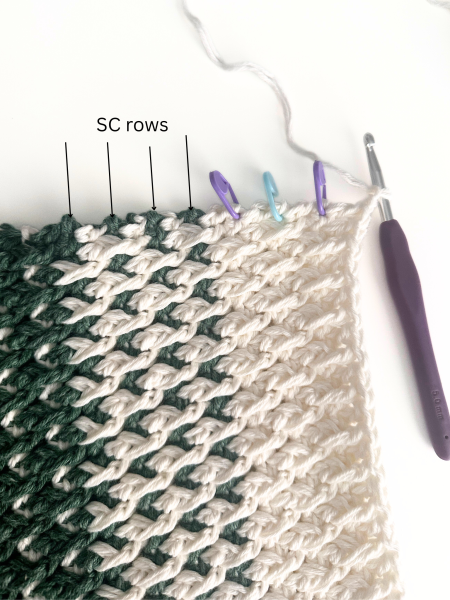
Row 2: Ch 1, turn. SC in first St and each St across (29 sts here and in every row)
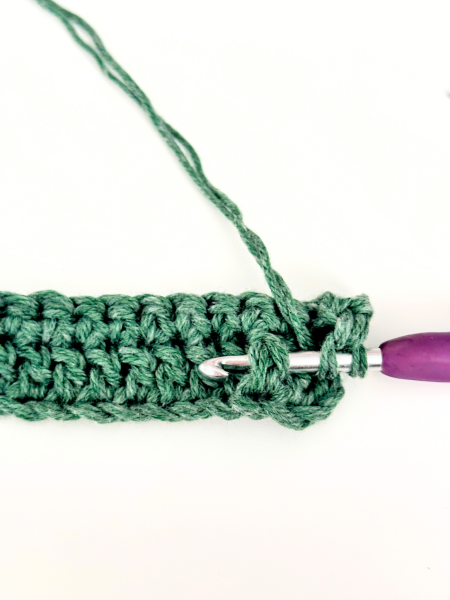
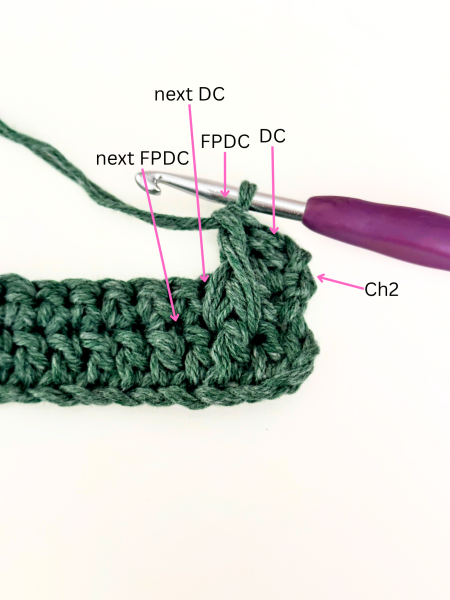
Row 3: Ch 2, turn (does not count as a stitch). DC in first St (see photo below), FPDC around the second DC two rows below (do not count the turning chain), *DC in next St, FPDC around the corresponding DC two rows below. Repeat from *, finishing with a DC in the last stitch.

Note: Remember to skip the stitch behind the FPDC on the current row. If not, you’ll end up doubling stitches and adding extra width to your trivet.
Row 4: repeat row 2.
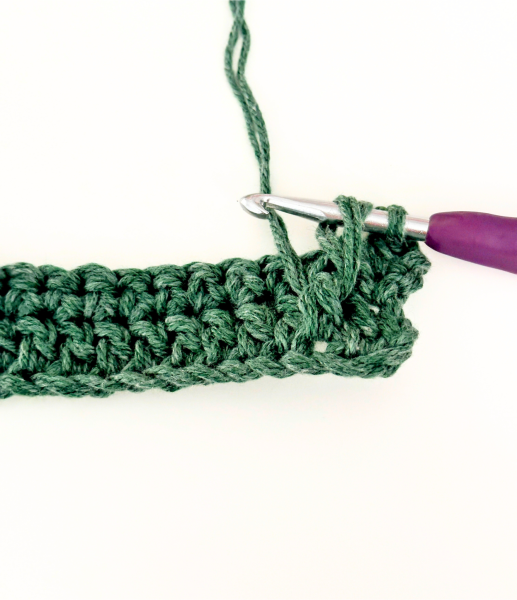
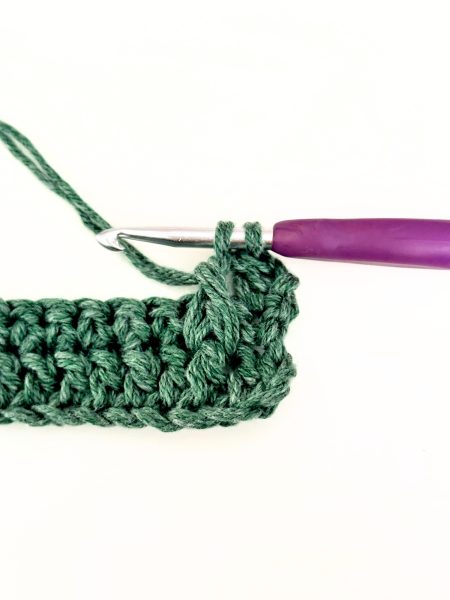
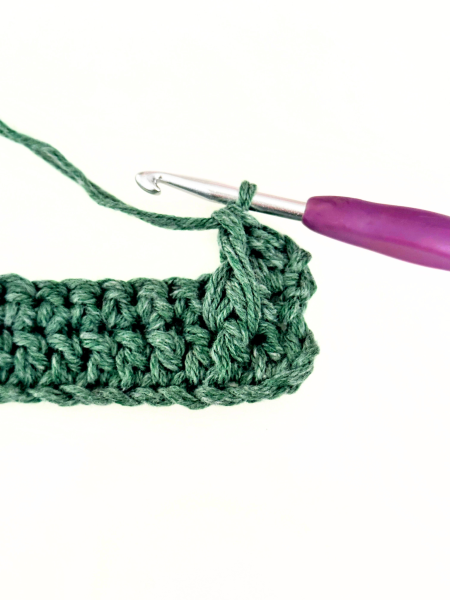
Row 5: Ch 2, turn. FPDC around the first DC two rows below (not the turning chain, see photo below), DC in next, FPDC in next, repeat alternating FPDC and DC across the row. Work a DC in last St, so at the end of the row, the last three stitches will be FPDC, DC, DC. See photos below.

Row 6-25 (or your desired size): Repeat rows 2-5.
These are the 4-row-repeat for the rest of the trivet. You can continue repeating them until you reach your desired size. You don’t need to complete a full 4-row repeat at the end, just make sure to finish on a double crochet row (either row 3 or 5).
Colour Changes:
- Rows 1-5: Green
- Row 6 (SC): White, carry green
- Row 7: Green, carry white
- Row 8 (SC): White, carry green
- Row 9: Green, carry white
- Row 10 (SC): White, carry green
- Row 11: Green, carry white
- Row 12 (SC): Green, carry white
- Row 13: White, carry green
- Row 14 (SC): Green, carry white
- Row 15: White, carry green
- Row 16 (SC): Green, carry white
- Row 17: White, carry green
- Row 18 (SC): Green, carry white
- Row 19-25: White
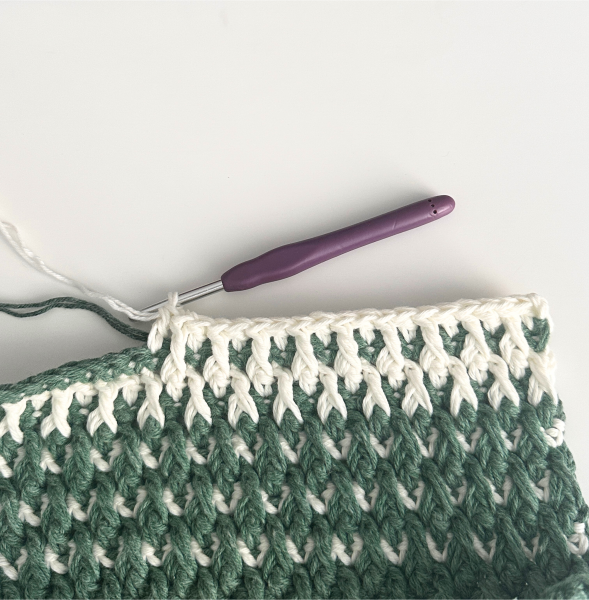
When changing colours, make the switch in the last stitch of the row so you’re ready to start the next row with the new colour. In the middle section, you’ll be alternating colours in each row, so it’s important to always carry the non-working yarn along as you go. That way, the next colour is right there and ready when you need it.
To carry the yarn: After switching to the new colour at the end of the row, turn your work and lay the unused yarn on top of the current row. Crochet over it to keep it hidden.
After each row, gently stretch your work and adjust the carried yarn so it’s not too tight or too loose – this helps maintain the shape and look of your trivet.
The very last row of your trivet should be a double crochet row with front post stitches, just like in rows 3 or 5. This will make it look symmetrical with the starting edge, since we began with a double crochet row as well.
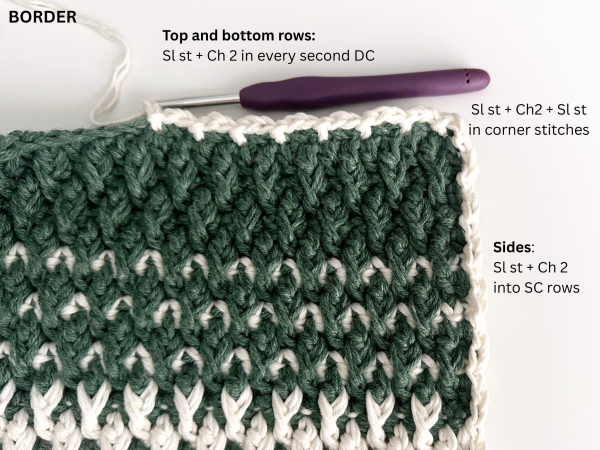
Border
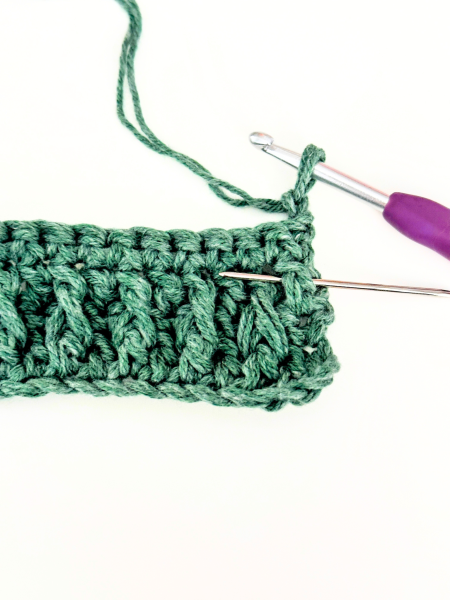
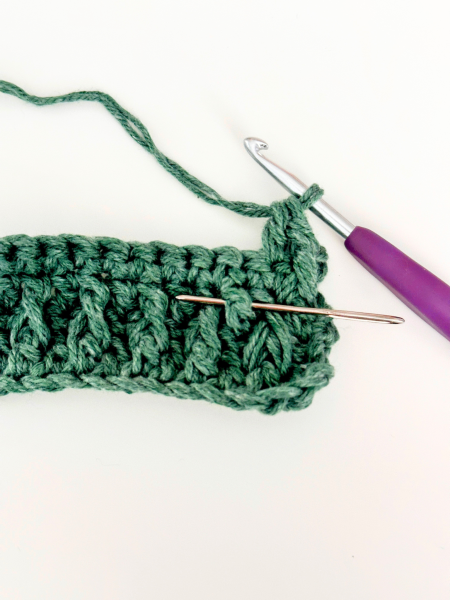
Sides: After finishing the last double crochet in the final row, begin working along the sides. *Chain 2, then slip stitch into the next single crochet row. Repeat from * until you reach the corner.
Corners: In the corner stitches, place Sl st+Ch2+Sl st.
Bottom & top rows: *Chain 2, skip one DC, slip stitch into the next DC, repeat from * across the row.
Fasten off and weave in all ends on the wrong side of the trivet.
Blocking
You may notice your trivet curling slightly as you work; that’s completely normal. To get it nice and flat, spray it lightly with water and pin it to a blocking board or lay it flat on a table.
If you’re using a table, place a large towel or something you can fold underneath, then pin the trivet to it. Straighten all the corners and edges to form a perfect square, and pin about every inch to hold it in place.
If any corners are curling up, they’ll stay that way once dry. So take a moment to flatten them completely. Let the trivet dry fully, which may take up to a day.
Below is the Alpine Stitch video tutorial, which shows you how to make front post double crochets. Please note that this trivet pattern differs from the general alpine stitch shown in the video. The tutorial is intended to provide a visual guide on how to work a front post double crochet two rows below.
4 replies on “Winter Spruce Crochet Trivet”
Hi Olga,
I just wanted to comment… what a LOVELY KITTY you have 🙂 I love Maine Coon cats… and Ragdolls… I have a 12.5 year old Ragdoll, he is PURE WHITE & “Sepia”, truly rare in color. His name is Dante. Hubby wanted to call him “Diablo” but I rejected that…. however he can have Diablo tendencies from time to time. LOL Look up a video on YouTube about a grey cat with attitude called “Thug Life” … it about sums it all up. I’ll include it here but I fear this is text base only and a URL will not work. You will have to copy/paste. Its worth a chuckle 🙂 Love your Trivet! LOL.. I just watched it again… tears me up every time, can’t stop laughing… Dante to a “T”. LOL https://www.youtube.com/watch?v=UoUEQYjYgf4
Thank you, Laurie! Oh, I love all cats too 😁 This one was actually one of my foster kitties, and I still miss him so much. That video made me laugh, cats are the best, always doing their own thing and making us laugh. I could watch them all day! 😄 I bet Dante looks absolutely stunning with that colour! 😻
This is gorgeous! (….and I may have just spent 20 minutes trying to quick-figure out if there’s a way to continue the gradient into another color repeat to make it longer and an ombre of greens…) <3
Hi Erin, that sounds like a fun idea! I’d love to see how it turns out once you figure it out! 🙂