I made this crochet handbag almost a year ago, but I’m finally sharing the pattern now! Since my original design, I’ve simplified it into a simple rectangular shape. It’s a small crochet handbag, perfect for carrying the essentials when you don’t need a larger bag. It’s just the right size to fit a phone, keys, and a few small items like sunglasses.
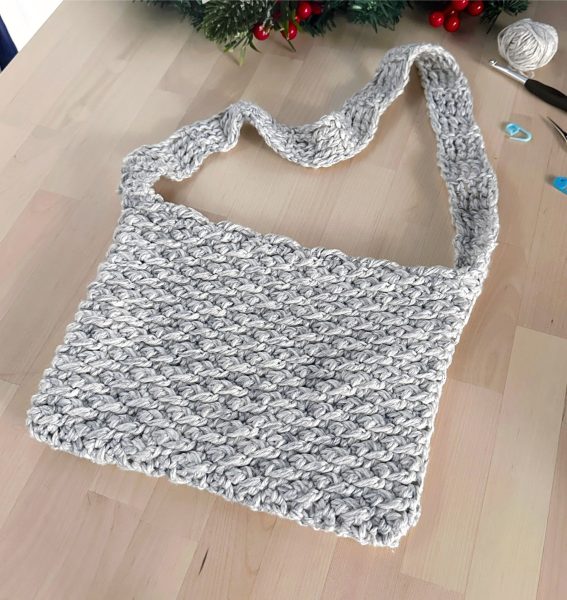
The design of this handbag is quite simple – just a rectangle worked in rows, then seamed on one side and the bottom to form the bag. After that, I made the handle and attached it to the bag.
Pin the bag crochet pattern to your Pinterest Crochet Board for later!
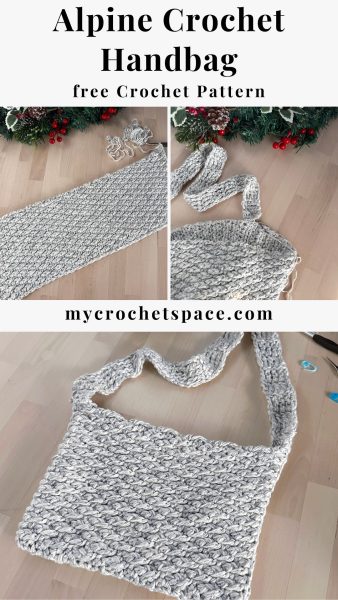
You can customize your handbag by adding a button or zipper if you’d like. I also recommend adding a lining if you know how, as sharp or small items like keys can poke through the stitches.
For now, I’m happy with how my crochet bag turned out, but I might add a zipper and a lining later to help keep the bag in perfect shape without stretching out. Once I do, I’ll include a section in this pattern with instructions for adding the lining and zipper.
About the Stitch
I used the Alpine Stitch for this handbag, which is one of my favourite stitches for bags. It’s a dense stitch that adds sturdiness to the bag while also creating a beautiful textured pattern.
Difficulty Level
Intermediate. This handbag also requires basic sewing skills to stitch the sides and bottom of the bag using your preferred sewing method.
Finished Size of the Bag:
Body: Length 9.5 inches (24cm) Height 7 inches (18cm)
Handle: Length 28 inches (71 cm) Width 1.5 inches (3.8cm)
Gauge
12 stitches x 13 rows = 4 inches (10cm) in Alpine stitch
Materials
This post may include affiliate links; view my disclosure policy for details.
- I used one skein of Comfy Color Mist in the color Foggy Beach. It’s a worsted weight #4 yarn made of 75% Pima Cotton and 25% Acrylic, with a yardage of 219 yards (200 meters).
- I used the entire skein to make this bag. If you’d like to make a larger bag, you’ll need more yarn.
- You can use any worsted-weight yarn of your choice (I used two strands held together) or any bulky #5 yarn.
- Crochet hook 5.5 mm
- Scissors, yarn needle (for weaving in the ends), tape measure.
Crochet Handbag Pattern Notes
- This pattern is worked with two strands held together: you can use one strand from the inside and one from the outside of the same skein. Alternatively, you can use bulky yarn instead.
- The handbag is worked in rows to create a rectangle.
- You can adjust the height of your handbag by chaining more or fewer stitches.
- Adjust the length of your handbag by working more or fewer rows.
- The handle can be made shorter or longer by adjusting the number of rows.
Abbreviations (US Terms)
Ch = chain
St = stitch
SC = single crochet
DC = double crochet
FPDC = front post double crochet
Tr = treble crochet (Yarn over twice, insert hook into the specified stitch, yarn over and pull up a loop. Yarn over and pull through two loops on your hook, yarn over and pull through another two loops on your hook, yarn over and pull through the last two loops on your hook)
Stitch used in this pattern: Alpine Stitch.
Handbag Pattern Instructions
With two strands held together, Ch 24 or any even number for the height of the bag. The 24 chains in my pattern measured 7 inches (18 cm).
Row 1: SC in the second Ch from the hook and in each St across the row. (Total: 23 stitches in this row and all rows following.)
Row 2: Ch 2, turn. The Ch 2 counts as the first DC stitch. DC in the next St and each St across the row.
Row 3: Ch 1, turn. SC in the first St (base of Ch 1) and each St across, ending with the last stitch in the turning Ch.
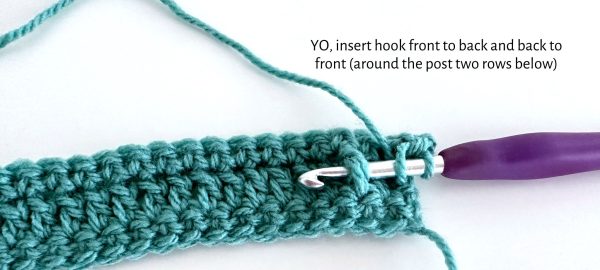
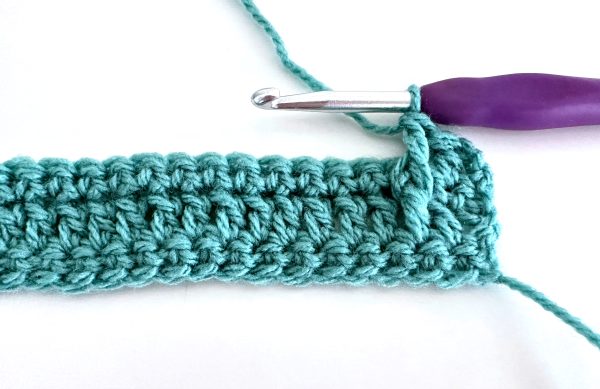
Row 4:Row 4: Ch 2, turn. DC in the next St, then FPDC in the following St (around the DC two rows below; see photos below or refer to the Alpine Stitch tutorial for detailed instructions and step-by-step photos). Work a DC in the next St, continue alternating FPDC and DC across the row. Finish with a DC in the last St.
Row 5: repeat row 3.
Row 6: Ch 2, turn. FPDC in first St, DC next, FPDC in next, repeat alternating DC and FPDC across the row. DC in last St.
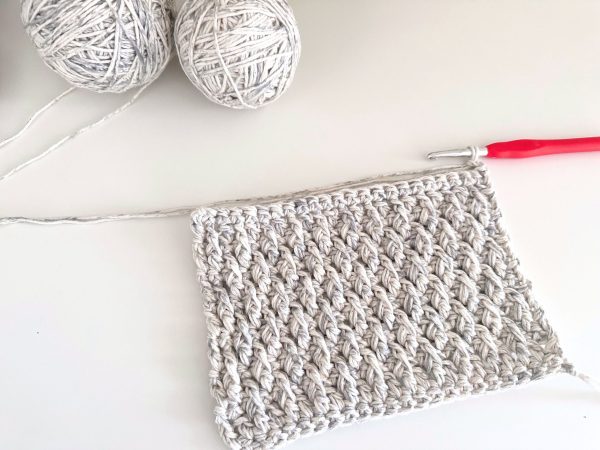
Note: always work a FPDC around the DC two rows below and a DC on top of FPDC.
Row 7: Repeat Rows 3 – 6 until you reach your desired length for the bag. In my pattern, I worked until it measured 19 – 20 inches (48 – 50 cm).
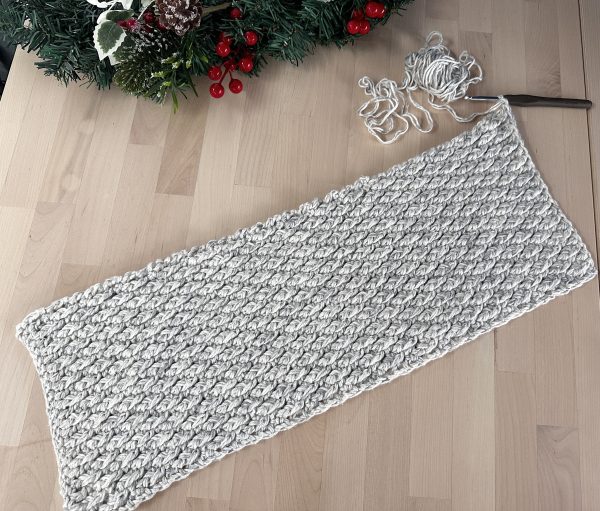
Fasten off and cut both strands of yarn approximately 1.6 yards (1.5 meters) from the last stitch to use for sewing the sides together.
Thread the yarn needle with one of the strands, fold the rectangle in half and start sewing the sides and bottom of the bag together. Use a mattress stitch or any stitch you prefer, going into each stitch on both sides.
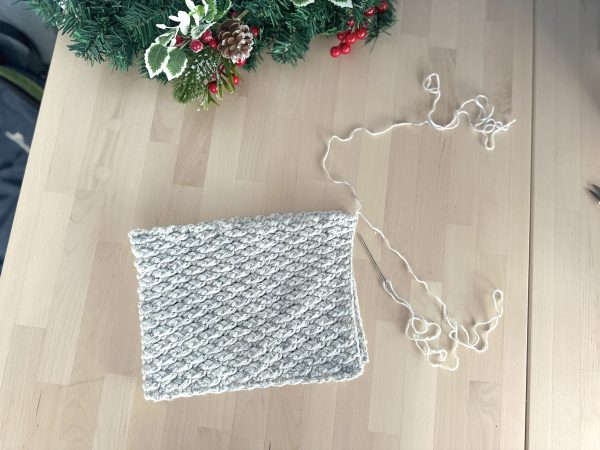
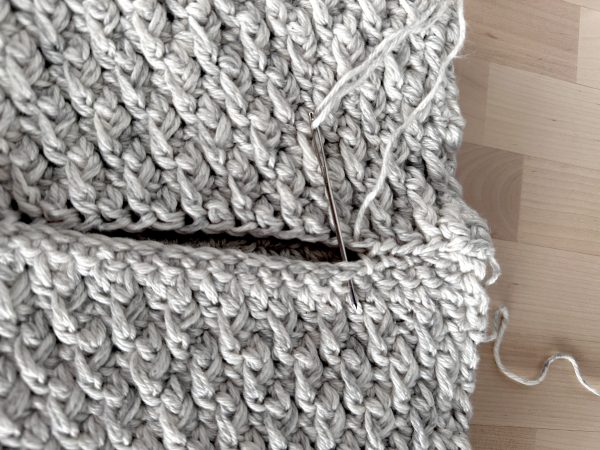
The other strand of yarn will be used to attach the handle on this side.
Handle
With two strands of yarn held together, Ch 6
Row 1: SC in the second Ch and each chain across the row. (5)
Row 2: Ch 1 and turn, SC in first and each St across. (5)
Row 3 – 4: repeat row 2.
Row 5: Ch 3, Tr in each st. (5) Ch3 , turn
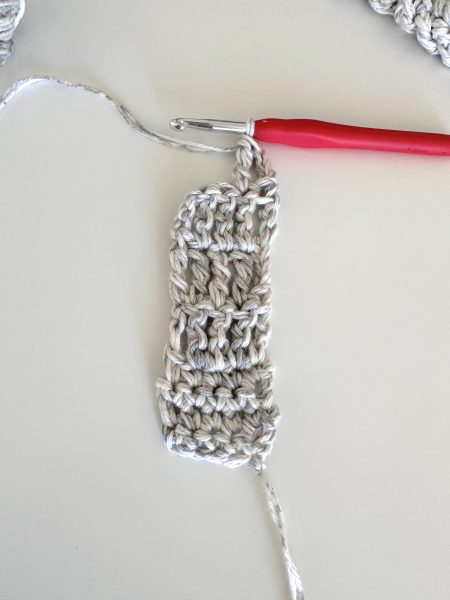
Repeat Row 5 until the handle reaches your desired length. For the final four rows, work SC stitches as described in Row 2.
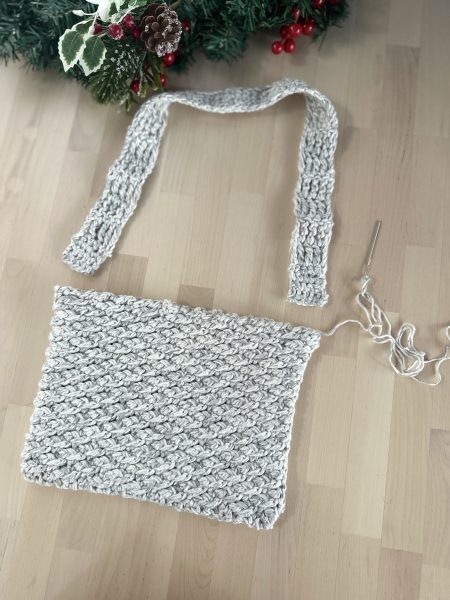
Attach the handle to both sides of the bag. I used stitch markers to position the handle and ensure it was centred. Once you’re happy with the placement, sew the handle to both sides.
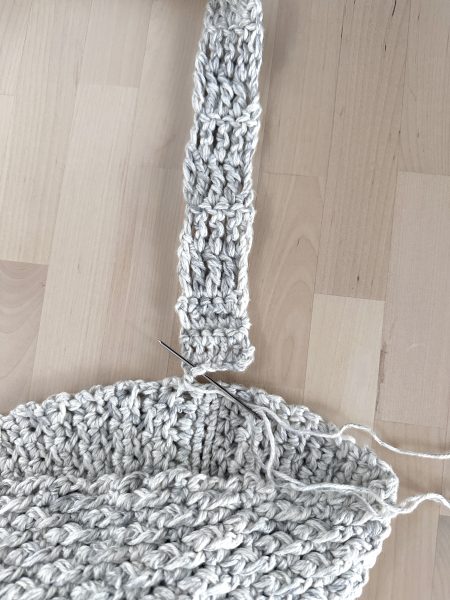
Weave in all the ends, and you’re done! If you’d like to make your bag stronger and prevent it from stretching out, you can add a lining if you know how.
Pin the bag crochet pattern to your Pinterest Crochet Board for later!

I hope you had as much fun making this beautiful handbag as I did! 🙂