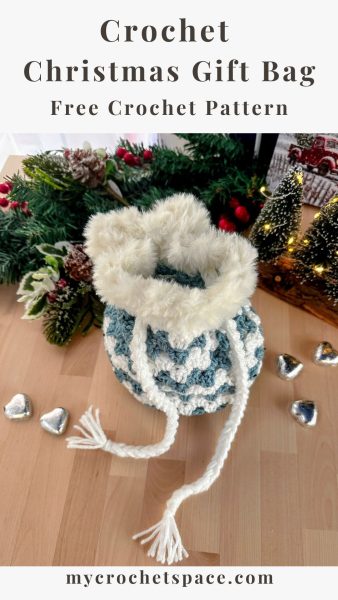
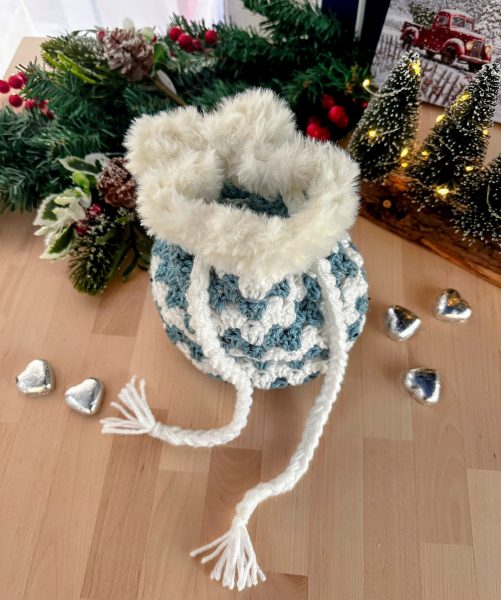
If you’re looking for creative ways to wrap your presents, this reusable gift bag is a great choice! You can gift it along with the present inside, and it’s both fun and easy to make.
This post may include affiliate links; view my disclosure policy for details.
I designed this bag with Christmas in mind, but it’s really more of a winter bag, making it perfect for other winter occasions, too. If you skip the faux fur edging and use different colours, it works beautifully for any time of the year!
About the Stitch
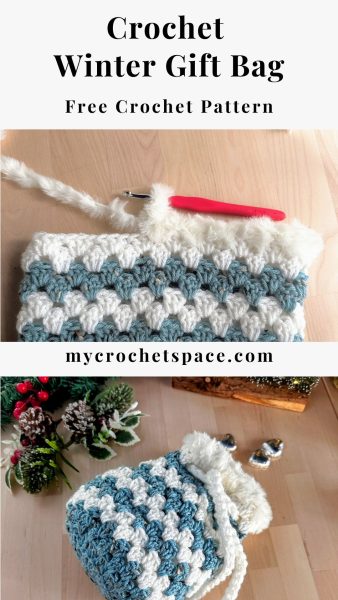
The main stitch used in this pattern is the Granny stitch. It’s a beginner-friendly stitch that’s simple to learn and uses double crochet stitches. And since double crochet stitches are tall, this pattern works up quickly.
About the Yarn
I used Brava Worsted in White and Brava Tweed in Heron for this project. I added a touch of Faux Fur (Moda Vera) in White for the edging. You can use any worsted weight #4 yarn and any Faux Fur yarn you like.
Crochet Gift Bag Pattern
Scroll down for the free crochet pattern or get the ad-free & premium PDF pattern with step-by-step photos and written instructions from my Etsy or Ravelry stores.
Pin the gift bag crochet pattern to your Pinterest Crochet Board for later!
Difficulty Level
Easy to Intermediate level.
Dimensions
Base diameter: 6 inches (15cm)
Height: 7 inches (18cm)
Gauge
4 DC stitch clusters x 9 rows in Granny Stitch = 4′′ (10cm)
Abbreviations (US Terms)
Ch = chain
St = stitch
SC = single crochet
DC = double crochet
DC cluster = three double crochet stitches worked in the same stitch
Sk = skip
Materials
- I used Brava Tweed (Heron) and Brava Worsted (White). For the edging, I used Vera Moda Faux Fur (White). You can use any worsted weight yarn of your choice and any Faux Fur yarn of your choice.
- Crochet hook 6mm
- Scissors, yarn needle (for weaving in the ends), tape measure
Crochet Gift Bag Pattern Notes
- The bag is worked in the round, starting from the base.
- To make a smaller bag, you can begin the body section sooner. Simply start the Granny stitch a row earlier and work fewer rows to reduce the height.
- The Ch 2 at the beginning of a round counts as the first stitch.
- For a sturdier base, the bottom is worked with two strands of yarn held together. You can use one strand from the inside of the yarn skein and the other from the outside of the same skein.
- Keep in mind that the first two rounds of the bag body (Rounds 4 and 5) will stay flat, adding to the base diameter. This slightly increases the base size while reducing the overall height. Starting from Round 6, the bag body will begin to take shape and work its way upward.
Crochet Gift Bag Instructions
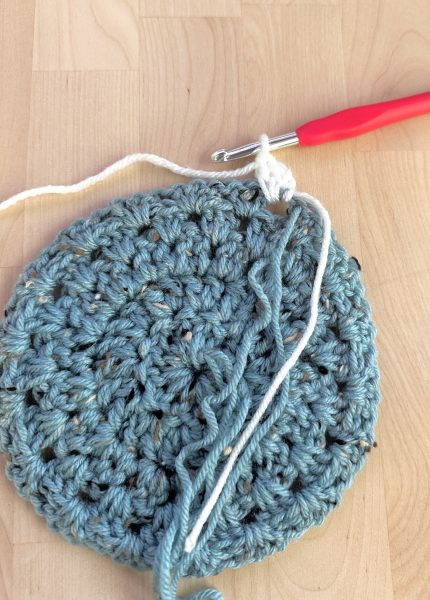
Round 1: Using Heron and two strands of yarn held together (one strand from the inside of the skein and one from the outside), make a magic ring or chain 4 and join with a Sl st to form a circle. Ch 2 (counts as the first stitch throughout the pattern), then work 11 DC into the ring. (12 stitches total)
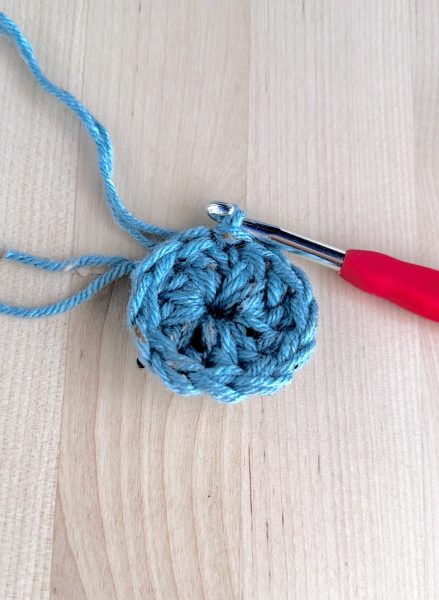
Rd2: Ch 2, turn. DC in first St. Then work 2 DC stitches in each St around, connect with a Sl st. (24 total)
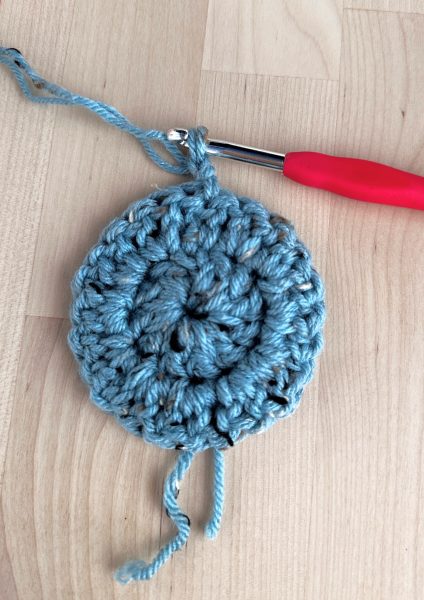
Rd 3: Ch 2, turn. Work 2 DC in first, *DC in next, 2 DC in next, repeat from * around. Connect with a Sl st. (36 Sts total)
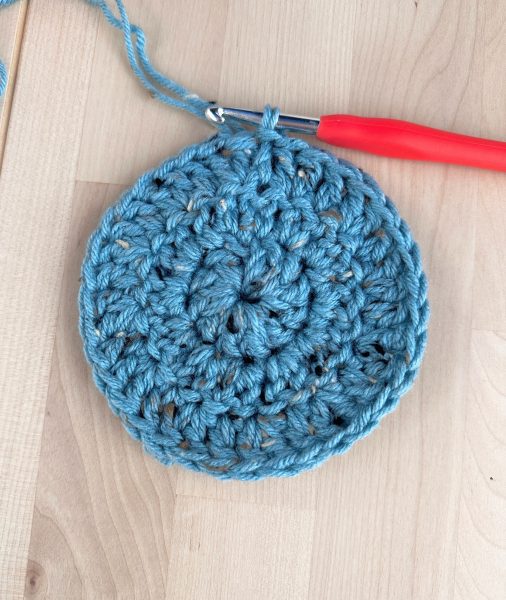
Rd 4: Continue with one strand of yarn from now on and cut the second strand of yarn approx. 8 inches away from the hook.
Ch 2, turn. Work 2 DC stitches in the first space between the DC stitches on the row below. *Skip 2 DC stitches and work 3 DC in the next space between the stitches. Repeat from * around. Sl st to first St. (18 DC clusters in this round and each following round)
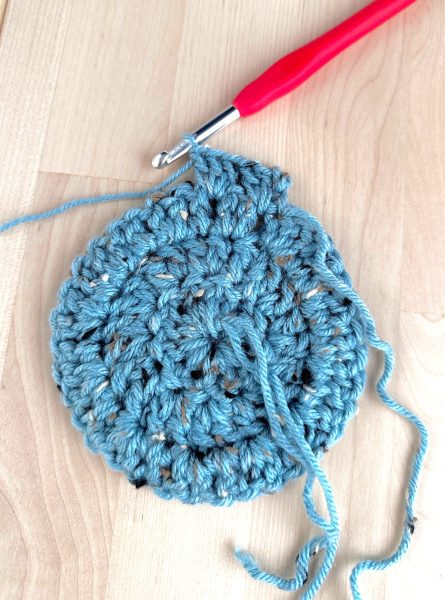
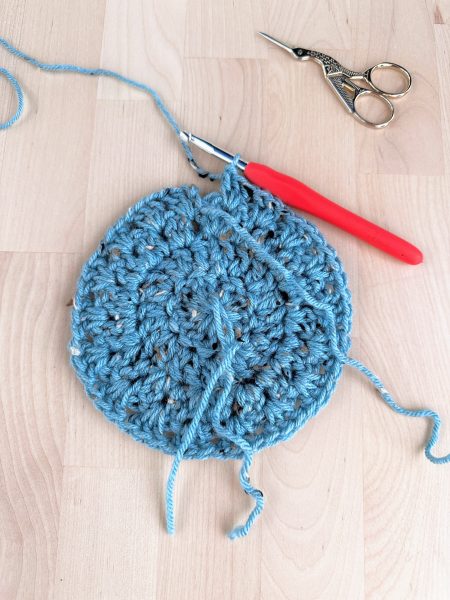
Rd 5: Ch 2, turn. Work 2 DC in the first space between the DC clusters, work 3 DC in each space between the DC clusters around. Connect with Sl St.
Note: Rounds 4 and 5 will count towards the base of the bag as they stay flat, adding to the base diameter. The bag will begin to take shape starting from Round 6 onward.
Rd 6: Switch to White and repeat Round 5. Leave the first colour yarn at the front of your project, facing you. Make sure all yarn changes stay on the same side whenever you switch colours. This will be the inside of your bag.
Colour Changes: Each colour is worked for two rounds before switching to the contrasting colour.
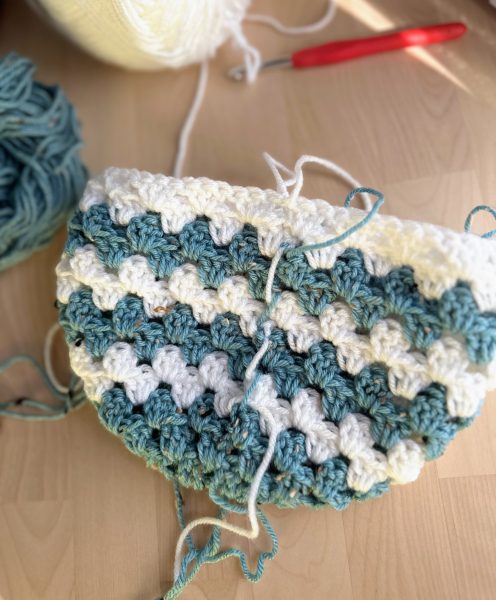
Work 19 rounds or to your desired height. When you are happy with the height of the bag, cut both yarns and fasten off. When you are happy with the height of the bag, cut both yarns and fasten off.
Join the Faux Fur White yarn and work a SC into the same stitch. Then, loosely work 2 SC stitches into each space between the clusters around. Join with a Sl st to finish.
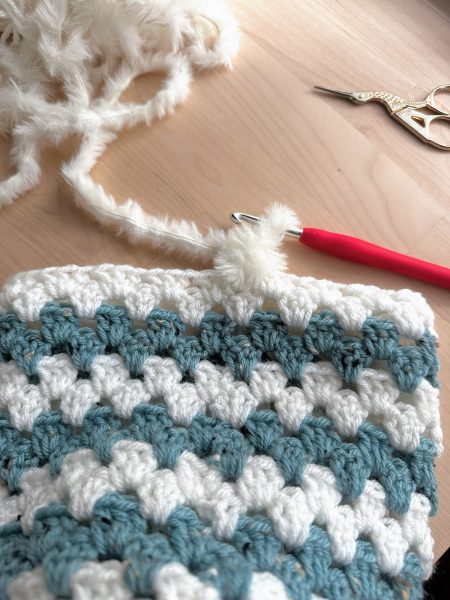
Working with Faux Fur yarn is easy and forgiving if you make a mistake. The fluff hides the stitches, so it doesn’t matter precisely where you insert your hook or which stitch you use.
Fasten off and weave in the Faux Fur yarn into the same row using a smaller-sized hook.
Making a drawstring
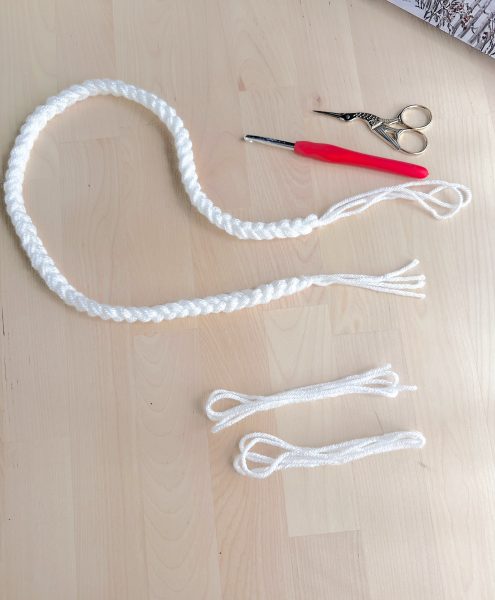
I made a long drawstring, approximately 25 inches (60 cm) in length. To make this length, cut four pieces of yarn, each 4 yards (3.7 m) long. If you prefer a shorter drawstring, simply cut the yarn to a shorter length. Hold all four strands together, make a slip knot using an 8mm hook, and chain until you reach your desired length.
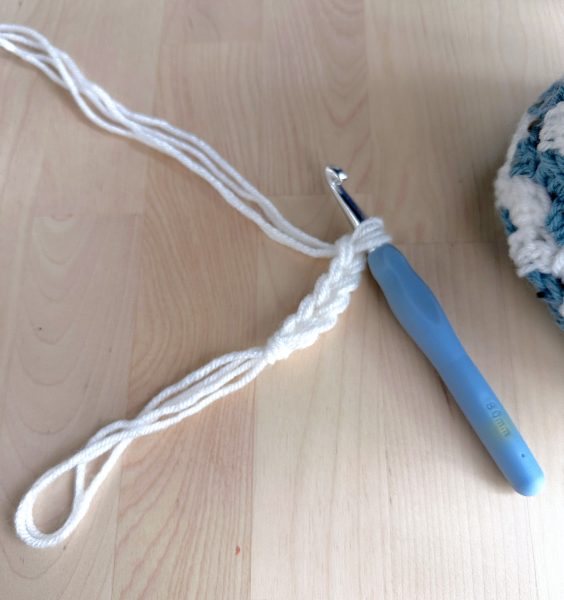
Tassels
Cut six pieces of yarn, each 8 inches long, for each tassel.
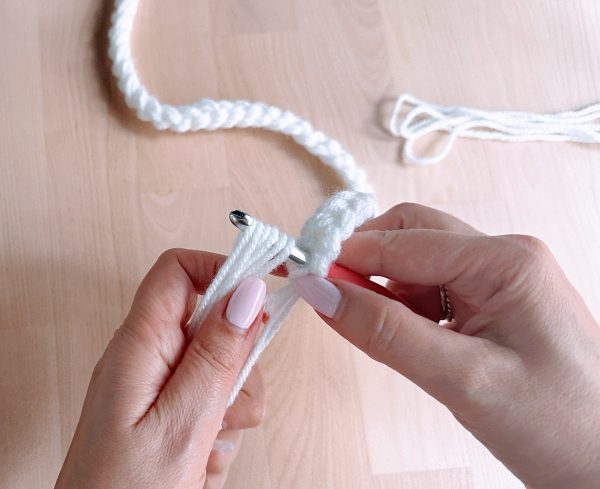
Fold the yarn pieces in half to create a loop. Insert the hook into the first chain of the drawstring and pull the loop halfway through.
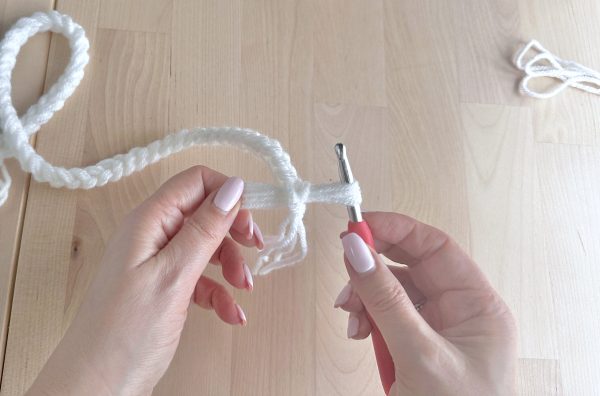
Then, yarn over and pull the ends of the tassel through the loop. Make sure to pick up all the tails from the drawstrings into the same loop.
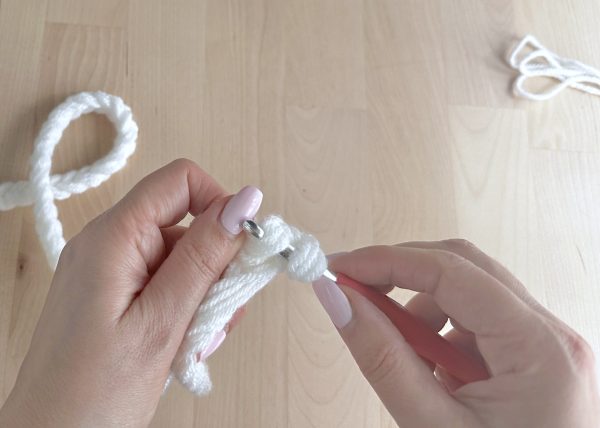
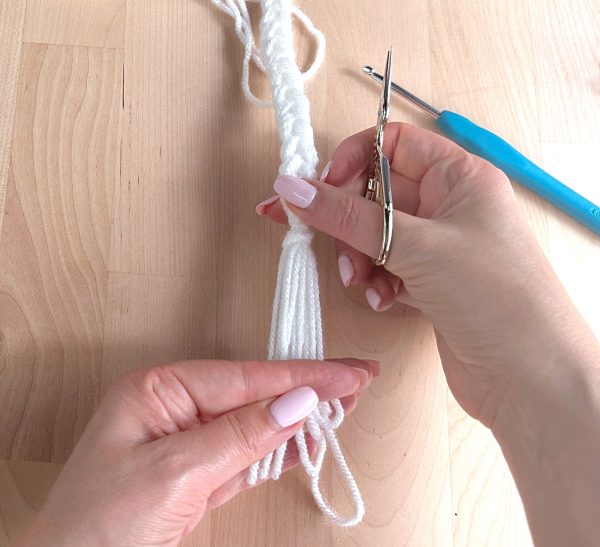
Tighten the knot and trim the tassel to your desired length. Repeat the process to create the second tassel.
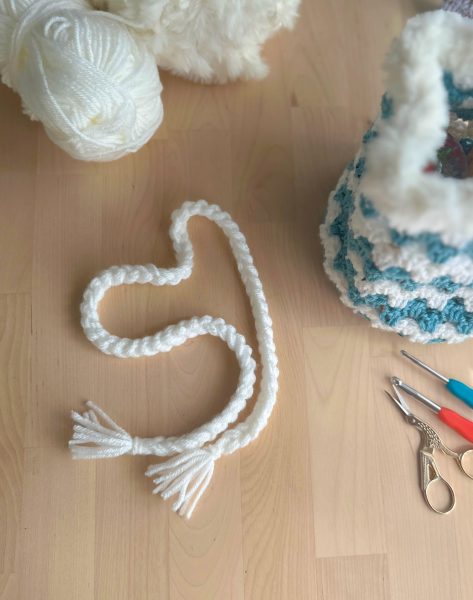
Done! Now all that’s left is to insert the drawstring into one of the spaces between the clusters in the bag (I used the 4th row from the top) and weave it in and out every second cluster. Weave in all yarn ends.
I hope you had as much fun making this gift bag as I did! 🙂
