Last updated: May 19, 2026
Looking for a fun crochet project for winter? I’ve got just the thing – the Misty Fingerless Crochet Gloves! They’re perfect for those cooler days in fall and winter. They’ve got a sleek, modern design with a cozy texture, and they’re so soft and warm. The best part? You can use your phone or pay at the store without having to take them off. Super convenient for everyday life! 🙂
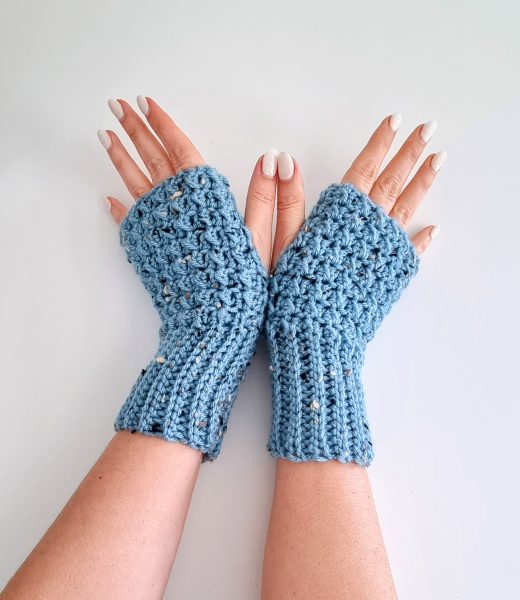
The best part of crocheting your own gloves is that you get to personalize them just the way you want. You can make them longer to cover more of your fingers and wider/narrower to fit your hand size. Plus, you’re free to pick a different colour or yarn type that suits your style. It’s all about making them truly yours!
Check out the Misty Crochet Neck Warmer pattern to make a matching cowl with your gloves!
The Design
I made these gloves by crocheting a rectangle and then sewing the sides together on the side of the thumb. It’s similar to how I created the Herringbone gloves, the Tweed Hand Warmers, the Ridged Gloves and the Easy Fingerless Gloves.
But the difference here is that I used two different stitch patterns to make the elastic cuff and the textured part around the hand. You’ll also need to switch between two different crochet hook sizes halfway through the row. So, this pattern is a little more elaborate and needs a bit more attention. But the result is well worth it, in my opinion 🙂
The reason I used two different hook sizes is to even out the height of the two different stitches slightly. Using two different crochet hook sizes serves two purposes: the larger hook makes the cuff softer and stretchier, while the smaller hook makes the textured part slightly denser.

So, here’s what happened when I made one glove with just one hook size. I ran into a little issue – the hand part ended up a bit too wide. When I tried to fix that width, the cuff ended up too tight. The reason behind this is that the stitch height in the hand part is taller than the slip stitch in the cuff, causing it to gain more height as you go. Tricky, right?
To resolve this issue, I had two choices: opt for a different stitch or use two different hook sizes. I could have chosen a taller stitch for the cuff (SC in BLO), but I found that the slip stitches looked better in this combination. I really love how the stitch pattern comes together, so I decided to go with the two hook sizes!
I think that even though you have to switch hooks in every single row, it still works up quickly because it’s a small project. I actually think it can be a fun and valuable learning experience to see how the two different hook sizes create different tension and affect the texture of the stitches.
Just an extra tip for the ribbing: Make sure to work the slip stitches loosely; they’ll be much easier to crochet into.
Difficulty level
These gloves require intermediate-level crochet skills. You should be familiar with slip stitches, slip stitches in the back loop only and half double crochet. Additionally, it’s important to pay attention to your stitches and either count them or use a stitch marker to determine when to switch crochet hooks and start with the different stitch patterns.
About the Yarn
I used Brava Tweed yarn #4 worsted weight, acrylic. Alternatively, you can use any worsted-weight yarn of your choice.
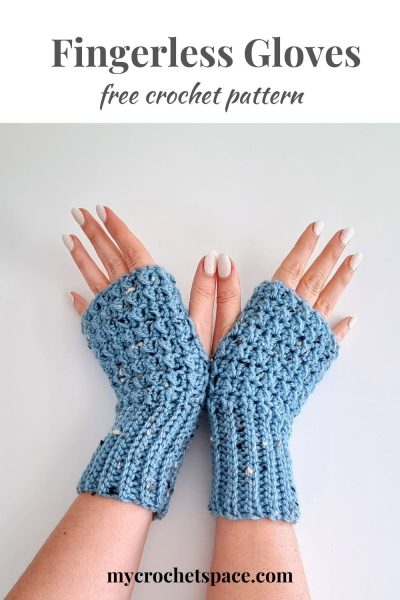
Fingerless Gloves Crochet Pattern
This post may include affiliate links; view my disclosure policy for details.
Scroll down for the free pattern, or get the ad-free & print-friendly version with step-by-step photos and written instructions from my Etsy or Ravelry stores.
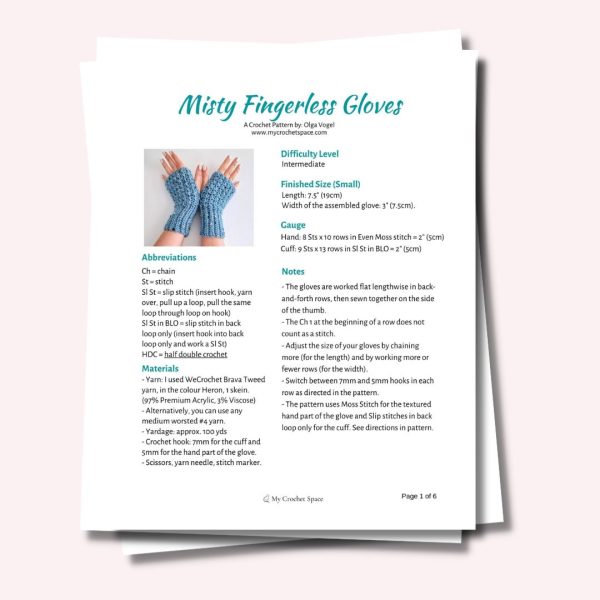
Misty Fingerless Gloves Crochet Pattern PDF
Or pin this crochet gloves pattern to your Pinterest Crochet Board for later!
Skill level
Intermediate
Finished Size (Small)
Length: 7.5″ (19 cm)
Width of the assembled glove: 3″ (7.5cm)
Gauge
8 Sts x 10 rows in Even Moss stitch = 2″ (5cm)
Materials
Yarn: I used WeCrochet Brava Tweed yarn, in colour Heron. (97% Premium Acrylic, 3% Viscose) 218yds/199m.
Yardage: approx. 100 yards for one pair of gloves.
Alternatively, you can use any medium worsted #4 yarn.
Crochet hook: 7mm for the cuff and 5mm for the hand part of the glove.
Scissors, yarn needle, stitch marker.
Abbreviations (US Terms)
Ch = chain
St = stitch
Sl St = slip stitch
Sl St in BLO = slip stitch in back loop only
HDC = half double crochet
The textured hand part of the glove uses Even Moss stitch.
Crochet Pattern Notes
- The gloves are worked flat lengthwise in back-and-forth rows, then sewn together on the side of the thumb.
- The Ch 1 at the beginning of a row does not count as a stitch.
- Adjust the size of your gloves by chaining more (for the length) and by working more or fewer rows (for the width).
- You need to work with two crochet hooks within one row. Use the 7mm hook for the cuff (slip stitches in back loop only, to create a more stretchy and airy elastic cuff) and the 5mm hook for the hand part (the Even Moss stitch, to create a denser and slightly shorter stitch for a better fit)
Sizing
Measure around the widest part of your hand (excluding the thumb) with a tape measure. Make the width 1″ (2.5cm) less than your actual hand measurement. For example, if your hand measures 7″ around (excluding the thumb), work the pattern until you reach 6″.
- 7″ (small) – width of glove 6″
- 8″ (medium) – width of glove 7″
- 9″ (large) – width of glove 8″
Crochet Fingerless Gloves Written Instructions
With 7mm Ch 34 (or any number until you reach 10 inches). As you continue working on the following rows, the length should shrink to 7.5 inches when it’s done. If you want longer gloves, make sure to chain approximately 2 inches more than your desired length.
Row 1: Still with 7mm crochet hook: Work 15 Sl Sts (loosely) starting from the second Ch from the hook. Now change to 5mm hook and work a HDC into the next Ch.
You can put a marker into that HDC stitch so you know when to switch back to 7mm hook in the next row and start with the slip stitches.
Work a *Sl St in next Ch, HDC in the next, repeat from * across the row, finishing with a Sl St in the last Ch. (15 slip stitches and 18 Even Moss stitches). Ch 1, turn.
Important: if you change the number of chains in the beginning, make sure you have an even number of chains left for the Moss Stitch part of the glove. You have to always finish a row with a Sl St.
Row 2: Sl st in the first St (on top of Sl St in the previous row), HDC in the next (on top of HDC in the previous row). Continue alternating Sl Sts and HDC across the row until you reach the stitch marker (18 Sts). Remove the marker and work the last HDC where the marker was. Place the marker into the new HDC stitch.
Now change to a 7mm hook and work 15 Sl Sts in BLO across the row. (18 Even Moss stitches and 15 Sl Sts in BLO)
Row 3: Ch 1, turn. Work 15 Sl Sts in BLO, starting from the first St from the hook until you reach the marker.
Change to a 5mm hook, remove the marker and work a HDC in that St. Place marker on top of the HDC you just made. Work a *Sl St in the next St, HDC in the next. Continue from * until the end of the row, finishing with Sl St again. Ch 1 and turn.
Row 4: repeat row 2.
Row 5: repeat row 3.
Keep repeating rows 2 and 3 until you reach your size: Small (30 rows or 6 inches), Medium (35 rows or 7 inches) and Large (40 rows or 8 inches).
It’s good to remember that you can always check the size by wrapping your unfinished glove around your hand.
Assembling
When you reach your desired size, sew the two sides together with the yarn needle, leaving a hole for your thumb.
Begin sewing 1.5 inches down from the top. Leave about 1.5 inches for your thumb and continue sewing the remaining part.
Note: When you reach the thumb hole, keep sewing on one side only (not too tight) for the length of the thumb hole. This way, you won’t need to cut the yarn.
Fasten off and weave in all ends. Done!
Make both gloves exactly the same way; there is no left or right.
I hope you like this crochet pattern! I really love seeing your beautiful creations using my patterns, make sure to tag me on Instagram @my_crochet_space to show off your makes!
Enjoy your crochet pattern! Happy Making! 🙂
4 replies on “Misty Crochet Fingerless Gloves”
Hi Olga, Your Misty Crochet Gloves are very pretty! Thank you for linking up at our weekly Link Party! You are being featured at our Wednesday
Party #527 this week. Here’s the direct link to the post in case you’d like to share your feature:
https://oombawkadesigncrochet.com/framed-flower-brooches-misty-gloves-rainbow-cardi-link-party-527/
Hope to see you again next week! Rhondda
Thank you so much! 🙂
maybe I missed it, but I can’t find the instructions for how to finish this glove up. do you just sew it together whip Stitch style or slip stitch up the side? where do you make the thumb hole and how big is it?
Hi Jill, sorry – I just updated the post with the instructions, thanks for letting me know! 🙂