Last updated: May 19, 2026
This Thermal Stitch Crochet Potholder pattern is a variation of the stitch I used in my Ultimate (Extra Thick) Potholder. It’s also made with the Half Double Crochet Thermal Stitch, but with a slight change that creates a different texture. You’ll notice the lines between the rows are more prominent in this version, while the Ultimate Potholder has a smoother, denser look.
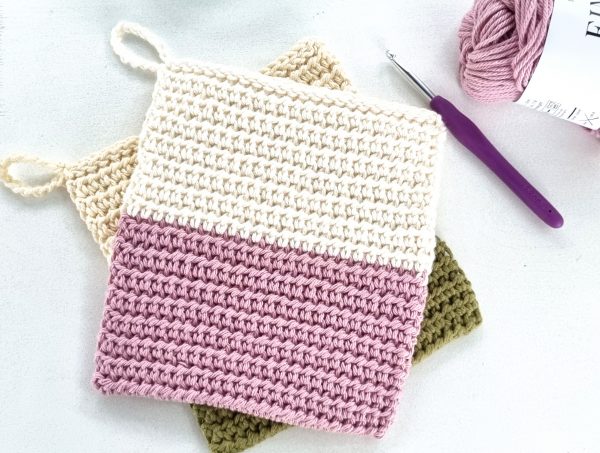
If you’re already familiar with the thermal stitch, you know it creates a very dense and sturdy fabric. It’s commonly used for crochet potholders and trivets, but it’s also great for any project that needs extra thickness, like bags, baskets, or other sturdy home accessories.
If you haven’t tried the thermal stitch yet, there are a few versions worth exploring. The Thermal Single Crochet is the most common and a great one to start with. The Thermal Half Double Crochet comes in two variations, both offering a bit more texture and thickness. There’s also the Thermal Double Crochet, which gives you an even taller and more textured fabric.
My personal favourite is the Ultimate Potholder, made with the half-double crochet version of the thermal stitch. But if you’re just getting started, I find the Thermal Single Crochet is the easiest to learn. I recommend beginning with that one to get comfortable with the technique before moving on to the other variations.
About Thermal Stitch
Thermal stitches are worked by inserting your hook into the stitch of the current row and a loop from the row below at the same time. That’s what gives the fabric its signature thickness. You can use single, half double, or double crochet for this technique.
The stitch itself is quite simple, but it might take a little practice to get used to!
Here are the three most important things to keep in mind when working thermal stitches:
- Make sure you find the correct first stitch on the row below.
- Don’t skip any stitches, it’s easy to do without noticing.
- Watch out for the last stitch, it often hides under the turning chain!
Make sure to count your stitches in every row. It’s the best way to catch any mistakes early and keep your edges nice and straight.
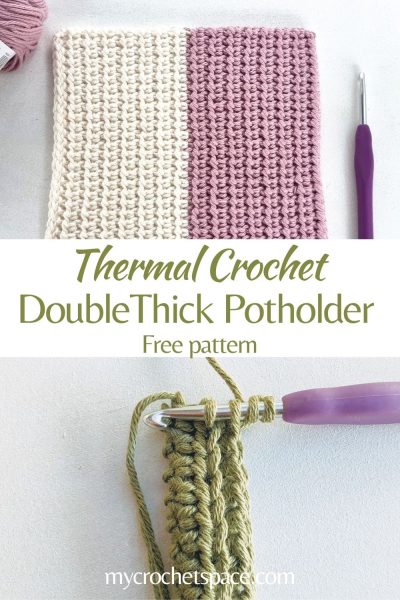
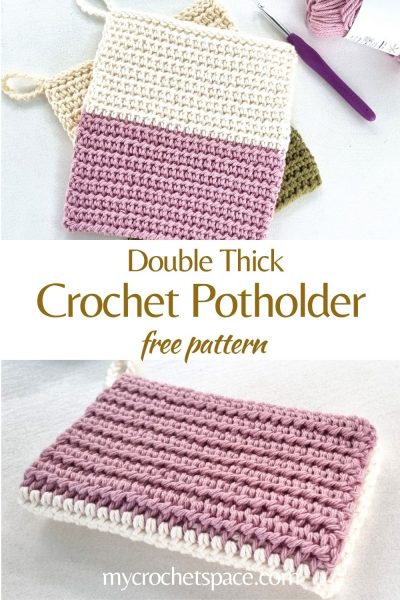
Thermal Half Double Crochet Potholder Pattern
Please scroll down for the free pattern or get the ad-free & print-friendly version with step-by-step photo and written instructions for a small fee from my Etsy or Ravelry stores.


Save this pin to your Pinterest board so you can easily access this pattern whenever you need it.
Difficulty
Easy / Intermediate level
Material
Yarn: any 100% Cotton, 10 ply / worsted weight #4
Hook: 5mm
Dimensions:
17cm x 18cm (6.5” x 7”)
Gauge:
15 stitches x 18 rows in Thermal HDC = 4″
Abbreviations:
Ch = chain
St = stitch
Sl St = slip stitch
HDC = half double crochet
Th HDC = Thermal half double crochet
Written Instructions:
Ch 26 or chain more for the desired size of your potholder.
Row 1: HDC in the third Ch from hook and across the row (24). Ch 2
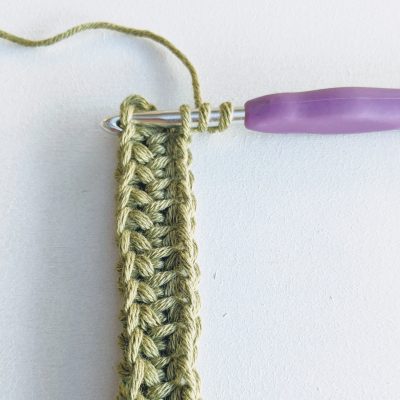
Row 2: Do not turn your work at the end of the row as you normally would. Just turn it vertically as pictured below, that way you will see the stitches better.
Yarn over and insert your hook in the back loop only of the first stitch and the unworked two chain stitches below. Yarn over, pull through 3 loops on hook, yarn over, pull through all loops on hook. Repeat this stitch (Th HDC) in every stitch across the row. Ch 2. (video demonstration available below)
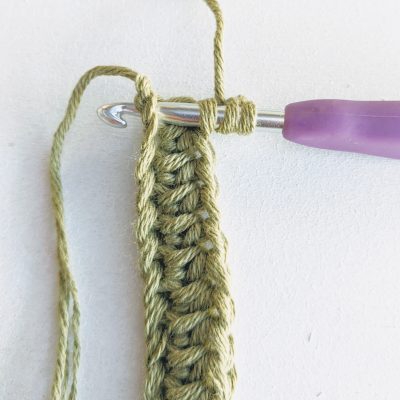
Note: When inserting your hook into the unworked chain stitches, you can work into one chain stitch only or both. I prefer to work in both stitches. Either way is OK.
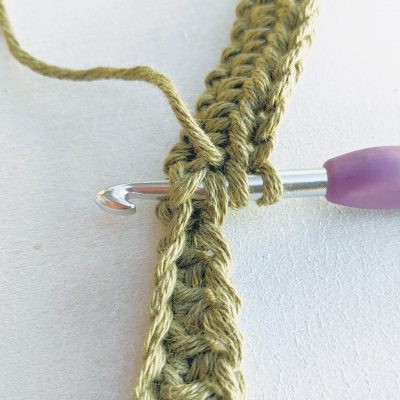
Row 3: Turn your work. Yarn over and insert your hook in the back loop only of the first stitch and the unworked loop from the row below. Yarn over, pull through 2 loops on hook, yarn over, pull through all loops on hook. Repeat Th HDC stitches in every stitch across the row (24). Ch 2.

Repeat row 3 until you reach 7” or your desired size.
Note: I switched to a different 100% cotton yarn with a similar weight halfway through the project. If you’re not sure how to change colours, I show exactly how to do it in my Crochet Thermal Stripes Potholder video tutorial.
LOOP: Ch 15 for the loop and continue to the last row.
LAST ROW: Insert your hook under both loops (front and back loops, see picture below) and into the unworked loop from the row below. Slip stitch through all the loops. You can watch the video below for visual guidance.
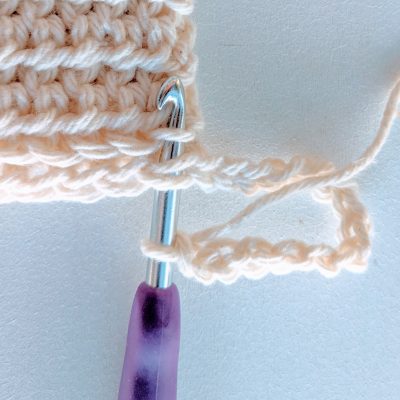
Fasten off and weave in all ends.
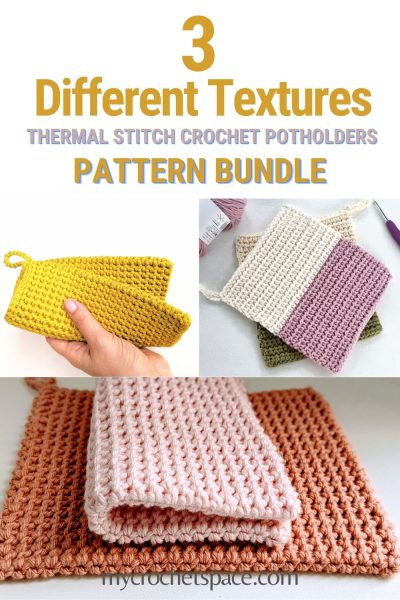
Would you like to have all three Thermal Stitch Potholder patterns in one convenient PDF bundle? It’s a great way to save and keep your patterns organised in one place. You’ll get all three versions of the Thermal Stitch Potholder patterns here.
Or if you prefer just the one PDF pattern, you can get it from my Etsy or Ravelry shops 🙂
Thermal Half Double Crochet Potholder Video Tutorial
Check out more free patterns in my post 16 Crochet Potholders from selected crochet designers!
More Crochet Potholder Patterns
- Houndstooth Crochet Potholder
- Single Crochet Cross Stitch – Potholder Pattern
- Crochet Christmas Tree Potholder
8 replies on “Thermal Half Double Crochet – Textured Potholder Pattern”
Thank you so much for this pattern! I kept losing stitches and had to rip out my work twice. Then I put markers at the beginning if each row to know where it started. I found this to be a great help!
That’s a great tip! Thanks for sharing 🙂
I have to thank you for sharing this pattern. I’ve been making these potholders for years. anyone that comes to visit get to choose a pair to take home. I’ve yet to try it in hdc so will do that, as well as handles for a bag. very appreciated!
You’re welcome and I’m so happy to hear that. 😊 I hope your future projects turn out beautifully!
I have a huge stash of Sugar and Cream (4 ply) cotton yarn and am wondering if it I could use 2 strands instead of one (10 ply) for this pattern? I am hopeful it will be thick enough for pot holders, or is it a bad idea? What do you think?
I made a potholder using two strands (4ply) using this pattern: https://mycrochetspace.com/extra-thick-thermal-potholder/ This pattern doesn’t have the ridges you get with the one above and I really like it, the thickness is great for me. I would recommend making a small sample and see if you like it! 🙂
)
Thank you so much for all of your wonderful patterns. They are so beautiful and you are very talented. Thanks again 🙂
Thank you so much, Monica! 💗 I’m glad you’re enjoying my patterns! 😊