Last updated: May 19, 2026
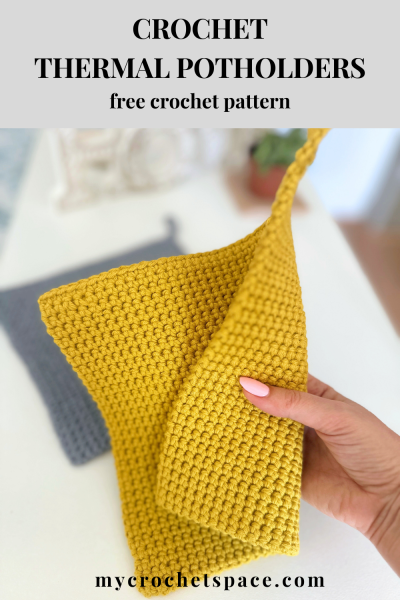
If you’re after a super thick and sturdy crochet stitch for your next crochet potholder, this pattern is a winner!
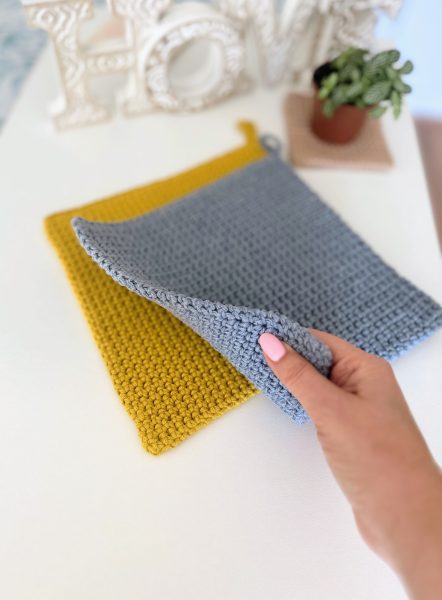
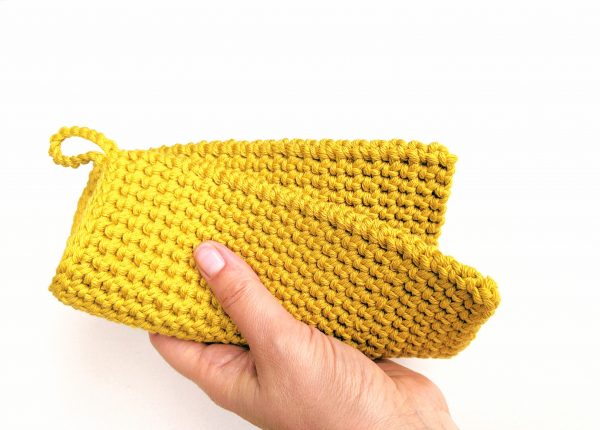
This crochet potholder pattern uses the Thermal Single Crochet stitch – one of the best stitches I know for crochet potholders! It’s incredibly dense, almost double the thickness of a regular single crochet, making it ideal for potholders.
About Thermal Stitch
Thermal Single Crochets are single crochets that are worked into the back loops of current and previous rows at the same time. That’s what creates the thickness.
There are also half-double crochets and double crochets that can be used as Thermal stitches. Take a look at my Extra Thick Potholder and Thermal Stitch Crochet Potholder, where I used half double crochet thermal stitches in different ways.
Difficulty
Easy/Intermediate.
The Thermal stitch isn’t hard, but it can be a little tricky at first. The most challenging part is figuring out exactly where to insert your hook – it’s all about finding the right stitch to crochet into.
The Thermal Stitch is a fun technique, but it might take a little practice at first – especially since you’ll be working into both the current and the previous rows at the same time. It’s important to keep an eye on your stitches in each row to make sure everything lines up.
One common mistake when starting out is accidentally skipping a stitch or working into the same one twice. The best way to avoid that is by counting your stitches at the end of each row. It really helps keep your edges straight and your project looking neat.
Need a visual guide? My step-by-step video tutorial on YouTube walks you through the entire process – from the very first row all the way to the final row, where I show you how to close the thermal stitches properly.
Once you’ve had some practice with the Thermal Stitch, try adding a few contrasting colours to make your potholder stand out! In my striped potholder pattern, I show you how to change colours and carry the yarn inside the thermal stitches, so there’s no need to cut the yarn every time you switch colours.
Crochet Potholder Pattern and Video Tutorial
Scroll down for the free pattern, or get the ad-free & print-friendly version with step-by-step photo and written instructions from my Etsy or Ravelry stores.
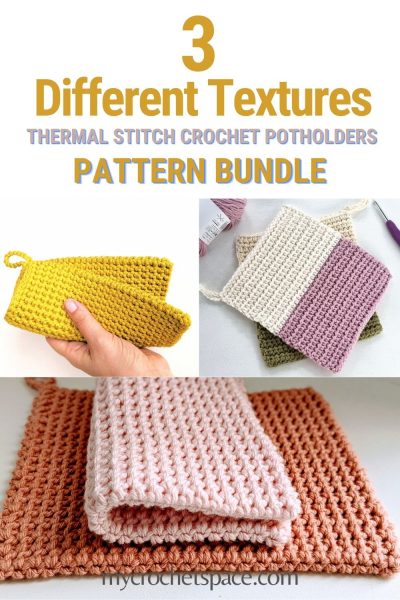
Alternatively, you can purchase all three versions of the Thermal Stitch Crochet Potholders as a bundle on Etsy here.
This post may include affiliate links, view my disclosure policy for details.
Materials:
- Yarn: any 100% Cotton, medium worsted weight #4 (10ply/Aran) approx. 120yds/109m. Cotton yarn options: Lion Brand Pima Cotton Yarn or 24/7 Cotton yarn.
- Hook: H-8 (5mm)
- Yarn needle
- Scissors
Dimensions:
This potholder measures 8.25 x 8.25 inches (21cmx21cm)
Abbreviations:
- Ch = chain
- St = stitch
- SC = single crochet
- Sl St = slip stitch
- Th st = Thermal stitch
Special Stitches
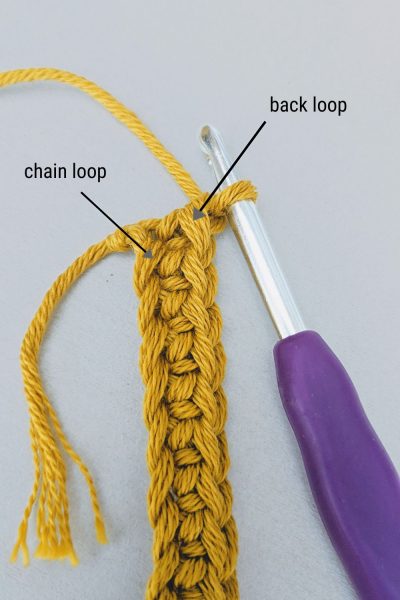
Thermal stitch: Insert your hook into the back loop of the next stitch plus the parallel loop on the row below. Work a single crochet as normal through both of those loops. (Watch the video demonstration)
Crochet Potholder Written Pattern
Ch 33 (or any number of chains for your desired size)
Row 1: Sc in the second chain from the hook and across (32 stitches total in each and every row).
Row 2: Ch 1 and turn your work so that you’re still facing the same side you were just working on (see picture below for reference). Insert your hook into the back loop of the first stitch and into the first unworked loop from the foundation chain. Yarn over and complete a regular single crochet through both loops – that’s your first Thermal Stitch! Continue working one Thermal Stitch into each stitch across the row.
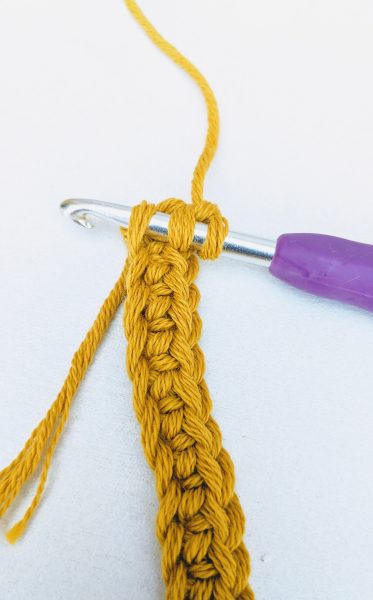
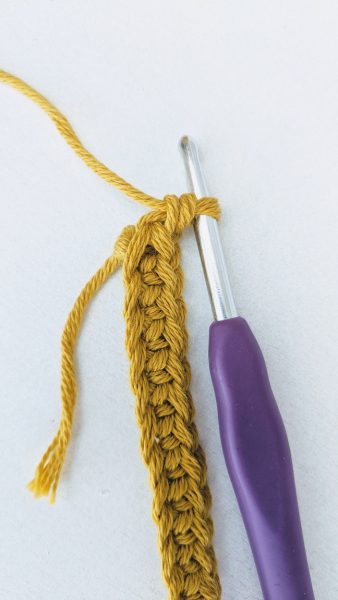
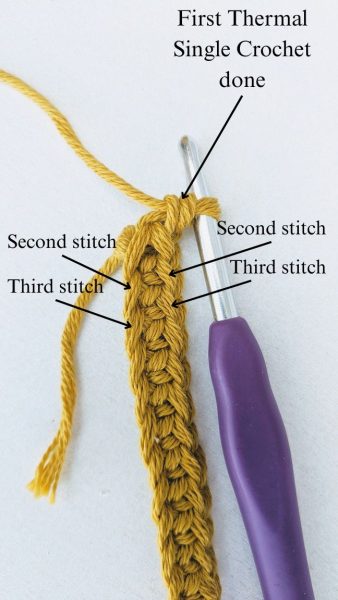
Row 3: Ch 1 and turn. Work Thermal Stitches across the row just like you did in the previous row – into the back loop of the current stitch and the parallel loop from the row below. Don’t forget the very last stitch – it can be easy to miss, as it sometimes hides along the edge. Count the stitches at the end, it should be 32 stitches in every row.

Rows 4- until you reach a perfect square or your desired size: Repeat Row 3.
After the first few rows, you’ll start to notice the thickness building up – it will look a bit like a cord at first. Just keep repeating the rows as described, and you’ll see your potholder slowly grow in length. It’s a slightly slower process than regular single crochet because each row folds over to create that extra thickness. But that’s exactly what makes it so sturdy and perfect for potholders! 🙂
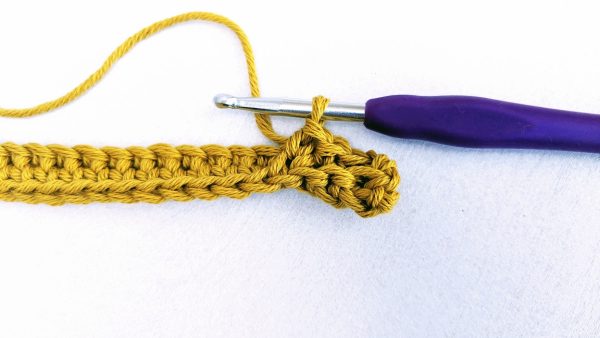
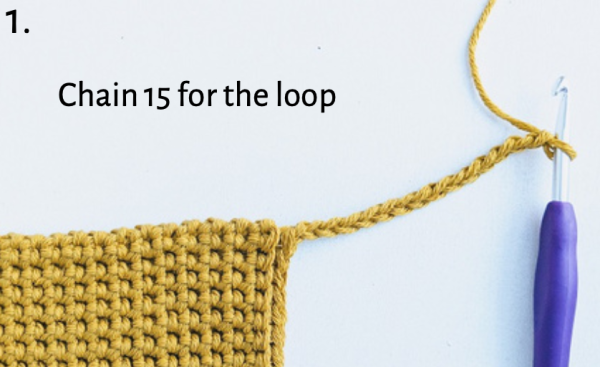
Last Row / Optional Loop: Before starting the final row, you can chain 15 if you’d like to add a hanging loop. If not, just chain 1 as usual.
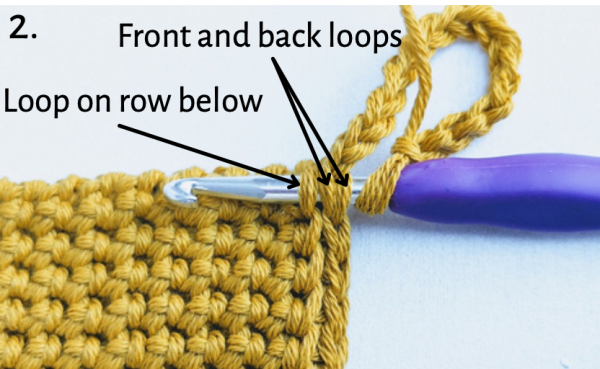
To close the thermal stitches, insert your hook under both the front and back loops of the current stitch (as you would for a regular single crochet), plus the parallel loop from the row below. You’ll have four loops on your hook (see photo below). Work a slip stitch (like shown in the potholder video) into each stitch across the row to finish. Or, if you prefer, you can use single crochets (like shown in the thermal stitch tutorial) instead. Repeat this for every stitch until the end of the row.
Fasten off and weave in all ends! Done 🙂
Crochet Potholder Video Tutorial
Did you enjoy making this crochet potholder?
Let me know what you think of the Thermal Stitch and what other projects you’d love to try it on!
If you’d like to print this pattern or save it to your computer, you can get the printable PDF version from my Etsy shop. Or get a bundle of three patterns that includes all the Thermal Stitch variations!
Be sure to check out the Half Double Crochet Thermal Stitch Potholder – the texture on that one is one of my favourites!
And don’t miss the Thermal Stripes Potholder, where I show how to carry yarn and switch colours while working the Thermal Stitch.
21 replies on “Everyday Thermal Crochet Potholder Pattern & Video”
Very good to learn a new stitch – thermal stitch – to make a potholder. I like small projects and hope to make a few for gift giving
Thanks
Maria I Lacey
Hi Maria, that’s great! The thermal stitch potholders would make great gifts! 🙂
Very easy to follow directions! Just finished single crochet thermal stitch and LOVE how it turned out! Thank you!!!!
Hi Loretta, thank you! So glad you liked it ❤️
Hi Olga! Beautiful pattern, I’m so excited to makes some Christmas gifts with this. About how much yarn did you use for one potholder? Amazing work!!
Hi Aubrie, thank you so much! Sorry, I haven’t specified that in the post, will add it now… It did take almost the whole skein of yarn, which was 119 yards (109m). Hope you enjoy making your potholders, they’ll make amazing gifts! 🙂
I have made these potholders for years. They clean up easily with some Spray and wash. They do shrink but that just helps to tighten up the sts and make them thicker. I have no craft supply stores where i live so go to Walmart. I use their Peaches and Cream but prefer Lily Sugar and Cream. think its thicker. I do my loop in the first row of chains. I add nine chs and then start sc in the 10th ch from hook. I do finish mine the way you do.
That’s a great option for the loop, thanks for sharing! 🙂
great learning new stitches. I’ve been crocheting for 50 yrs. I really like the thermal stitch. I made pot holders and I love then. thank you for sharing this.
You’re so welcome, Connie! I love learning new stitches too! Happy you are enjoying the thermal stitch 🙂
I’m glad I found your pattern. This will be perfect to go along with the pattern from Ursula Graf’s pattern for the Double Density Oven Mitts on YouTube. Thank you for sharing!
You’re welcome, Rose! Glad you like it! 🙂
I’ve also been making these potholders for years. I am crocheting them up right now as a Christmas gift… but I’d like to add some simple decorative border around just to give it a little more “finish”. Any ideas?? Thanks!
Hi Dorothy, I quite like the simple look, but I know what you mean! I wish I could give you some ideas, but I haven’t used borders on mine and have not seen anyone do that on thermal potholders. Perhaps you could try the Crab Stitch? The only way is to try and see if you like it 🙂
My best friend just aksed me to make her some potholders, and I am eager to try this pattern!
That’s awesome! I hope you like it 🙂
Hi Olga! I love using my thermal stitch potholder and I couldn’t believe how easy it was to crochet! Thank you for linking up at our weekly Link Party! You are being featured at our Wednesday
Party #539 this week. Here’s the direct link to the post in case you’d like to share your feature:
https://oombawkadesigncrochet.com/free-crochet-patterns-for-barbie-mermaid-toasted-bread-and-thermal-stitch-potholder-party-539/ Hope to see you again next week! Rhondda
I saw a lady use this stitch a few years ago and had her show me how to do it. It is my favorite hot pad stitch. I love how thick this hotpad is.
However, she did not show me how to end it so, I never really liked how I did the ending. Thank you for your video. The stitch looks so much better with your ending.
I actually didn’t know how to start the first row of thermal stitches but after a couple of tries I found a way I liked. Seeing your video let me know that I was doing it correctly.
Now I am going to try your HDC thermal stitch. Thank you so much.
So glad to hear you found the video helpful! 🩷 I’m really excited for you to try out the HDC thermal stitch too! 😊
Hi Olga,
Thank you so much for sharing your pattern. You made it so simple that even a beginner can make this.
You’re welcome! 💕 Happy to hear your found it simple! 😊