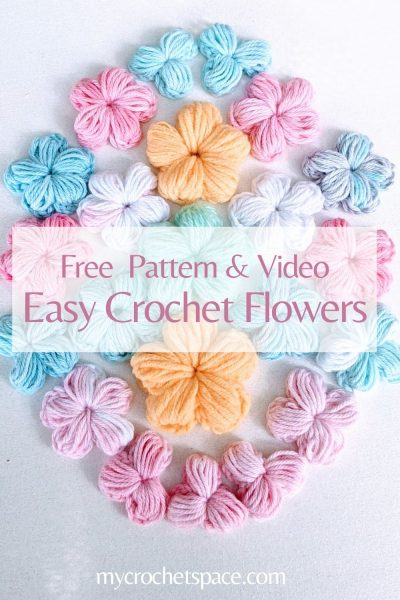
There are so many different versions of crochet flowers! And this is just one of many ways that I believe is very simple but very cute and also very pretty! So, if you want to know how to make crochet flowers – scroll down! You’ll find step-by-step photo instructions and a video demonstration!
In this Crochet Flower Tutorial:
- How to make crochet flowers step by step
- Crochet flower video demonstration
- What can you do with crochet flowers
I fell in love with those little crochet flowers as soon as I made the first one. I really like the simplicity of this pattern.
Difficulty
Easy. While I don’t think they are the easiest project to start with if you’re an absolute beginner, I also would like to encourage you just to try. If you watch the video demonstration below, it’ll be easier for you to follow. Just have some fun and enjoy making those little crochet flowers, even if you never held a crochet hook in your life!
How long does one crochet flower take to make
Minutes. Depending on your skill level and the number of petals you choose to make. You can crochet one in just a couple of minutes if you are familiar with the Puff Stitch. Or it can take a few minutes longer if this stitch is new to you.
The pattern is very simple as it consists of one round of petals. All petals will be coming directly out of the centre. So if you would like to crochet more than just one, it won’t take too much of your time.
Cotton yarn vs Acrylic – my experience
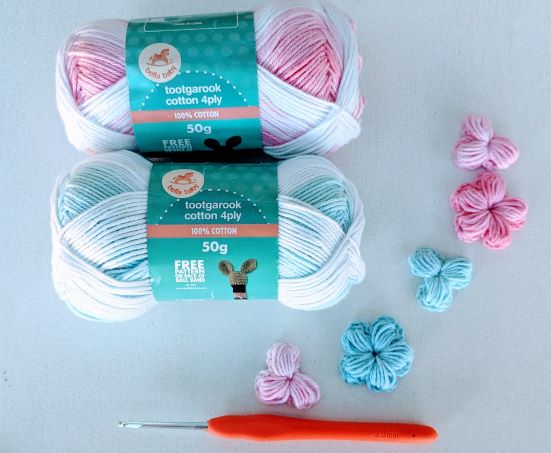
I have experimented with different types of yarn. I had this beautiful 100% Cotton yarn 4ply / fingering (pictured above), and because I love those colours, I really wanted to crochet some flowers out of this yarn.
Especially because it’s changing colour on its own from pink to white to pink again (same with the sky-blue colour yarn), I wanted to see how it might add some life to the flowers.
And don’t get me wrong, I love cotton yarn. But I guess it wasn’t the best choice of yarn for this particular project, and I found it harder to work Puff Stitches with this yarn. Not that the process was harder, but it’s the end result that looked different. The Puff Stitches (or petals) looked a little flat and heavy.
I also had to re-arrange the strands of yarn inside the stitches to make them look more harmonious and evenly distributed, as they were not bouncing back in shape as the acrylic did. I found that no matter how much I tried to be consistent with my tension and stitch height, most of the time, there were still one or two strands that stood out as being slightly too long or too short.
Acrylic, on the other hand, was much easier to work with. I used Acrylic 8ply (light worsted), and it felt like the yarn was much softer and more elastic. The Puff Stitches turned out really airy and springy, and at the end, I got a puffy flower with a more even distribution of strands of yarn in each petal (see picture below).
But again, this is just my own experience with those particular types of yarns!

I also experimented with making different numbers of petals – I made 3-petal, 4-petal and 5-petal flowers. I think they all look cute, but for me, the winner is the 5-petal flower!
Special Crochet Stitches
This pattern primarily uses Puff Stitches to create the petals of the flower, with the entire flower being made in just one round of these stitches. If you have never used Puff Stitches before, they are quite easy to do, though they can be a bit fiddly since you need to pull the hook through many loops. Sometimes, the hook can get stuck in the middle of the stitch. However, normally, if you make the loops tall enough, there will be sufficient space for the hook to pass through.
The difficulty also depends on the type of yarn you’re using. If the yarn you’re using doesn’t split easily, then the hook will glide through the loops much smoother without getting stuck in the middle of the stitch.
The most important thing here is to keep the right tension when making the petals. Pull all the loops very tall and to the same height as your other loops, and remember to turn the hook down when pulling yarn through all the loops.
Puff Stitch (Pf St): *yarn over, pull up a long loop** repeat from * to ** six more times (total 7). You will have 15 loops on your hook. Yarn over and pull through all loops. Ch 1 to finalise the Puff Stitch. You can watch the short video demonstration below, where I demonstrate how to crochet those flowers.
If you like Puff Stitches, take a look at my Crochet Laptop Sleeve where I used this stitch in another pattern!
See the step-by-step instructions below or watch the short video demonstration on YouTube.
How to Make Easy Crochet Flowers Step-by-Step

Material
Yarn: I’ve used 100% Cotton, Super Fine #1 (4ply/Baby) and Acrylic light worsted #3 (8ply/DK). But you can use any type/size of yarn and colour you like.
Hook: 3mm (D) for Cotton and 4mm (G) for Acrylic. Adjust your hook size to the type of yarn you’re using.
Dimensions:
Cotton flower measures approx. 1.5“ (3cm) across, and Acrylic flowers were slightly larger because of the yarn thickness, approx. 2″ (5cm) across. You may have a different measurement if you use a different type of yarn and hook.
Abbreviations (US Terms):
Ch = Chain
St = Stitch
Sl St = Slip Stitch
Pf St = Puff Stitch
Easy Crochet Flower Free Pattern
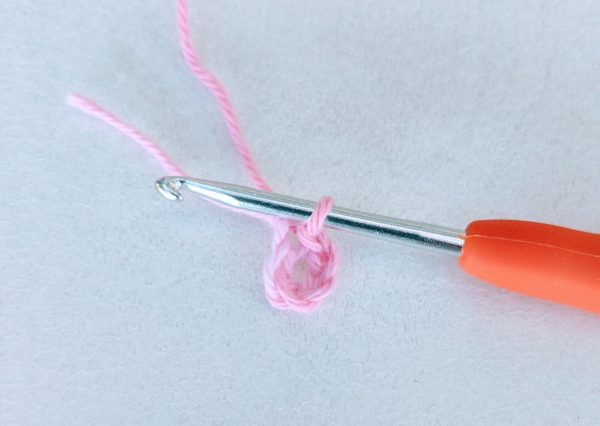
Ch 5 and join with a Sl St to form a ring.
Crochet Flower Petal Steps:
- Ch 3,
- Pf St into the ring,
- Ch 3,
- connect with a Sl St into the ring.
That’s one flower petal. See the pictures below for each step.
Chain 3
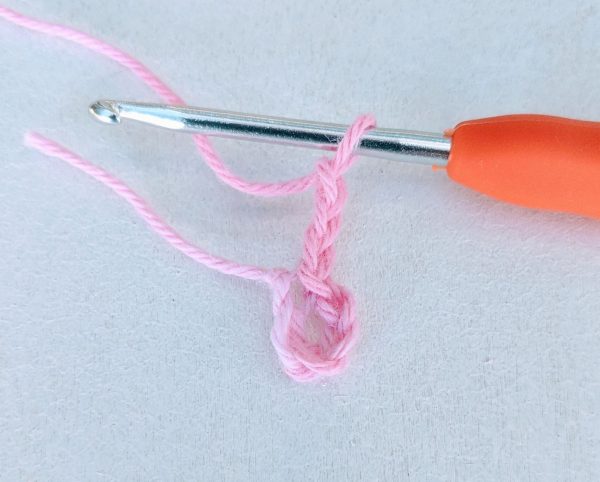
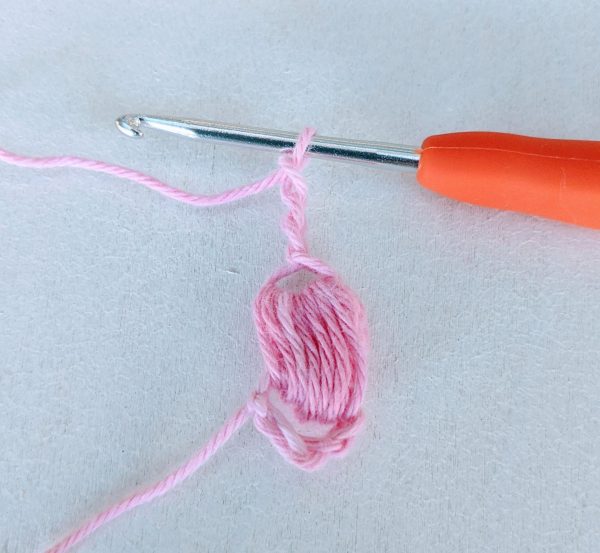
Pf St into ring
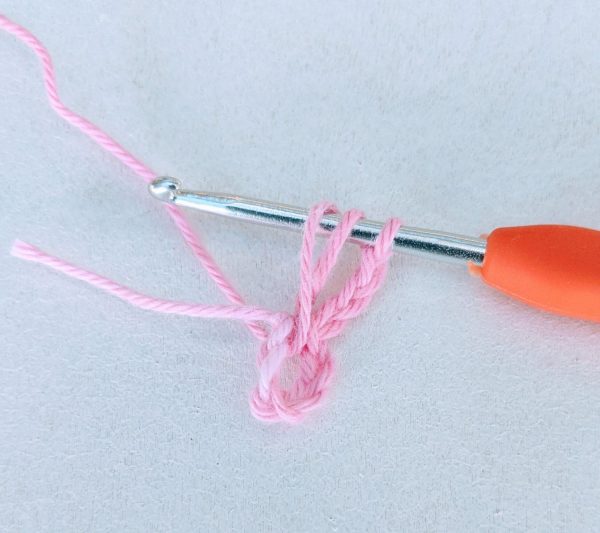
Pf St into ring (x7 yarn over & pull up a loop) – you should have 15 loops on your hook
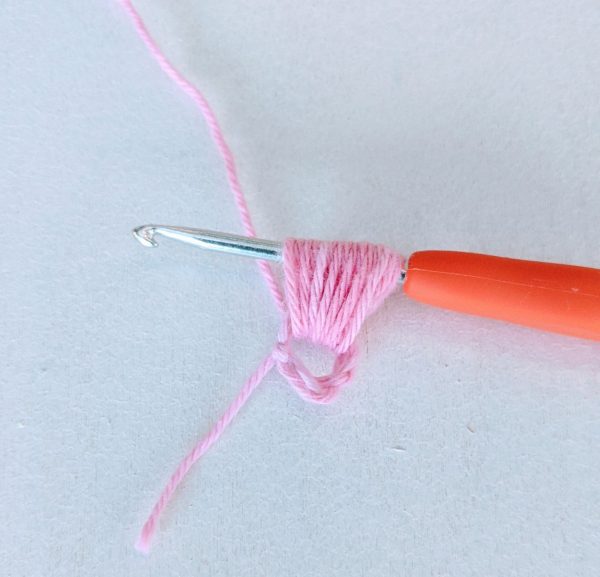
Yarn over and pull through all loops on hook
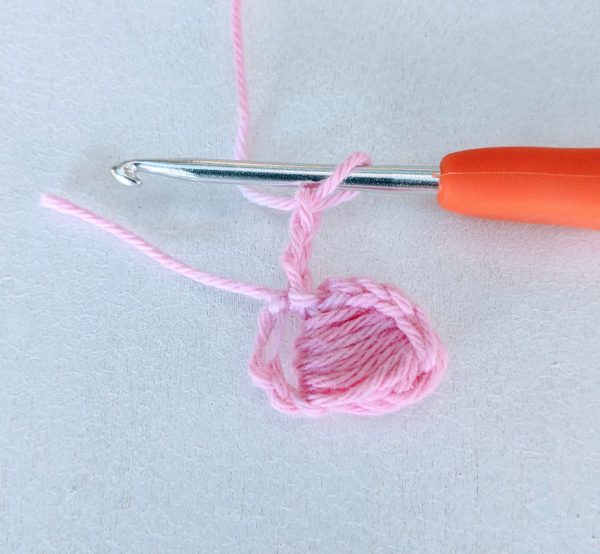
Ch 1 to secure the Pf St
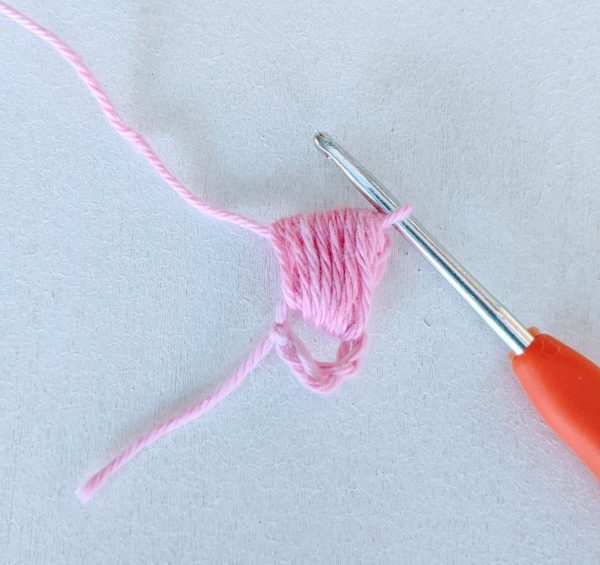
Ch 3 again to finish up the side of the petal
Join to the ring centre with a Sl St.

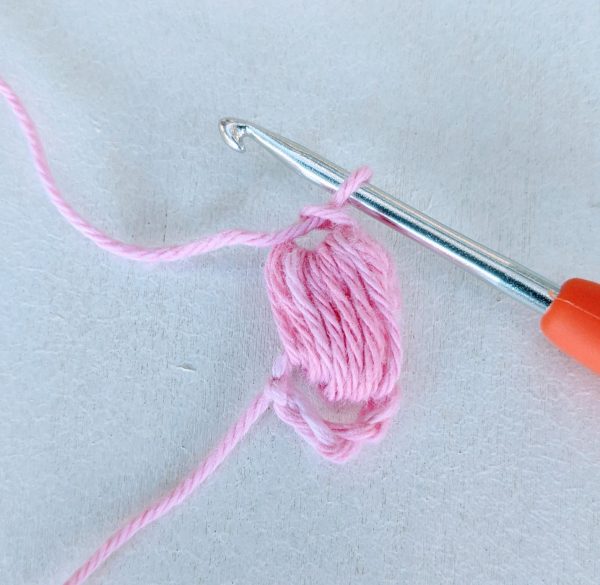
One petal done!
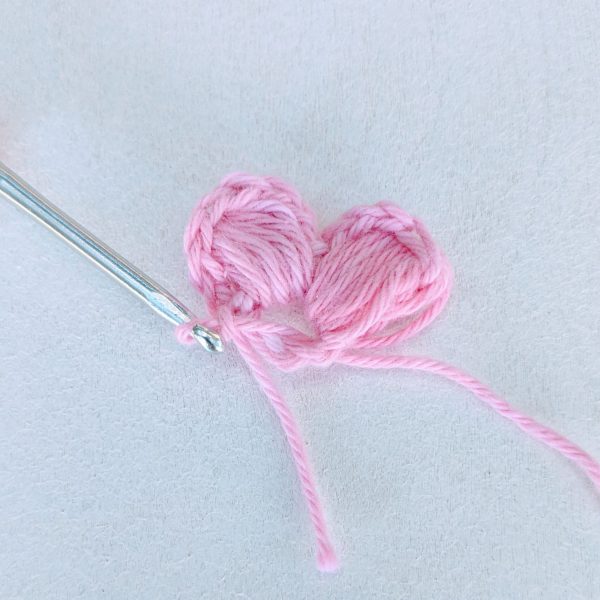
Chain 3 again to start the second petal.
Puff Stitch (yarn over and pull up a loop x7, chain 1 to finalise the Puff Stitch)

Chain 3 and connect with a Sl St to the centre of the ring. That’s the second flower petal done.
Now, repeat three more times for a five-petal flower or as many times as the number of petals you would like to have.
When you get to the last couple of petals it may look like you’re running out of space. Just push all the petals you have on the ring together towards the first one to create some more space for the rest of the flower. And if you’re using a soft yarn it should be quite easy to do!

Finishing off
After you finish your last petal: Ch 1 to secure the last stitch, cut the yarn and fasten off. If you are using this crochet flower to stitch on a garment, then you can leave a longer tail of yarn for sewing.
After finishing all the petals, take a look at the flower. Normally, there is one side that looks better than the other. I normally choose the better side to be the ‘right’ side and pop the Puff Stitches out on that side so that the chain-3 along the sides of the petals will stay on the other side (the back of the flower). But that’s up to your preference!
Weave in all ends.
How to Crochet Simple Flowers Video Tutorial
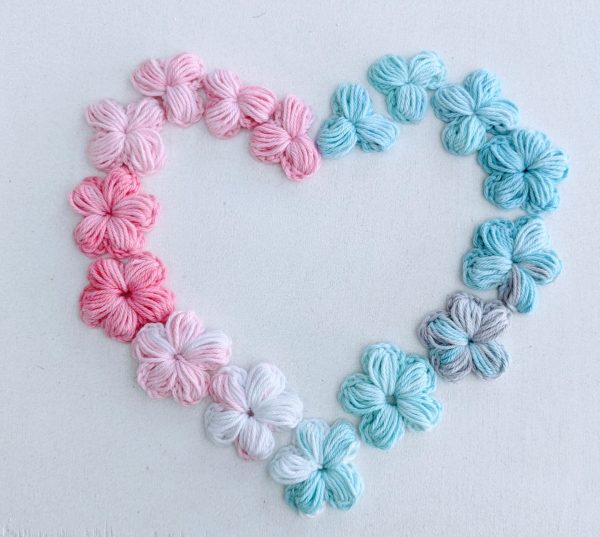
What can you do with crochet flowers?
You can leave a longer tail and stitch those little crochet flowers onto beanies, scarves, hats, blankets, and throws. You can make a brooch or stitch a little flower on a headband, hair tie/hair accessory. Or make a crochet wall art. There are many different ways to incorporate them into your crochet or any type of project!
I’ve used a 3-petal flower on my Cup Sleeve that I made sometime last year.
I’m also planning to use all of those crochet flowers and do another project – maybe some type of wall art. So check back soon to see when it’s finished!
And where would you use those crochet flowers? Let me know in the comments below if you found it easy to crochet these simple flowers!
More Free Crochet Patterns
- Tea Spa Crochet Mug Rug – Free Pattern
- Apache Tears Crochet
- Crochet Laptop Case Free Pattern
- 21 Small Crochet Projects for Last Minute Gifts
- 25 Beautiful One Skein Crochet Scarf Patterns
- Top 30 One Skein Crochet Projects
- Crochet Simple Cup Cozy
6 replies on “How to Make Crochet Flowers”
Hi, I’m Audrey. I’m a blossoming crocheter and was wondering if I could use this tutorial to make a granny square with credit to you in the video.
My account is Jessica Kerr Yonley.
Hi Audrey, sure you can! Let me know when your granny square is ready, I’d love to see it! 🙂
Hi Olga
I just st watched your video on how to make the
5 Petal Puff Flower and curious how you would attach them together? any suggestions would be greatly appreciated.
Hi Lori, I would probably use a yarn (tapestry) needle and attach them together using the same yarn. Slip stitching would work as well, but it depends on the project. What are you making?
WOW 😲 lovely flowers
Thank you! 💕