Last updated: May 15, 2026
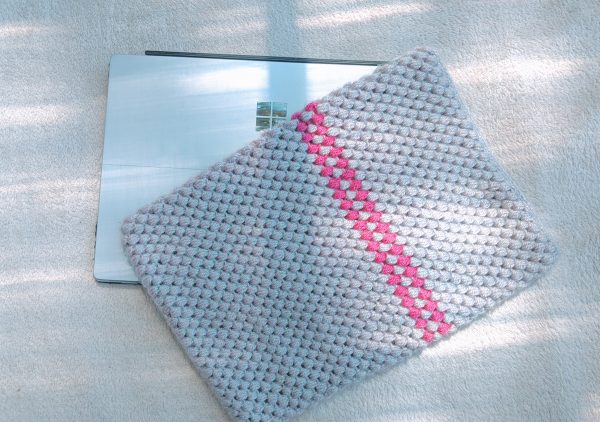
I have made a few crochet laptop cases in the past, but this time, I wanted to share the pattern with you! I like this laptop sleeve pattern because of its simplicity, modern look, and stitch thickness, which will provide protection for your laptop.
Feel free to adjust this pattern by using just one colour or adding more stripes in one or multiple colours – there are plenty of ways to customise your crochet laptop case and make it look unique!
This pattern is simple, quick, and easy to work up, you could easily finish one in a day! Once you get through the first few rounds, it’s just a relaxing, repetitive pattern from there.
I used Puff Stitches throughout the entire pattern. If you’re new to this stitch, it might feel a little tricky at first since you’ll need to pull through nine loops to complete it. Just be sure to pull the loops up nice and tall so your hook can glide through them easily, and try to keep your tension slightly on the looser side.
I’m using Moda Vera Starlight yarn for this project, which is 100% acrylic, #3 light worsted weight. It’s super soft and really easy to work with. I especially love the colour, it’s hard to capture in photos, but it has this subtle green sparkle that doesn’t quite show up in pictures. I love how it reflects the sunlight!
You can use any type of yarn in any colour. You’ll need to adjust the size of your crochet hook if you use a different-weight yarn. You can find the recommended hook size on the yarn label.
Special Stitches
Puff Stitch: Yarn over, insert your hook into the next stitch, and pull up a long loop (about the height of a double crochet). *Yarn over again, insert the hook into the same stitch and pull up another long loop. Repeat from * two more times, so that you yarn over and pull up a loop four times in total into the same stitch. For a visual guide, refer to the video demonstration below.
Puff stitches vary in how thick or ‘puffy’ they are, depending on the pattern. So the number of times you yarn over and pull up a loop into the same stitch can vary. You can make the stitches puffier or slimmer by adjusting the number of times you yarn over & pull up a loop.
Take a look at my Crochet Shawl/Wrap, where I used a combination of puff stitches and double crochet stitches to create a beautiful, lacy look.
Difficulty
Easy (Advanced Beginner-Intermediate)
If you already have some crochet experience and know how to do the basic stitches, then you’ll have no problem with this pattern!
Materials
Yarn: Moda Vera Starlight, acrylic. Colours: Off-White 3 skeins and Tea-Rose 1 skein. (or any 8ply/DK/light worsted yarn), 1 skein = 159 yds (145 m)
Hook: 3mm
Gauge
10 puff stitches x 13 rows = 4″ (10cm)
Notes
This pattern is for a Surface Pro laptop. Adjust the number of chains and rows to fit the width and length of your laptop.
The initial amount of chains will depend on the type of yarn you’re using. Cotton yarn tends not to stretch as much as acrylic.
Dimensions
Laptop Dimensions (Surface Pro): width 20cm (8”) and length 29cm (11.5”)
Crochet Sleeve finished size: width 21.5cm (8.5”) and length 32cm (12.5”)
Abbreviations
Ch = chain
SC = single crochet
HDC = half double crochet
St = stitch
Sl st = slip stitch
Pf st = Puff Stitch: Yarn over, insert your hook into the next stitch, and pull up a long loop (about the height of a double crochet). *Yarn over again, insert the hook into the same stitch and pull up another long loop. Repeat from * two more times, so that you yarn over and pull up a loop four times in total into the same stitch. For a visual guide, refer to the video demonstration below.
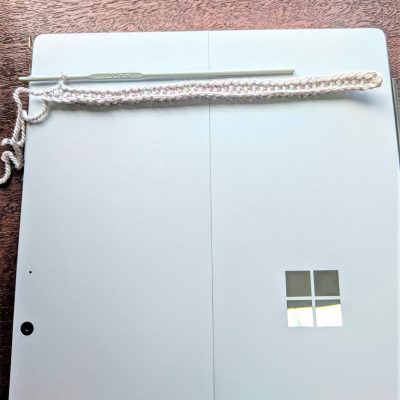
Note that I’m demonstrating the stitches and all the tips for starting the rows and joining rows on a smaller example, which is not the actual size of the laptop case. This is just for demonstration purposes 🙂
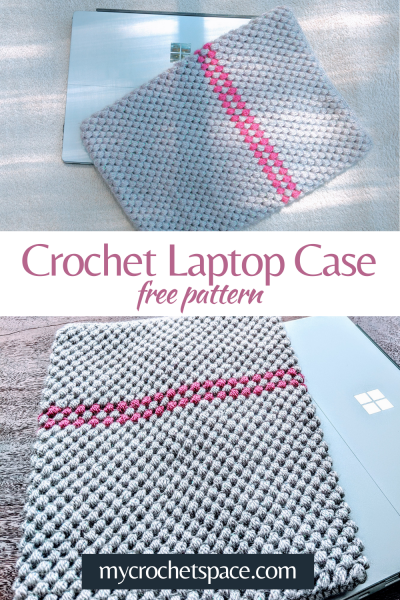
Crochet Laptop Case Free Pattern
Ch 44 (or any even number if you need to make it bigger)
Row 1: HDC in the second chain from hook and across, turn (total 43)
Note: It might look a bit shorter than your laptop’s width at first, as you can see in the photo below. But don’t worry, it should stretch out as you continue with the next rows (as long as you’re using the same type of yarn I did). If you’re using cotton or a cotton blend, though, it may not stretch as much.
When you finish the first row, try stretching it to match the width of your laptop. If it’s not stretching enough, you’ll need to add more chains.
Row 2: Do not chain as you normally would at the beginning of a new row. Instead, stretch the loop on your hook a bit longer (to the height of a double crochet). To create the first Puff Stitch: Yarn over, insert your hook into the first stitch, yarn over, and pull up a loop (three loops on hook). *Yarn over, insert into the same St, yarn over and pull up another loop (five loops on hook). Repeat from * two more times. You’ll have 9 loops on your hook. Yarn over and pull through all 9 loops on your hook. Ch 1 to complete the puff stitch. Skip 1 stitch, work a Puff Stitch in the next stitch, and repeat until you reach the end of the row. (Check out the video demonstration below for detailed instructions on making puff stitches).
Working in the round from this row onwards, rotate and keep working on the other side of the chain. Work a Pf St in the first chain, *skip 1, Pf St in next *until the end of the row, Sl St (Total 42 Pf st).
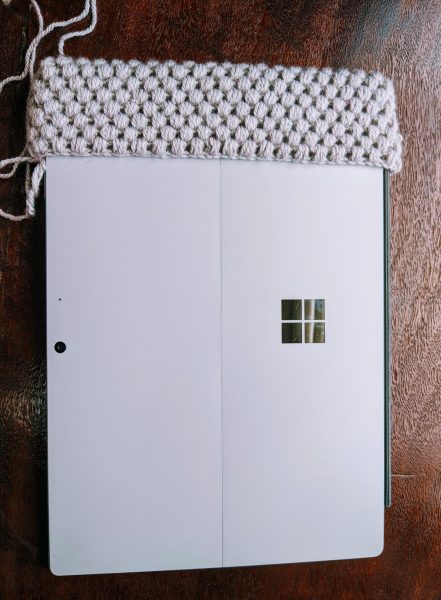
Round 3: Stretch the loop on your hook and work the first Pf St in the gap between the puff stitches in the previous row, behind the loop on the hook (refer to video) and in each gap across. Sl St.
You can watch the short video below.
Crochet Laptop Case – Puff Stitches – short video demonstration
For demonstration purposes, I’m using a smaller size to demonstrate all the stitches. This is not the actual size of the laptop case 🙂
More Free Crochet Patterns
- Crochet Textured Laptop Case
- Tea Spa Crochet Mug Rug
- Crochet Potholder – Cross Stitch Crochet
- Crochet Triangle Shawl – Aquamarine Joy
2 replies on “Crochet Laptop Sleeve”
I tried working this pattern as written starting with an odd number of chains over and over and could not get it to work out right. Can’t figure out what I’m doing wrong but I finally tried with an even number of chains and so far so good.
Hi Sarah, you’re absolutely right! Thank you so much for catching that error 🙂 You can either chain an even number of stitches and follow the pattern as is, or chain an odd number and work the first HDC into the third chain from the hook instead of the second. I’m glad you figured it out, and I really appreciate you letting me know! I hope you’re enjoying the rest of the project 🙂 😊