Last updated: May 15, 2026
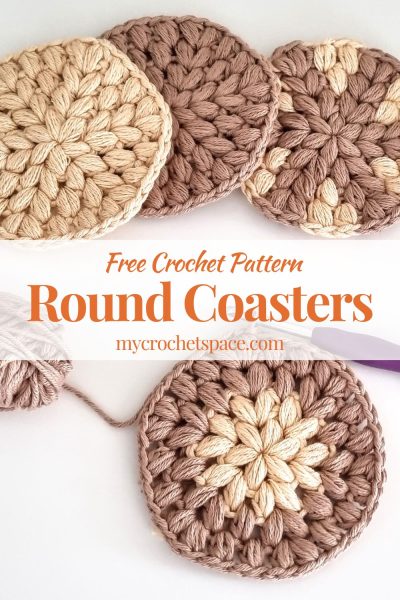
These textured round crochet coasters are quick and fun to make! 🧶
They’re worked in the round using puff stitches, which gives them that extra cute, squishy look.
The free pattern walks you through crocheting in the round, changing colours if you want to mix it up, and increasing in each round to shape the coaster into a circle. Perfect for beginners learning new skills and a great little project for experienced crocheters, too!
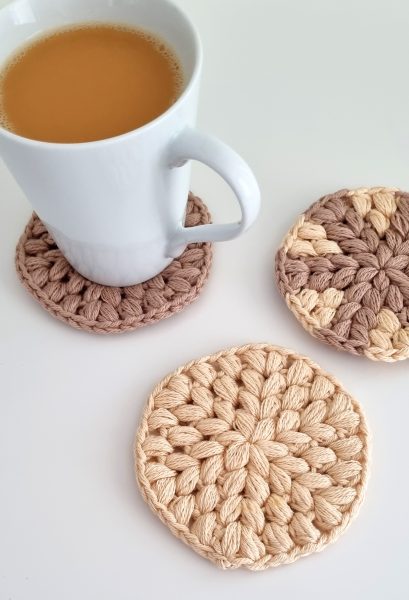
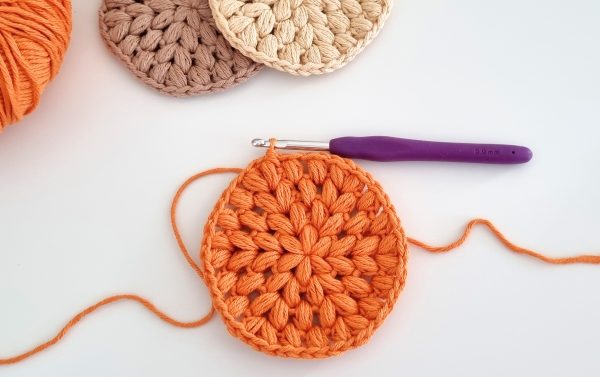
These coasters make lovely little crochet gifts, and the best part, you can work one up in under an hour! They’re great for using up leftover yarn, and mixing different colours can give each one a unique look. Just make sure to use cotton yarn of the same weight for the best results.
If you’re changing colours, you’ll have a few more ends to weave in, but the good news is that the fluffy puff stitches make it super easy to hide them neatly. 😊
How to Crochet Round Coasters
To crochet simple circle coasters, you’ll start in the centre and work your way out in the round. Each round needs to grow slightly larger than the one before, so the coaster stays flat on the table. That’s why we add more stitches as we go. The good news is that these increases follow a simple, repeatable pattern. Once you get the hang of it, it’s easy to remember! 😊
In short, you’ll start with six stitches in the first round and then add six more stitches in each round after that. So, the second round will have 12 stitches, the third will have 18, and the fourth will have 24. See the pattern? Each round increases by six stitches. Easy and predictable. Once you know the rhythm, it’s easy! 😊
Now we just need to make sure those extra stitches are spread out evenly. If you add them all too close together, like in just one section of the round, you’ll end up with a wavy or uneven coaster. One side might ripple while the other starts to curl. The key is not just how many stitches you add, but where you add them. A nice, even distribution keeps your coaster flat and looking great! 😊
In the pattern below, you’ll see exactly where to place your stitches. I’ve stacked the increases on top of each other in each round, it’s not only easier to see where to increase, but I also like the way it looks. Since this pattern has just four rounds, stacking the increases still gives you a nice, smooth circle.
If you decide to make your coaster larger (or even turn it into a rug! 😊), you’ll want to start shifting the increases slightly in each round instead of stacking them directly on top of each other. You’ll still add the same number of increases, just space them out differently to help maintain that nice, round shape. But for this small coaster, stacking the increases works just fine.
Round Crochet Coaster Free Pattern
Scroll down for the free pattern or pin this to your Pinterest crochet board for later.
Dimensions
4″ x 4″ (10cm x 10cm)
Abbreviations (US Terms)
Ch = chain
St = stitch
YO = yarn over
Sl st = slip stitch
Pf St = puff stitch
Special Stitches
Puff Stitch: Yarn over, insert hook into specified stitch, yarn over and pull up a long loop (to the height of a double crochet). Yarn over, insert your hook into the same stitch and pull up a long loop. Yarn over again, insert hook into the same stitch again and pull up a long loop again. You should have 7 loops on your hook. Yarn over and pull through all loops on your hook. Yarn over again and pull through the loop. One Puff Stitch done!
Materials
- You can use any 100% cotton, worsted weight yarn #4 Aran/10ply yarn
- Crochet hook 5mm (H)
- Scissors
- Yarn needle
Crochet Coasters Pattern Notes
- This crochet coaster starts with a magic crochet ring. Alternatively, you can start with a chain 3 and work all your puff stitches in the first round into the first stitch.
- This crochet coaster measures 4 inches in diameter. The size can be easily adjusted by working more rounds.
Crochet Round Coasters Instructions
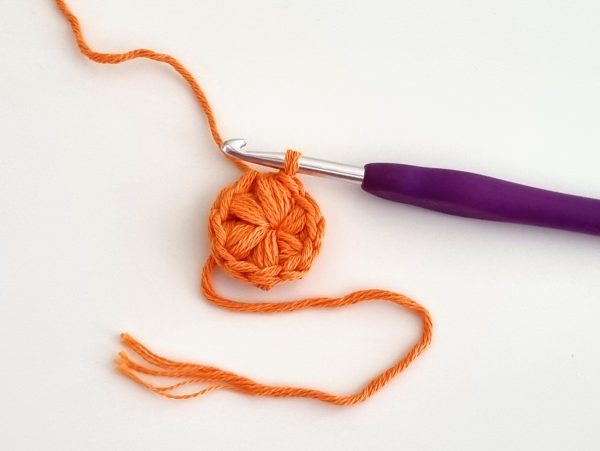
Start with a magic circle, Ch 1.
Round 1. Working puff stitches into the circle.
- Work 6 Pf Sts into the circle, join the round by slip stitching into the top of the first stitch in this round. Tighten the magic circle.
(Puff Stitch: YO, insert hook into specified stitch, YO and pull up a long loop to the height of a normal double crochet. YO, insert your hook into the same stitch and pull up a long loop. YO again, insert hook into the same stitch again and pull up a long loop again. You should have 7 loops on your hook. YO and pull through all loops on your hook. YO again and pull through the loop on your hook)
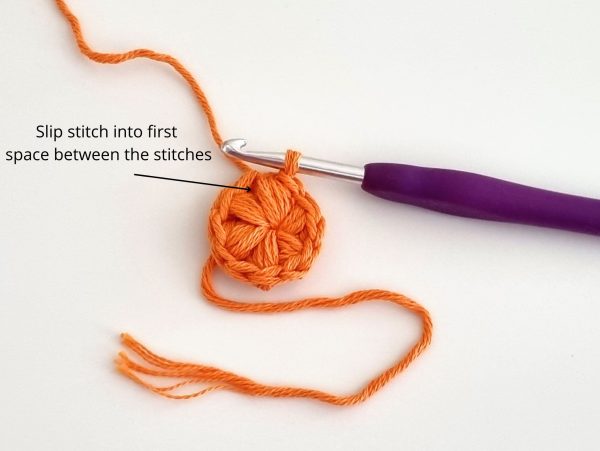
Round 2. In this round, you work 2 Pf Sts in each space. Pf Sts are worked into the gap between the stitches in the previous round.
- Sl St into the space between the stitches in the previous round, Ch 1. Work 2 Pf Sts in each space, join the round with a Sl St. (12 Puff stitches in total)
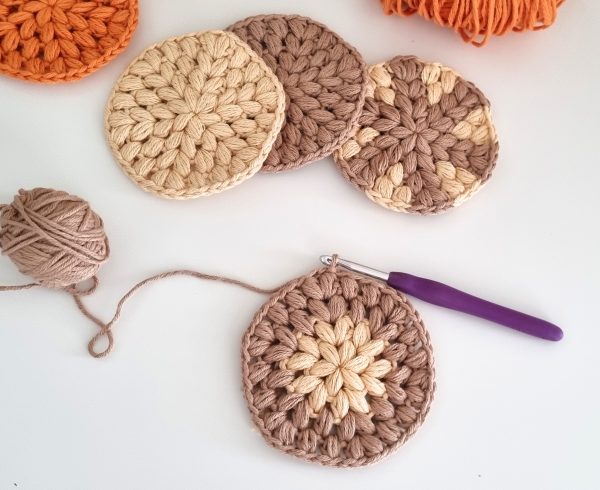
Round 3. You can continue with the same colour or switch to a different one, as you see in the first picture. To switch colour, simply fasten off and cut the yarn.
- Sl St to first space between the stitches (or join new colour here with a slip stitch). Ch 1, *2 Pf Sts in the same space, 1 Pf St in the next space. Repeat from *until the end of the round, join. (18)
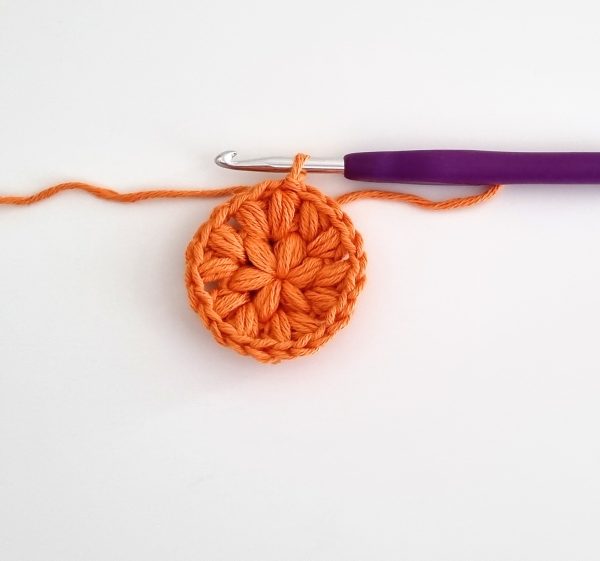
Round 4. In this round, you work 2 Pf St in the first space, 1 in the next and 1 in the next.
- Sl St to next St. Ch 1, *2 Pf Sts in first, 1 Pf St in next, 1 Pf St in next. Repeat from * until the end of the round; join. (24)
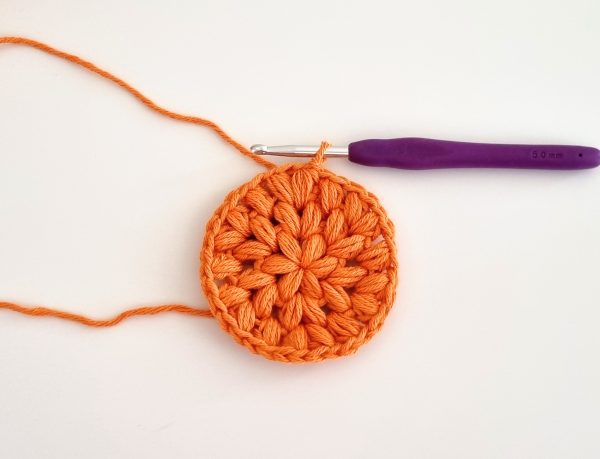
Fasten off and weave in all ends. Block your coaster into a round shape by lightly spraying it with water and pinning it in place to dry.
To create a round shape for a larger project (such as adding more rounds to make a rug), you’ll need to adjust the increases (two puff stitches in one stitch) in each round so that they are not stacked on top of each other. The stacked increases create a bend because they occur in the same spot in each round, resulting in a hexagon shape as you add more rounds.
For example, starting from round 4, slip stitch to the next stitch. Chain 1, then *1 puff stitch in the first stitch, 2 puff stitches in the next, 1 puff stitch in the next. Repeat from * until the end of the round and join. (24 stitches).
Let me know if you have any questions in the comments below! Share your finished projects on Instagram and tag me @my_crochet_space, I would love to see your beautiful makes!
Crochet Round Coasters Video Demonstration
In this video, I will show two rounds: how to start the coaster and how to make Puff Stitches. For the colour changes, please see the second video below.
How to Change Colours Video Demonstration
In this video, I demonstrate how I changed colours in both versions of the two-coloured coasters. Starting with the easier version first, where you just need to fasten off after the second round and attach the new colour.
After that, you can watch how I changed colours within the round to make the second version. This one is slightly more challenging as you need to carry the non-working yarn within the stitches and adjust the tension when changing to a different colour.
I hope these videos are helpful to you! If you have any questions, please let me know in the comments below. 🙂
15 replies on “Crochet Round Coasters”
These were so much fun to make! I’d love to learn the details on how you switched colors for the third variety in your top photo.
Hi Isabel, glad to hear! I changed colour in the middle of a Puff St, after pulling through 7 loops on the hook. Then I joined the new colour and chained one to complete the Puff st with the new colour and carry the previous colour within the Puff Stitches until you switch again. It’s a little trickier and I might make a short video on this! 🙂
Have you made a video yet? I’m a novice crocheter (experienced knitter, though), but also a visual learner. Would love to see the changing colors on a video. I love how these two colors resembled cork. Love this pattern ad except for the changing of colors, I think I actually understand it! 😊
Hi Cheryl, thank you for the reminder! I had completely forgotten about it. I’ll do my best to create a video, hopefully by the end of the week! 🙂
what kind of yarn would you recommend for these?
Hi Stacy, I was using Abbey Road Kung Fu Cotton – there are many beautiful colours. If you don’t have that brand where you are, Memento Pima Cotton by WeCrochet is nice too: https://www.crochet.com/yarn/memento-pima-cotton/c/5420419
But really, any worsted-weight cotton you like would be ok.:)
never mind I found it! I made one and it is beautiful. thank you for the free pattern!
Hi Olga, I love the multicolored puff stitch coasters you made! Thank you for linking up at our weekly Link Party! You are being featured at our Wednesday
Party #509 this week. Here’s the direct link to the post in case you’d like to share your feature:
https://oombawkadesigncrochet.com/crochet-round-coasters-shell-in-the-round-square-rocky-road-fudge-link-party-509/
Hope to see you again next week! Rhondda
Thank you, Rhondda! 🙂
Today is 08.24.23 @ 4:04 pm. I tried to pin this pattern to Pinterest and the link appears to be dead? I pinned a couple of patterns yesterday.
Oh… thanks for letting me know! It should be working now 🙂
(1/24/24) Love this pattern! If I want to make this larger than 5 rounds, do I continue with 2 pf st, 1 pf st X (round # – 2)?
For example, round 7 would be *2 pf st, 1 pf st, 1 pf st, 1 pf st, 1 pf st, 1 pf st* repeat from * to the end of the round?
Hi Tiffany, that sounds correct to me! 😊 As you continue working on additional rows, you just add one more puff stitch between the increases (2 puff stitches).
Hey Hi Olga,
I tried this circle but as I go on increasing the rounds, it gives me a hexagon shape and not a proper circle. What should I do?
Hi Ann,
You can block your coaster by lightly spraying it with water and pinning it in a circular shape to dry. Another option is to change the increases (two puff stitches in one stitch) in round 4. In this pattern, the increases are stacked on top of each other, creating a lovely design. You can see this clearly in the first photo of this post – the coaster with two colors looks like a wheel, with the darker color showing the increases. However, you can adjust round 4 so the increases aren’t stacked.
Here’s how you can do it: In round 4, start with a slip stitch to the next stitch. Chain 1, then *1 puff stitch in the first stitch, 2 puff stitches in the next, 1 puff stitch in the next. Repeat from * until the end of the round and join. (24 stitches) The stacked increases create a bend because they occur in the same spot in each round, resulting in a hexagon shape as you add more rounds. To avoid that, you need to move your increases.
I hope this helps! I will also add this note to the written pattern so it will be easier to find! 🙂