Last updated: August 28, 2025
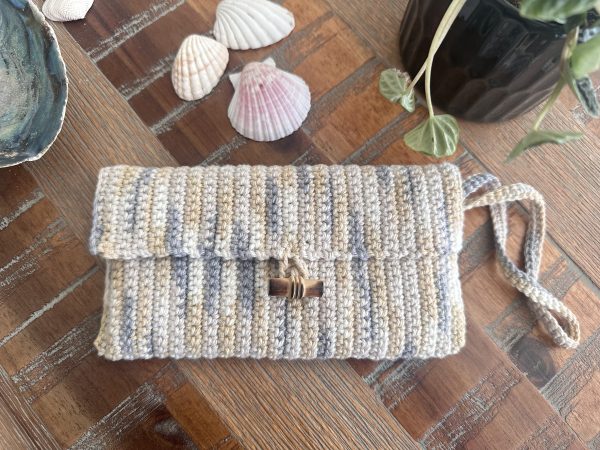
This little crochet clutch is the perfect first project for beginners. With just one basic stitch, the single crochet, it’s incredibly easy and quick to make. Whether you’re an absolute beginner or just want to make something that’s not too complicated, this pattern is a great choice to get you started!
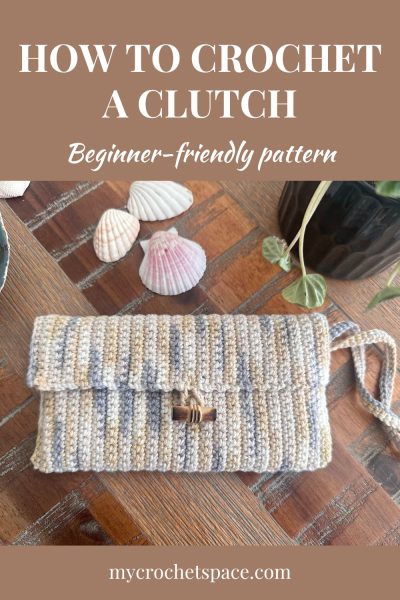
This little purse is great for carrying your essentials when you don’t need a larger handbag. It’s designed to comfortably fit your phone, keys, or other small items. Or you can use it to keep your sunglasses scratch-free!
Difficulty
This crochet pattern is easy and beginner-friendly. What makes it easy is that the pattern uses only one basic crochet stitch – single crochet. The design of this is simple so that any beginner can make it! Simply create a rectangle and then sew the sides together, attaching the button, button loop, and handle afterwards.
Assembling the clutch requires basic sewing skills to attach the button and sew the sides together. I think the assembling part is an exciting part as the purse comes together in these last steps!
So, if you know how to single crochet and have a basic understanding of using a sewing needle, then you won’t have any issues!
And if you don’t know how to crochet yet and would like to learn, I made a video tutorial where you can learn how to start and make the very first basic crochet stitches. You can find the video with detailed photos and written instructions in my How to Crochet for Beginners – a Step-by-Step Guide.
Have fun, and enjoy making this little crochet clutch!
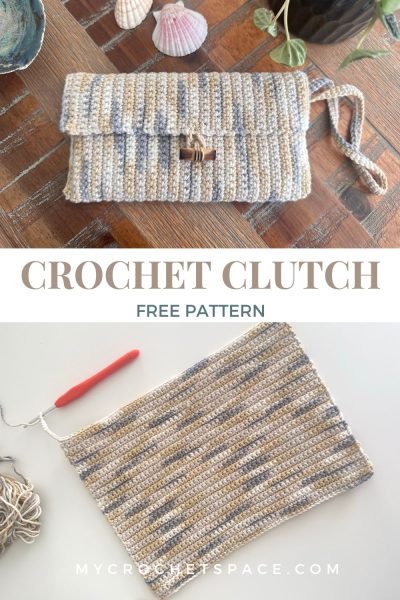
Easy Crochet Clutch Pattern for Beginners
Pin this crochet pattern to your Pinterest Crochet Board for later!
Crochet Pattern Notes:
- This pattern is worked flat in back-and-forth rows to make a rectangle. The bottom part will fold, and the sides need to be sewn together.
- Always Ch 1 at the beginning of a row. Ch 1 does not count as a stitch.
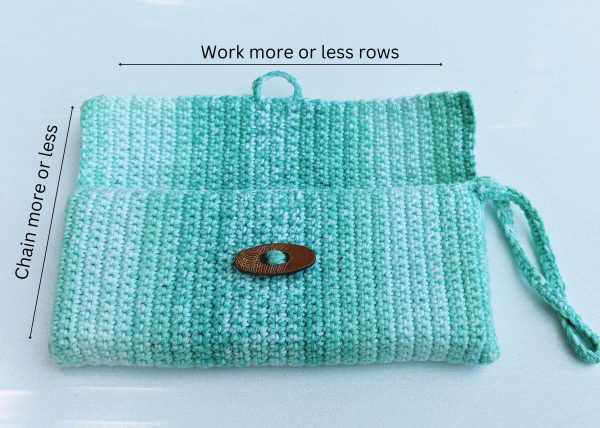
- You can make a bigger size by chaining more for the height and working more rows to make it longer.
- I crochet quite tightly. If your gauge doesn’t match, your clutch will be slightly larger or smaller.
Materials:
- Yarn: You can use any cotton or cotton blend yarn of your choice in your favourite colour. Weight: light #3/dk/8ply (103yds/95m)
- I used: For the green clutch, cotton & bamboo blend light worsted #3 (8ply/DK), brand unknown. For the beige clutch: 1 skein of Cotton Blend Prints 8 ply (4 Seasons Brighton, 50% cotton, 50% acrylic, 50g, 103yds/95m).
- Crochet hook size: 3mm. I’m using a smaller crochet hook than recommended for the yarn weight to create a denser crochet fabric without holes.
- Yarn needle for sewing the sides together and weaving in ends.
- Sewing needle to attach the button.
- 1 Button of your choice.
- Scissors
Dimensions:
7″ x 4″ (18cm x 10cm)
Gauge:
22 SC stitches x 25 rows = 4” (10cm).
Abbreviations:
Ch – chain
SC – single crochet
St – stitch
Pattern Instructions
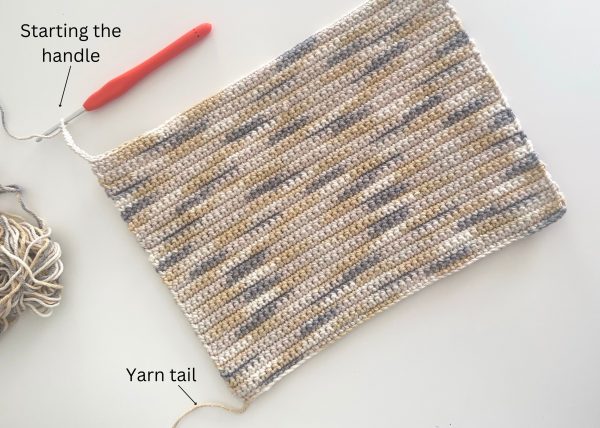
Make a slip knot, leaving approx. 20 inches long tail for sewing the sides together at the end.
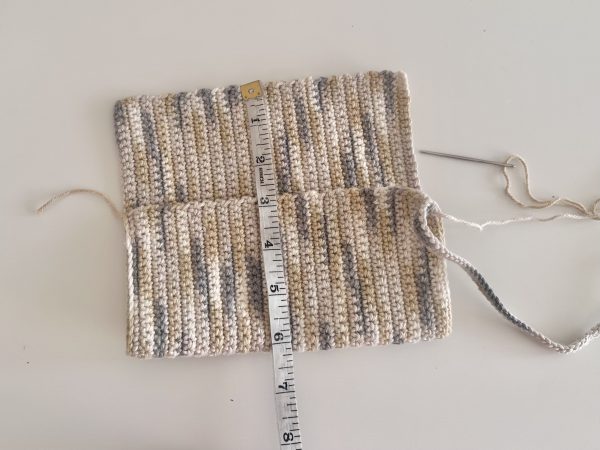
Chapter 53 (or until you reach your desired height, as shown in the photo above).
Note: The 53 chains for my foundation chain measured 8.5 inches (22cm) long. Once I started working on it and made the first few rows, it stretched to 9.5 inches. Keep in mind that your project may stretch a little.
Row 1: SC in the second chain from hook and across (total 52 stitches), turn.
Row 2: Ch 1, SC in the first chain from hook and across the row, turn. (52 stitches)
Make sure to have the same number of stitches in every row!
Row 3-45 (or until you reach your desired length): repeat row 2.
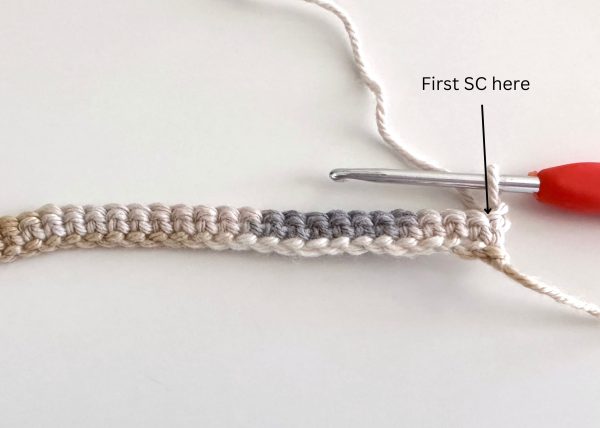
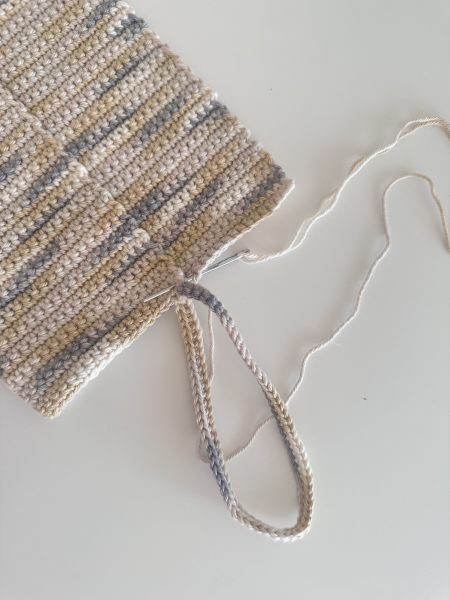
Make sure to have an odd number of rows to start the next step (handle) on the same side as the beginning yarn tail, like in the photo below.
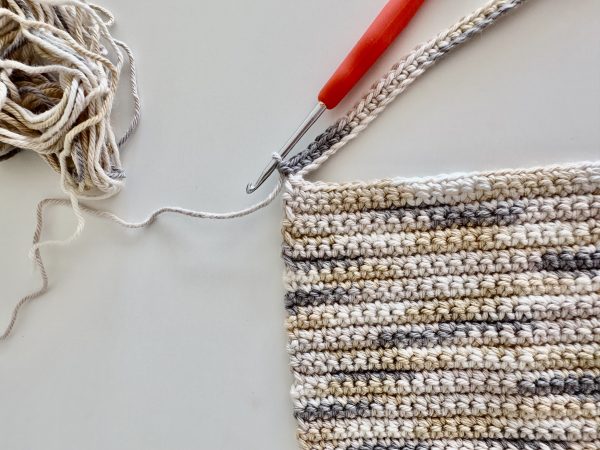
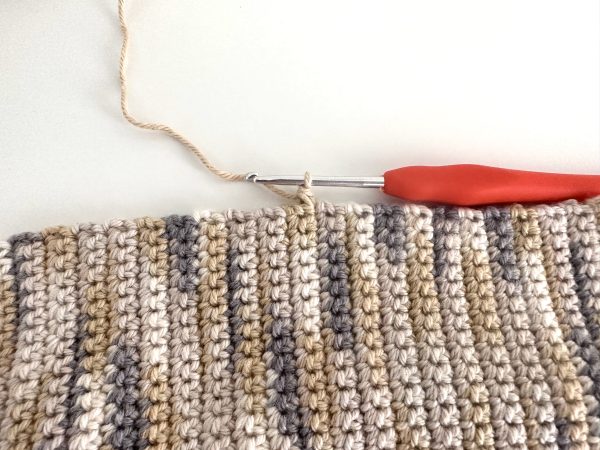
Clutch Handle
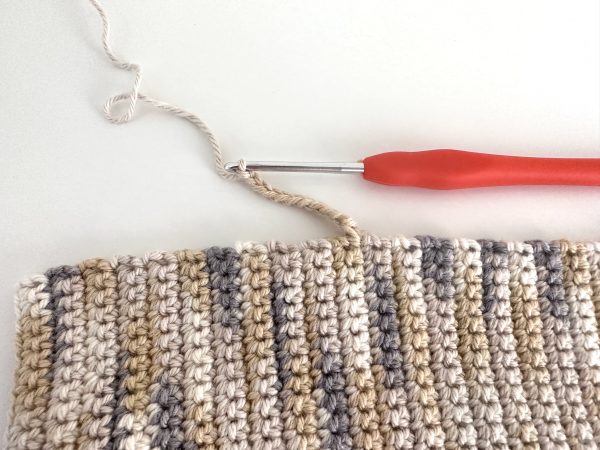
After you have completed row 45 (or your last row): Ch 70. The handle should fit comfortably around your wrist, with some extra space. If you want a longer or shorter handle, adjust the number of chains.
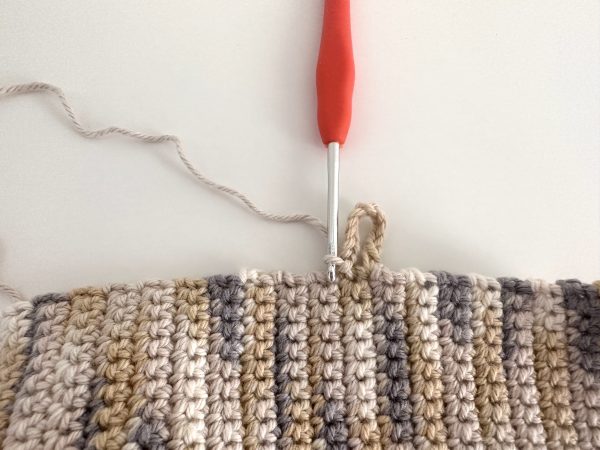
Work a row of SC stitches, starting from the second Ch and across all the way to the first chain.
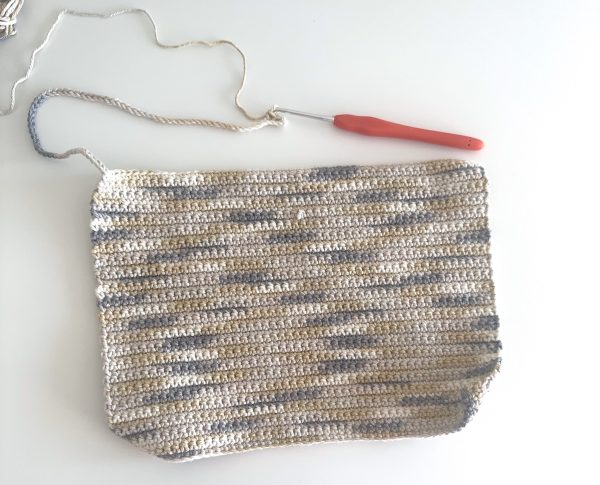
Slip stitch to the same stitch and fasten off, leaving approx. 20″ (40 cm) yarn for sewing the sides together.
Assembling
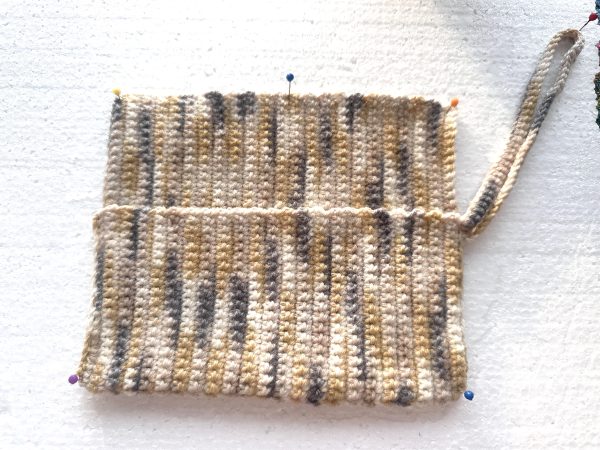
You should have a flat rectangle with a handle in one of the corners. Now turn your rectangle vertically so that the handle is at the bottom and the rows are going vertically. Thread your yarn needle.
Fold the bottom part up so that you still have approx 2.5 or 3 inches on top. Make sure to make that fold in a way that your phone or glasses will fit inside.
Take the end of the handle and form a loop, making sure it’s not twisted.
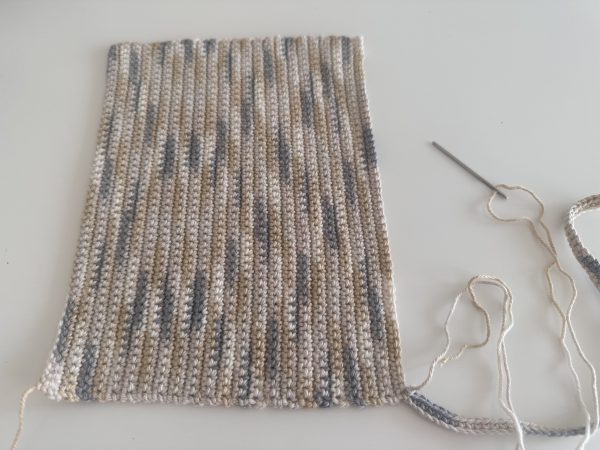
To join the sides, carefully sew them together by inserting the needle into each stitch along the edge.
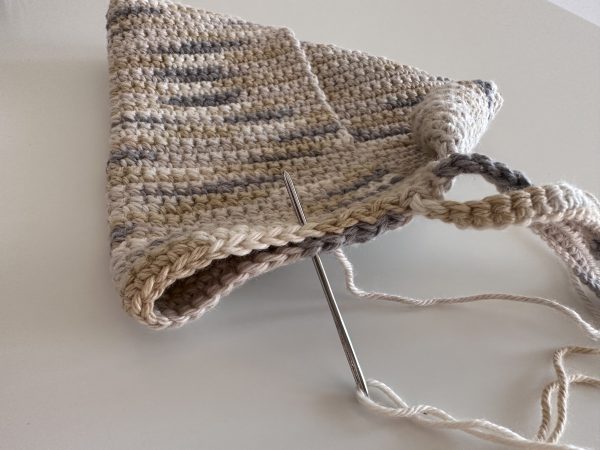
Sew the other side together, ensuring that both sides align in a straight line. Once the sewing is complete, take the time to weave in all ends.
If your edges are curling, you can block your clutch before you attach the button. If you don’t know what blocking means, see the Blocking section below.
Attaching the Button
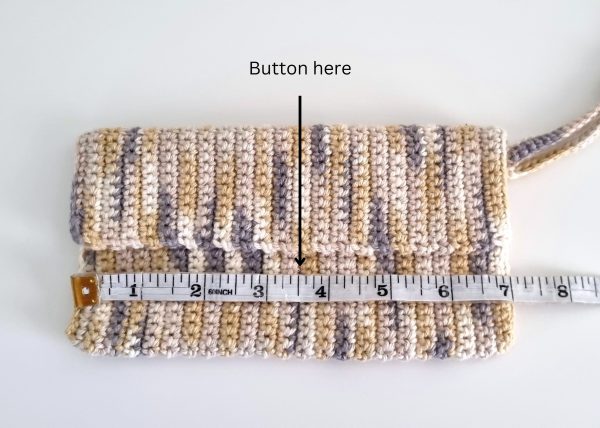
Choose a large decorative button, then fold down the upper portion and mark where you want to position the button. Ideally, it should be centred and placed just beneath the closed top edge. Stitch the button in place.
Button Loop
To make a button loop, attach yarn in the middle of the top part of your clutch.
Make a chain of 10 stitches. Adjust the number according to the size of your button.
Slip stitch into the same stitch to make a loop.
Weave in all ends. You just made yourself a crochet clutch! 🙂
Blocking your Clutch
If your clutch has curly edges, you can easily flatten them by blocking it. To do so, dampen the purse and carefully lay it flat on a table. Secure the edges either by pinning them with pins or pressing them down using items you have at home, such as a book or a box.
Leave the clutch in this position until it is completely dry. You will notice that the edges have straightened out. Once dry, your crochet clutch will be ready to use! That’s it!
I hope you enjoyed this easy clutch pattern! 🙂
If you create anything using my patterns, share it on Instagram and tag me @my_crochet_space. I would love to see your creations!
4 replies on “Beginner Crochet Clutch Pattern”
Олечка просто прелесть😘
Danke! 🙂
Thanks so much for the cute clutch pattern. Could you tell me what brand of yarn you used for the two samples. Thanks so much.
Hi Judy, that’s a good question! I don’t remember the brand of the green yarn I used since I made it a while back, even before I started this blog. Unfortunately, I didn’t keep the label. However, the beige yarn I used to demonstrate the process, I used Brighton 4 Seasons yarn (a blend of cotton and acrylic), which is available in Australia. I’ll make sure to include this information in the materials section, thank you for asking! 🙂