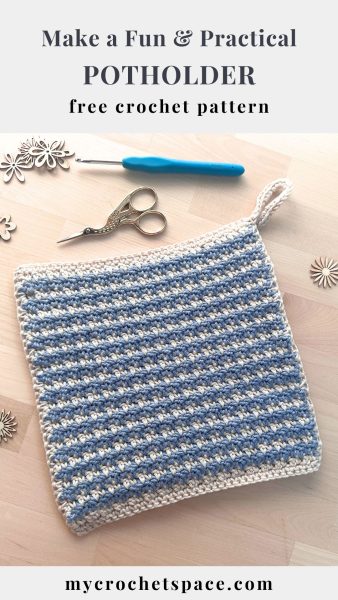
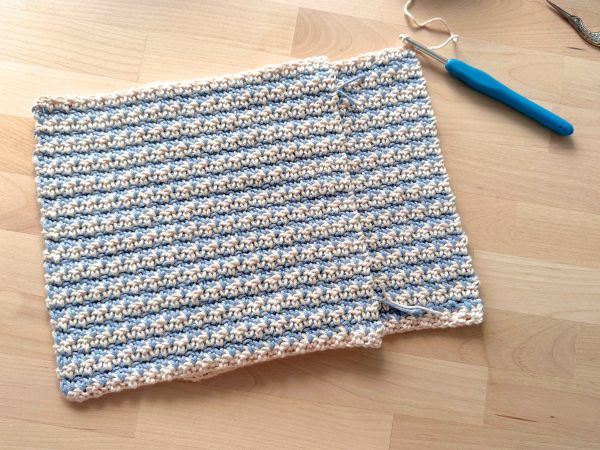
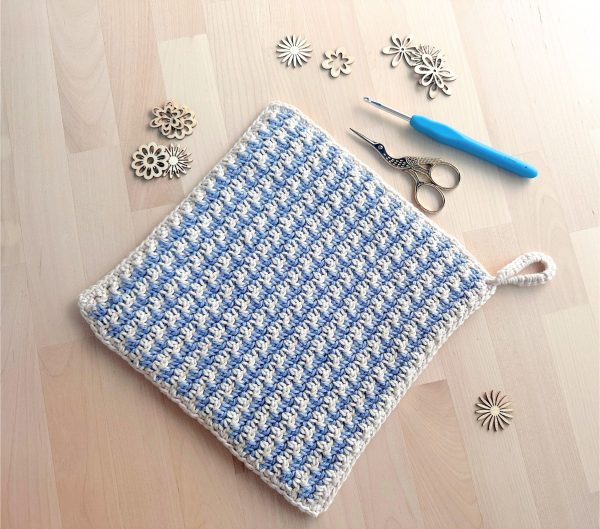
It’s time for another potholder pattern! I love making potholders – they’re super practical in the kitchen and make for a great portable project. Here’s a new pattern for a double thick crochet potholder using the Houndstooth stitch.
This potholder is designed to be double-layered, giving you extra-thick crochet fabric for added protection. It’s perfect for use as a trivet on the table too. I love using my handmade potholders and trivets interchangeably. 🙂
What yarn to use
My go-to yarn for potholders is 100% cotton. It’s durable, machine washable, and most importantly, safe to use when handling hot baking trays, pots and pans.
I used light worsted #3 weight cotton yarn for this potholder because I had a lot of it at home and wanted to use up my stash. Even though it’s a lighter yarn, the potholder is still quite thick since it’s double-layered. You can also use worsted-weight #4 yarn if you prefer, which will make the potholder slightly larger and thicker. If needed, you can always adjust the size of your potholder by starting with a shorter or longer chain.
About the Stitch
The houndstooth stitch is an interesting pattern that’s easier to crochet than you might think. It uses basic crochet stitches like single and double crochet. I have a tutorial on this stitch, complete with a short video demonstration, available here.
Crochet Potholder – Free Pattern
Please scroll down for the free pattern or get the ad-free & print-friendly version with step-by-step photos and written instructions from my Etsy or Ravelry stores.
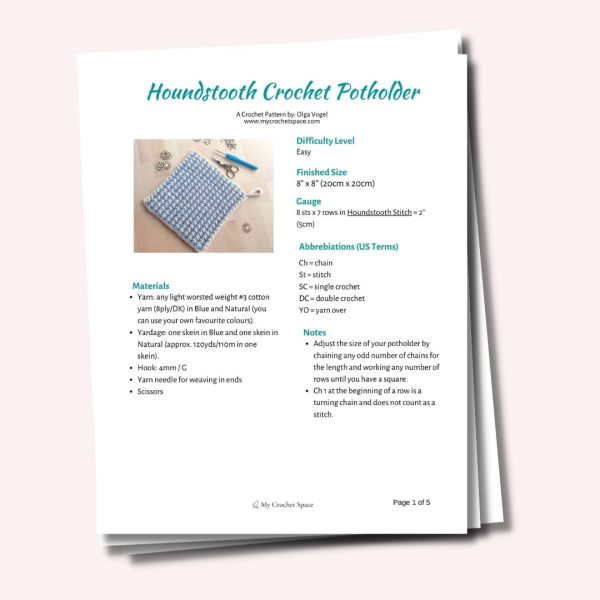
Houndstooth Potholder Crochet Pattern PDF
Or pin this crochet pattern to your Pinterest Crochet Board for later!
Difficulty
Easy.
This pattern is easy and beginner-friendly, although it may look complicated. If you’re an absolute beginner, the only challenges may be switching colours (see photo tutorial with a video demonstration) and making a border. However, it is still simple enough that even beginners should be able to follow and create a beautiful potholder!
This post may include affiliate links, view my disclosure policy for details.
Material:
- Yarn: any light worsted weight #3 cotton yarn (8ply/DK) in Blue and Natural (you can use your own favourite colours).
- Yardage: one skein in Blue (approx. 120yds/110m) and one skein in Natural (approx. 120yds/110m).
- Hook: 4mm / G
- Yarn needle for weaving in ends
- Scissors
Dimensions:
8″ x 8″ (20cm x 20cm)
Gauge
8 sts x 7 rows in Houndstooth Stitch = 2′′ (5cm)
Abbreviations (US Terms)
- Ch = chain
- St = stitch
- SC = single crochet
- DC = double crochet
- YO = yarn over
Potholder Pattern Notes
- Adjust the size of your potholder by chaining any odd number of chains for the length and working any number of rows until you have a square.
- Ch 1 at the beginning of a row is a turning chain and does not count as a stitch.
Crochet Potholder Written Pattern
Chain 35 or any odd number for your desired length (pick any colour to start with).
Row 1: SC in second chain from hook, DC in next, *SC in next, DC in next, repeat from * across the row. Join new yarn colour in the last stitch. If not sure how to join new yarn or switch between the colours, watch this video demonstration (34 stitches in each row).
Row 2: With the new colour, ch 1 and turn. Carry the previous colour yarn all the way across the row by placing it on top of the stitches. Work a SC in the first stitch (on top of the DC in the previous row), then DC in the next stitch (on top of the SC in the previous row). Repeat *SC in the next stitch, DC in the next stitch* across the row. Change colour in the last DC.
Row 3 – 27 or until your desired size: repeat row 2. Fasten off.
Make two squares with the same measurements. I find that when working the Houndstooth stitch, the tension can vary in each row because of the carried yarn inside the stitches. While working on the second square, I like to measure it against the first one after each row to ensure they have the same tension. I’d rather take the time to check and make sure they match than skip checking and later realize the tension is off, forcing me to redo a few rows. It saves time in the long run! 🙂
Make sure the carried yarn is neither too tight nor too loose; otherwise, the edges won’t be straight. After finishing a row, gently pull the carried yarn to tighten the first stitches where the colour was changed. Then, stretch the row slightly so the carried yarn lays comfortably inside the stitches. Watch the video demonstration for guidance.
When you’ve finished 27 rows, pick the color you want for your border. I went with the lighter colour. Cut the other yarn and keep going with your chosen border colour.
Decide which side will be the right side. There’s a slight difference in how the colours pop on each side, so just choose the one you like best!
Before you start with the border, secure all the ends on the inside of the potholder. You don’t need to fully weave in the ends since they won’t be visible, but make sure they are secure and won’t come loose after a few washes. At the very least, make a couple of stitches to create a knot and tuck them away from the edge to the inside of the potholder.
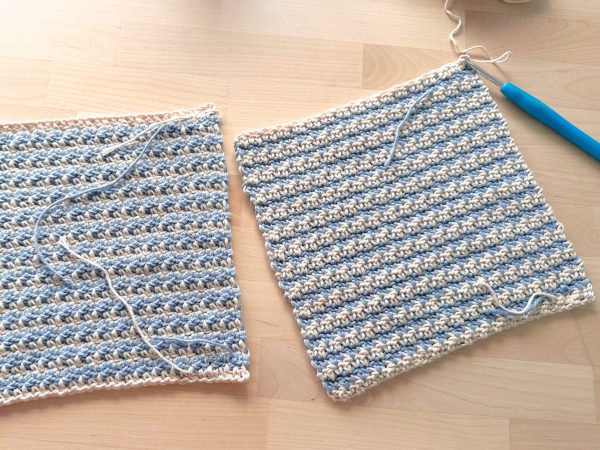
Join the squares by making a border like it’s shown below.
Joining Border & Loop: Lay the squares with the wrong sides facing each other.
Join the squares by pulling the loop on your hook through the first stitch of the first square.
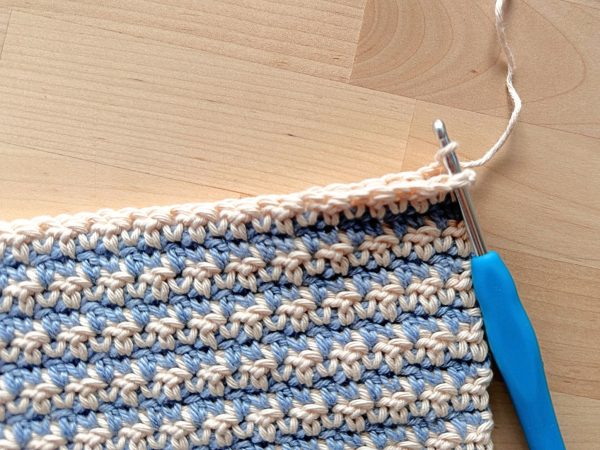
Chain 1 and make a single crochet into the same stitch, ensuring the hook goes through two loops on both squares. Make a single crochet into each stitch across the row. Refer to the photos below for guidance.
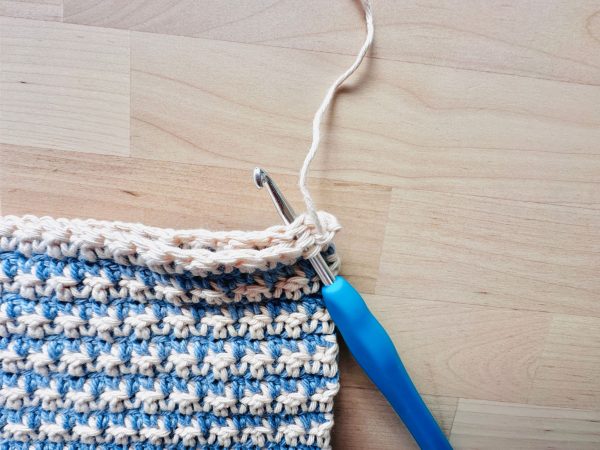
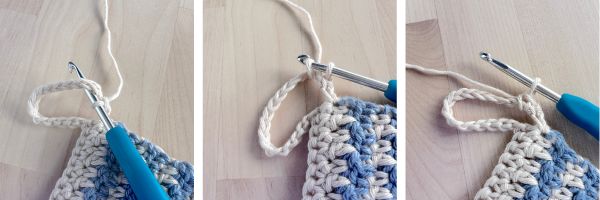
Loop: When you get to the end of the row, Ch 17 to make a loop, then work a SC into the same St.
Ch 1, and turn. Work 25 SC around the chain stitches by inserting your hook inside the loop, see photos below.
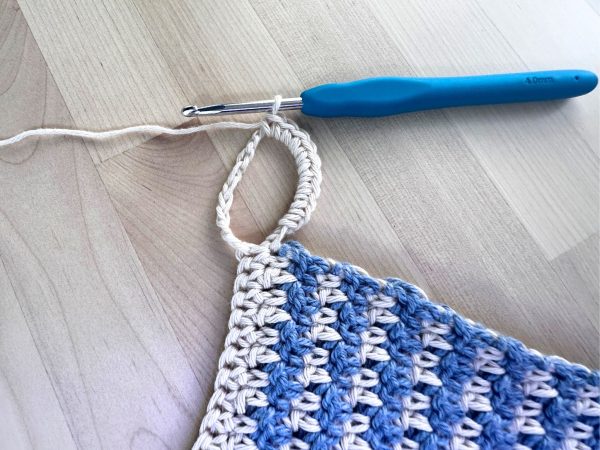
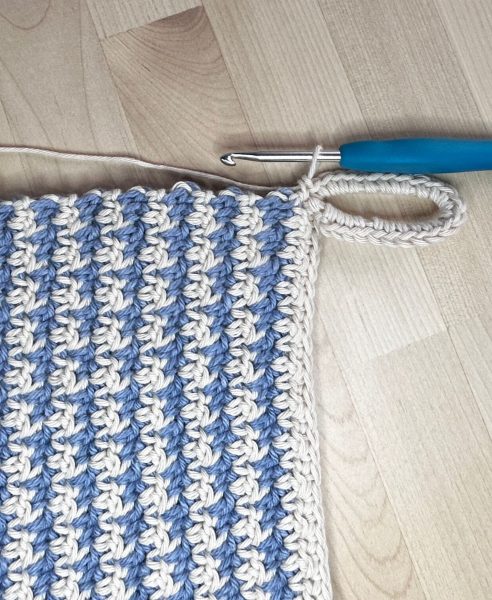
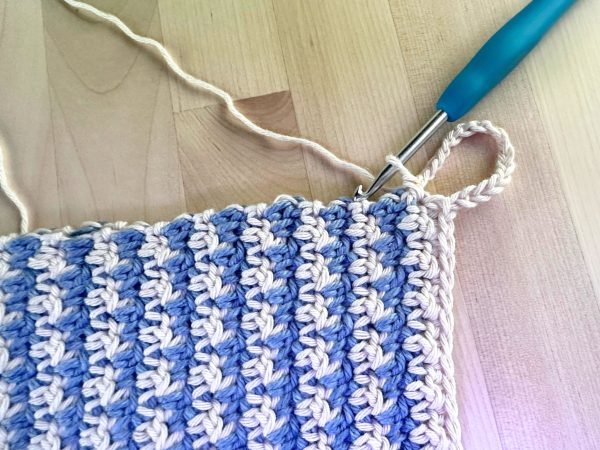
Turn the potholder and continue with the border along the other side. Evenly distribute about 34 SC stitches, aiming for around 4 SC stitches per inch.
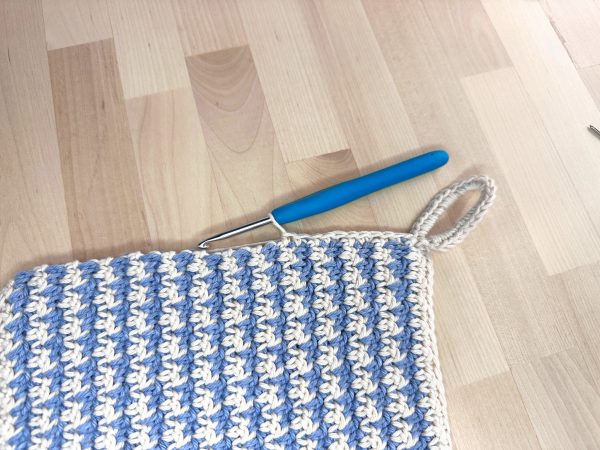
Corners: Work a SC, Ch 1, and another SC all into one stitch at each corner. When you get to the end, join with a slip stitch to the first border stitch. Fasten off and weave in all ends. Done!
I hope you like this double thick potholder crochet potholder pattern!