In this Moss Stitch Crochet tutorial, you will find:
When I saw the Moss stitch for the first time I had no idea how easy it was to crochet! I was mesmerized by the intricate pattern of bright contrasting colours making their way through the crochet fabric.
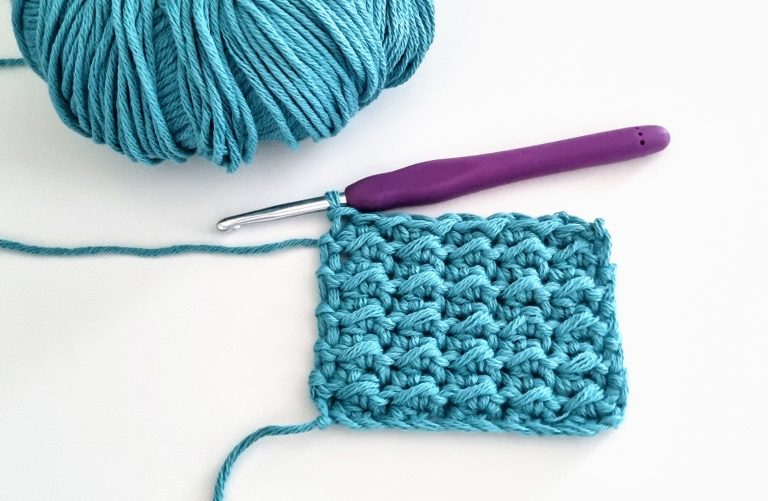
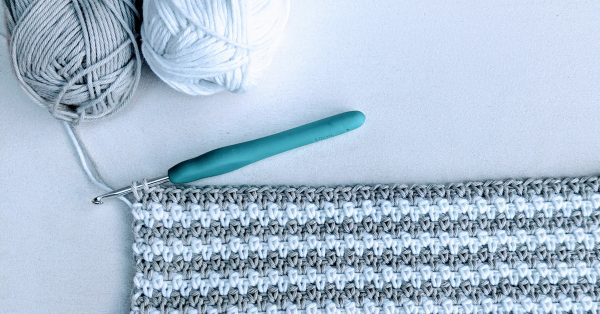
The crochet Moss stitch on it’s own is a very simple and easy to crochet stitch. But the use of multiple colours adds a little more complexity to how it looks. I love the simple grain-like texture of it and how different this stitch looks when used in patterns with multiple colours. And most of all, I love how easy it is to crochet!
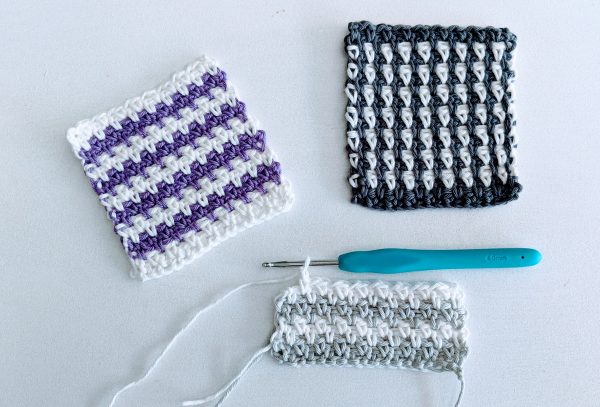
The Moss Stitch becomes clearly defined when there are a couple of different colours in use. It looks very pretty and you can play with different combinations of colours and create a variety of different crochet patterns.
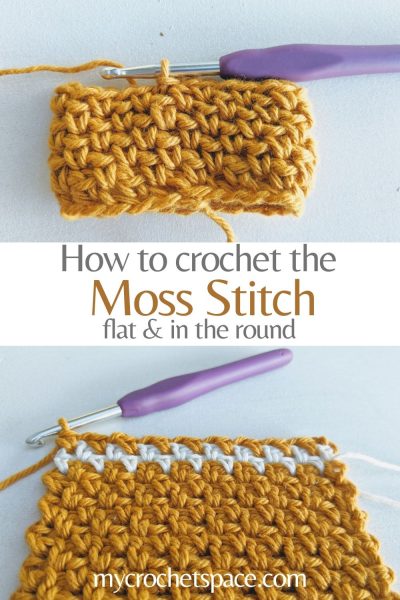
An example below shows how just by switching to a different colour every row (dark grey) or every second row (purple) will create a different look.
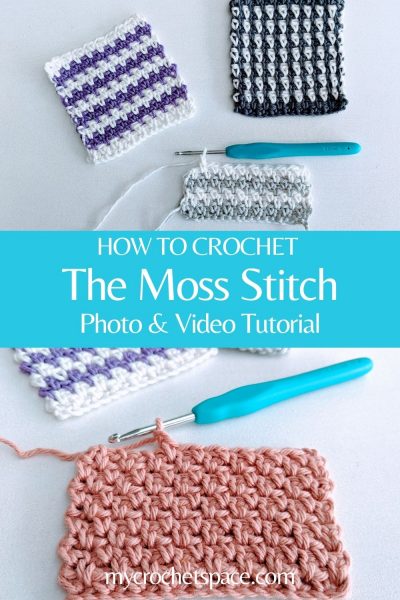
How to Crochet the Moss Stitch For Beginners
Moss stitch (also called Linen stitch or Granite stitch) is a combination of single crochet and chain stitches. Basically, it’s a single crochet followed by a chain 1. The chain 1 will allow you to skip one stitch and so the next single crochet will go in the next stitch after that.
In a pattern it looks like this:
- Single Crochet,
- Chain 1, Skip 1,
- Single Crochet,
- Chain 1, Skip 1 and so on. Take a look at the video demonstration or the step by step photo tutorial below.
Difficulty
Beginner / Easy.
Moss stitch is one of the easiest stitches I know and I would recommend it to any beginner. The fact that there are only two types of basic stitches here makes it very beginner friendly. If you know how to chain and how to single crochet then you can crochet the Moss stitch.
This combination of stitches is very easy to remember. If you are a beginner and would like to make a bigger project you can use this stitch to crochet a scarf, a poncho or even a blanket!
And if you use a multi-coloured yarn such as Caron Cakes or Lionbrand’s Mandala Ombre then you won’t even need to change colours yourself. The yarn will do the work for you!
Below is one of my patterns Crochet Men’s Scarf Cool Ombre where you can see what the Moss stitch looks like when you use a gradient multi-coloured yarn. I believe this is one of the easiest ways to make a beautiful colourful piece of garment without all the hassle of changing yarn and weaving in ends.
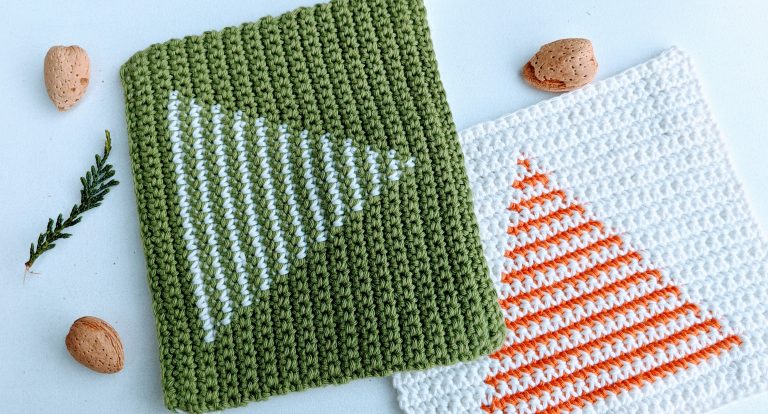
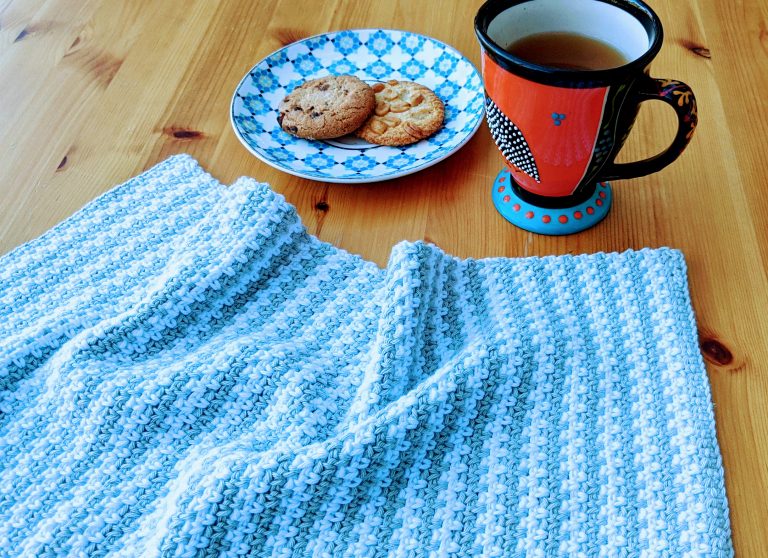
An if you like to make something for your kitchen, try this Crochet Tea Towel. This pattern is also using the Moss Stitch but with 2 contrasting colours which you’ll need to alternate. You can find the short video demonstraton in the post.
Is the Crochet Moss Stitch a Fast Stitch?
In my opinion, yes.
I guess, if you’re reading this then chances are that you like the actual process of crocheting and not just the end result. That special time of being immersed in every single stitch, the movement of the crochet hook, the texture of the yarn, forgetting the time and being in the zone. For me it’s meditative, almost therapeutic.
But sometimes, if I’m planning to make something for a special occasion, I just want to know if it’s going to work up fast or take forever.
So it might help to know before starting a project how quick and easy it will be. Some stitches are taking longer than others to crochet the same size of fabric. It depends on density and height of the stitch.
Let’s say you would like to make a 4″ square coaster. The shorter the stitch (such as Single Crochet or Slip Stitch) the denser the fabric you’re creating and the longer it will take. Or if you’re crocheting a very thick stitch such as the Thermal stitch which is double the thickness of the normal Single Crochet (great for potholders!) – will take double the time of normal Single Crochet. Nevertheless so worth it! 🙂
When we crochet the Moss stitch, we are skipping every other stitch (and replacing it with a chain 1 instead, which is very quick to do) we’ll progress much quicker than if we had to crochet Single crochets into every stitch. So the fabric will be less dense because of that and a little more stretchy than if you had single crochets in every stitch.
I consider Double crochet stitches as one of the fastest stitches because of their height. But I think the Moss stitch is quite fast too even though this stitch is not as tall as the Double crochet.
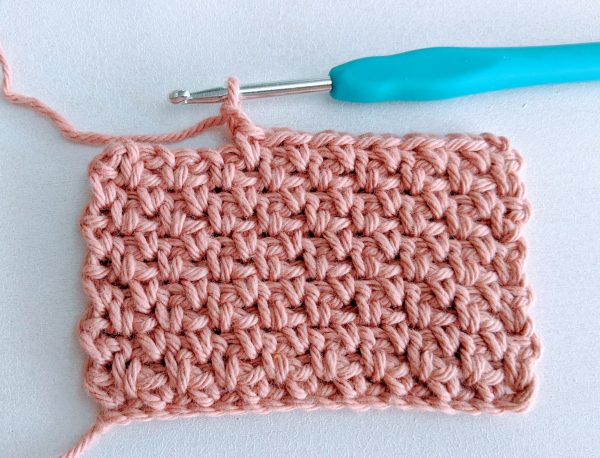
Moss Stitch Crochet Photo Tutorial
To start with the Moss stitch, take a look at the photo tutorial below or scroll down for the video demonstration.
Materials
Yarn: any worsted weight /size #4 medium weight (to learn this stitch you can use any type of yarn as long as you can see the stitches clearly)
Crochet hook: 5mm H-8 (adjust the size to the type of yarn you’re using)
Step 1
Make a slip knot and chain any even number. For the purpose of practise, let’s chain 20. (If you are an absolute beginner, take a look at my video tutorial in How to Crochet where I show how to make a slip knot and the first basic stitches)
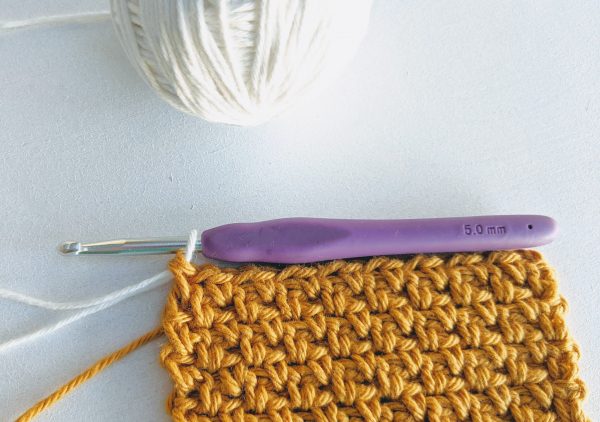
Step 2
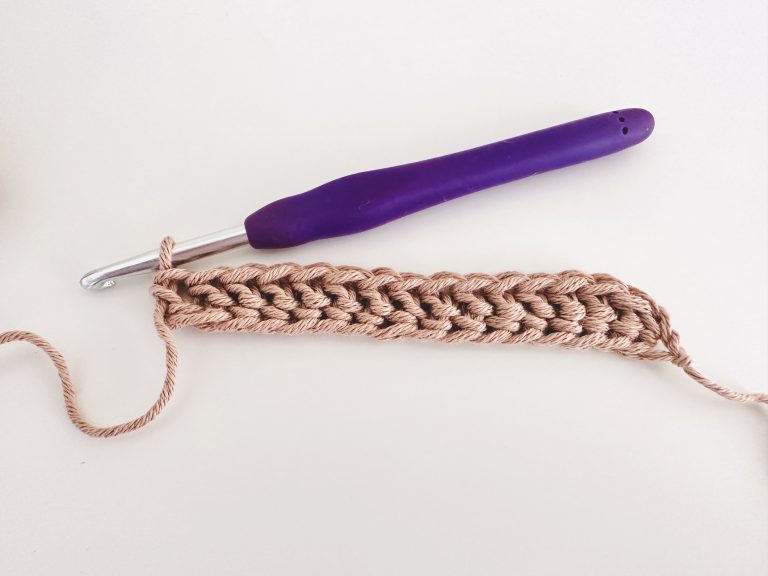
Row 1: Single crochet in the fourth chain from hook
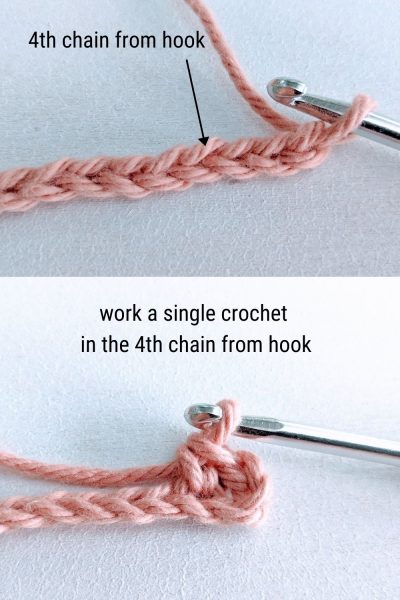
Step 3
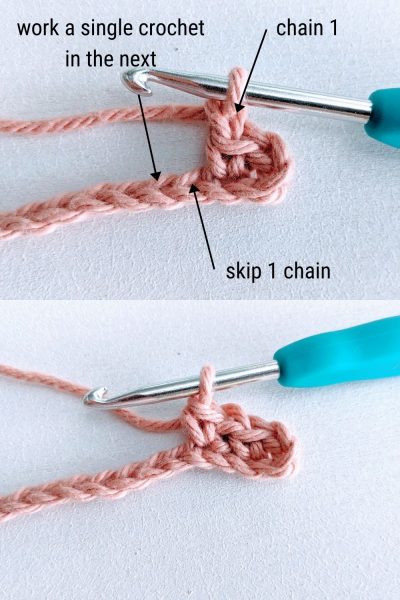
Chain 1, skip one chain stitch and work a single crochet in the next after that.
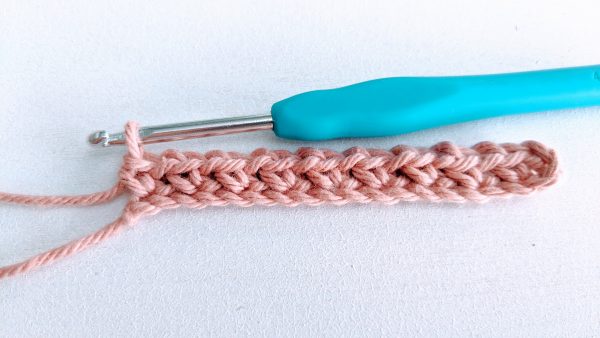
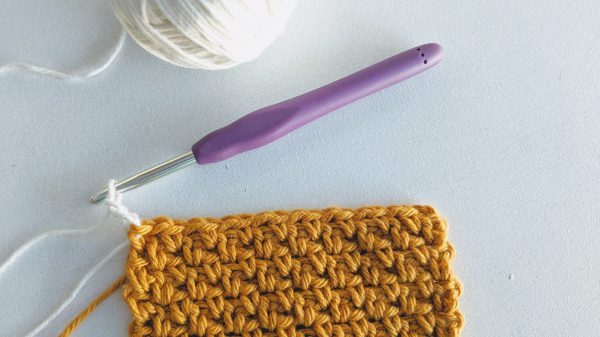
Step 4
Repeat step 3 to the end of the chain. You should have 9 single crochet stitches plus the turning chain.
Step 5
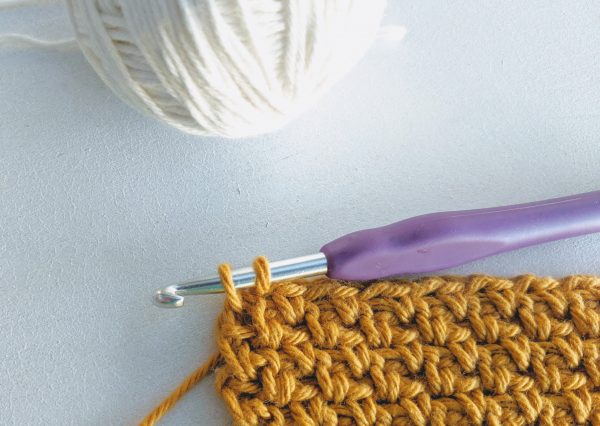
Row 2: Chain 2 and turn.
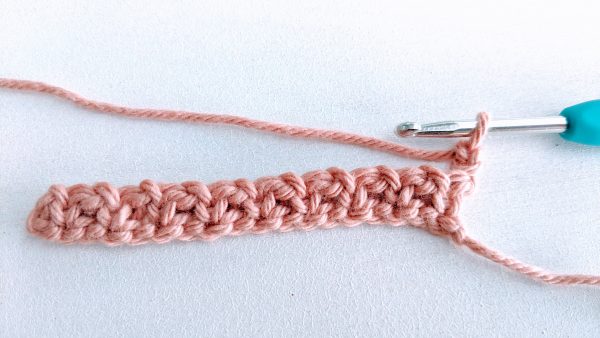
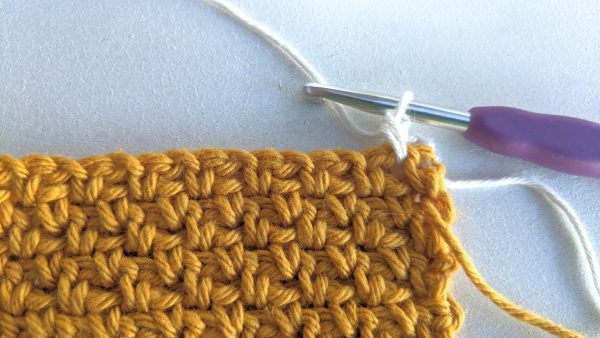
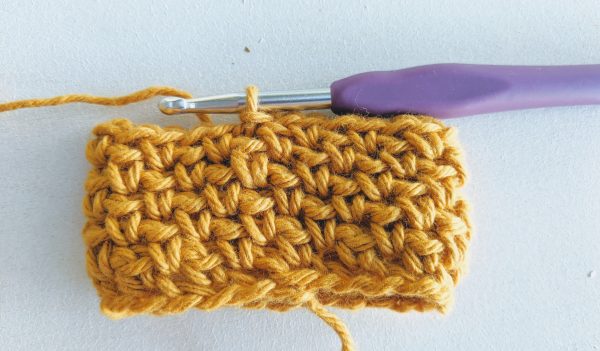
Step 6
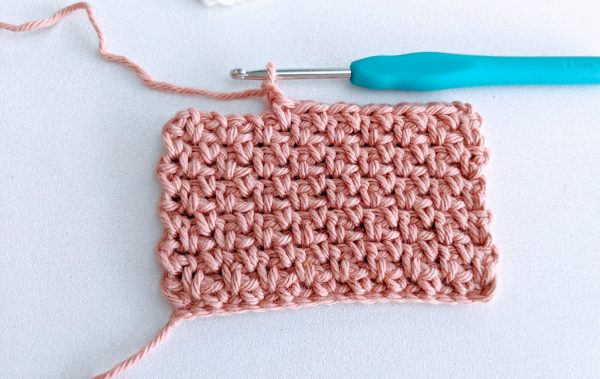
Work a single crochet into the space between the stitches from the previous row (the chain-1-space).
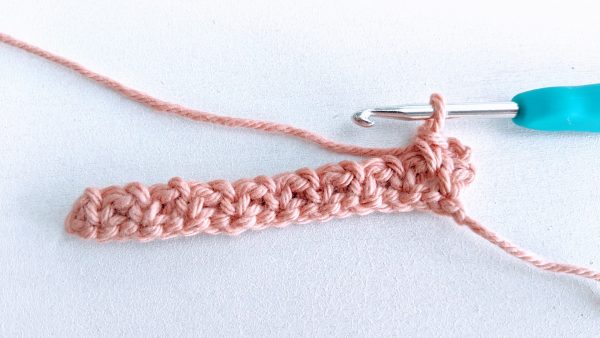
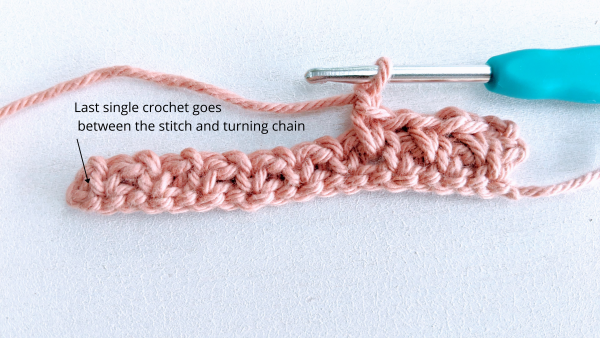
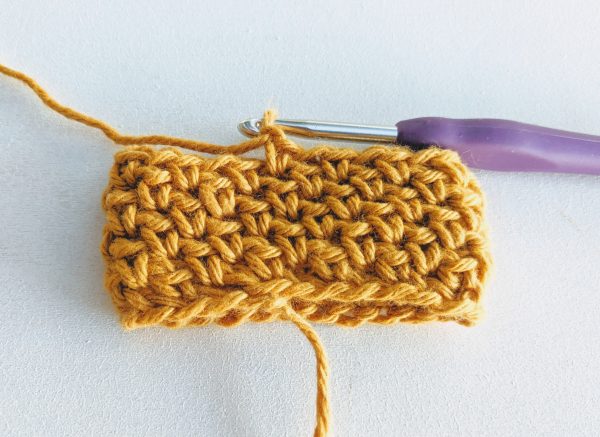
Step 7
Chain 1, skip 1 and work a Single crochet in the next space between the stitches. Repeat to the end of this row. Last Single crochet goes between the stitch and turning chain.
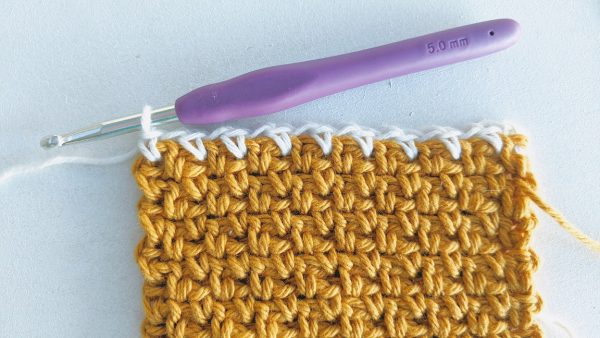
You should have the same amount of single crochet stitches in every row (here we have 9 single crochets plus the turning chain in every row).
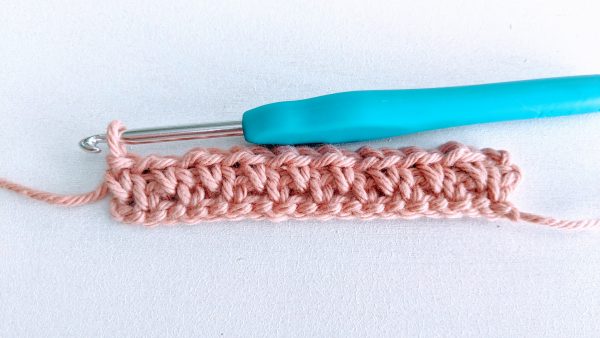
Repeat row 2 (see step 5) until you reach the desired size.
Moss Stitch Crochet Written Instructions
Abbreviations:
St = Stitch
Ch = Chain
SC = Single Crochet
Sk = skip
Chain any even number.
Row 1: SC in 4th Ch from hook, *Ch 1, sk 1 Ch, SC in next Ch**, repeat from * to ** to the end of the row. The very last stitch should be a SC. Ch 2 and turn.
Row 2: SC in first Ch-1-space (between the SC stitches from previous row), *Ch 1, Sk 1 St, SC in next Ch-1-space**. Repeat from * to ** to the end of the row. The very last SC should be worked into the space between the turning chain (Ch 2) and the SC from the previous row. Ch 2 and turn.
Repeat row 2 until you reach the desired size of your project.
Note:
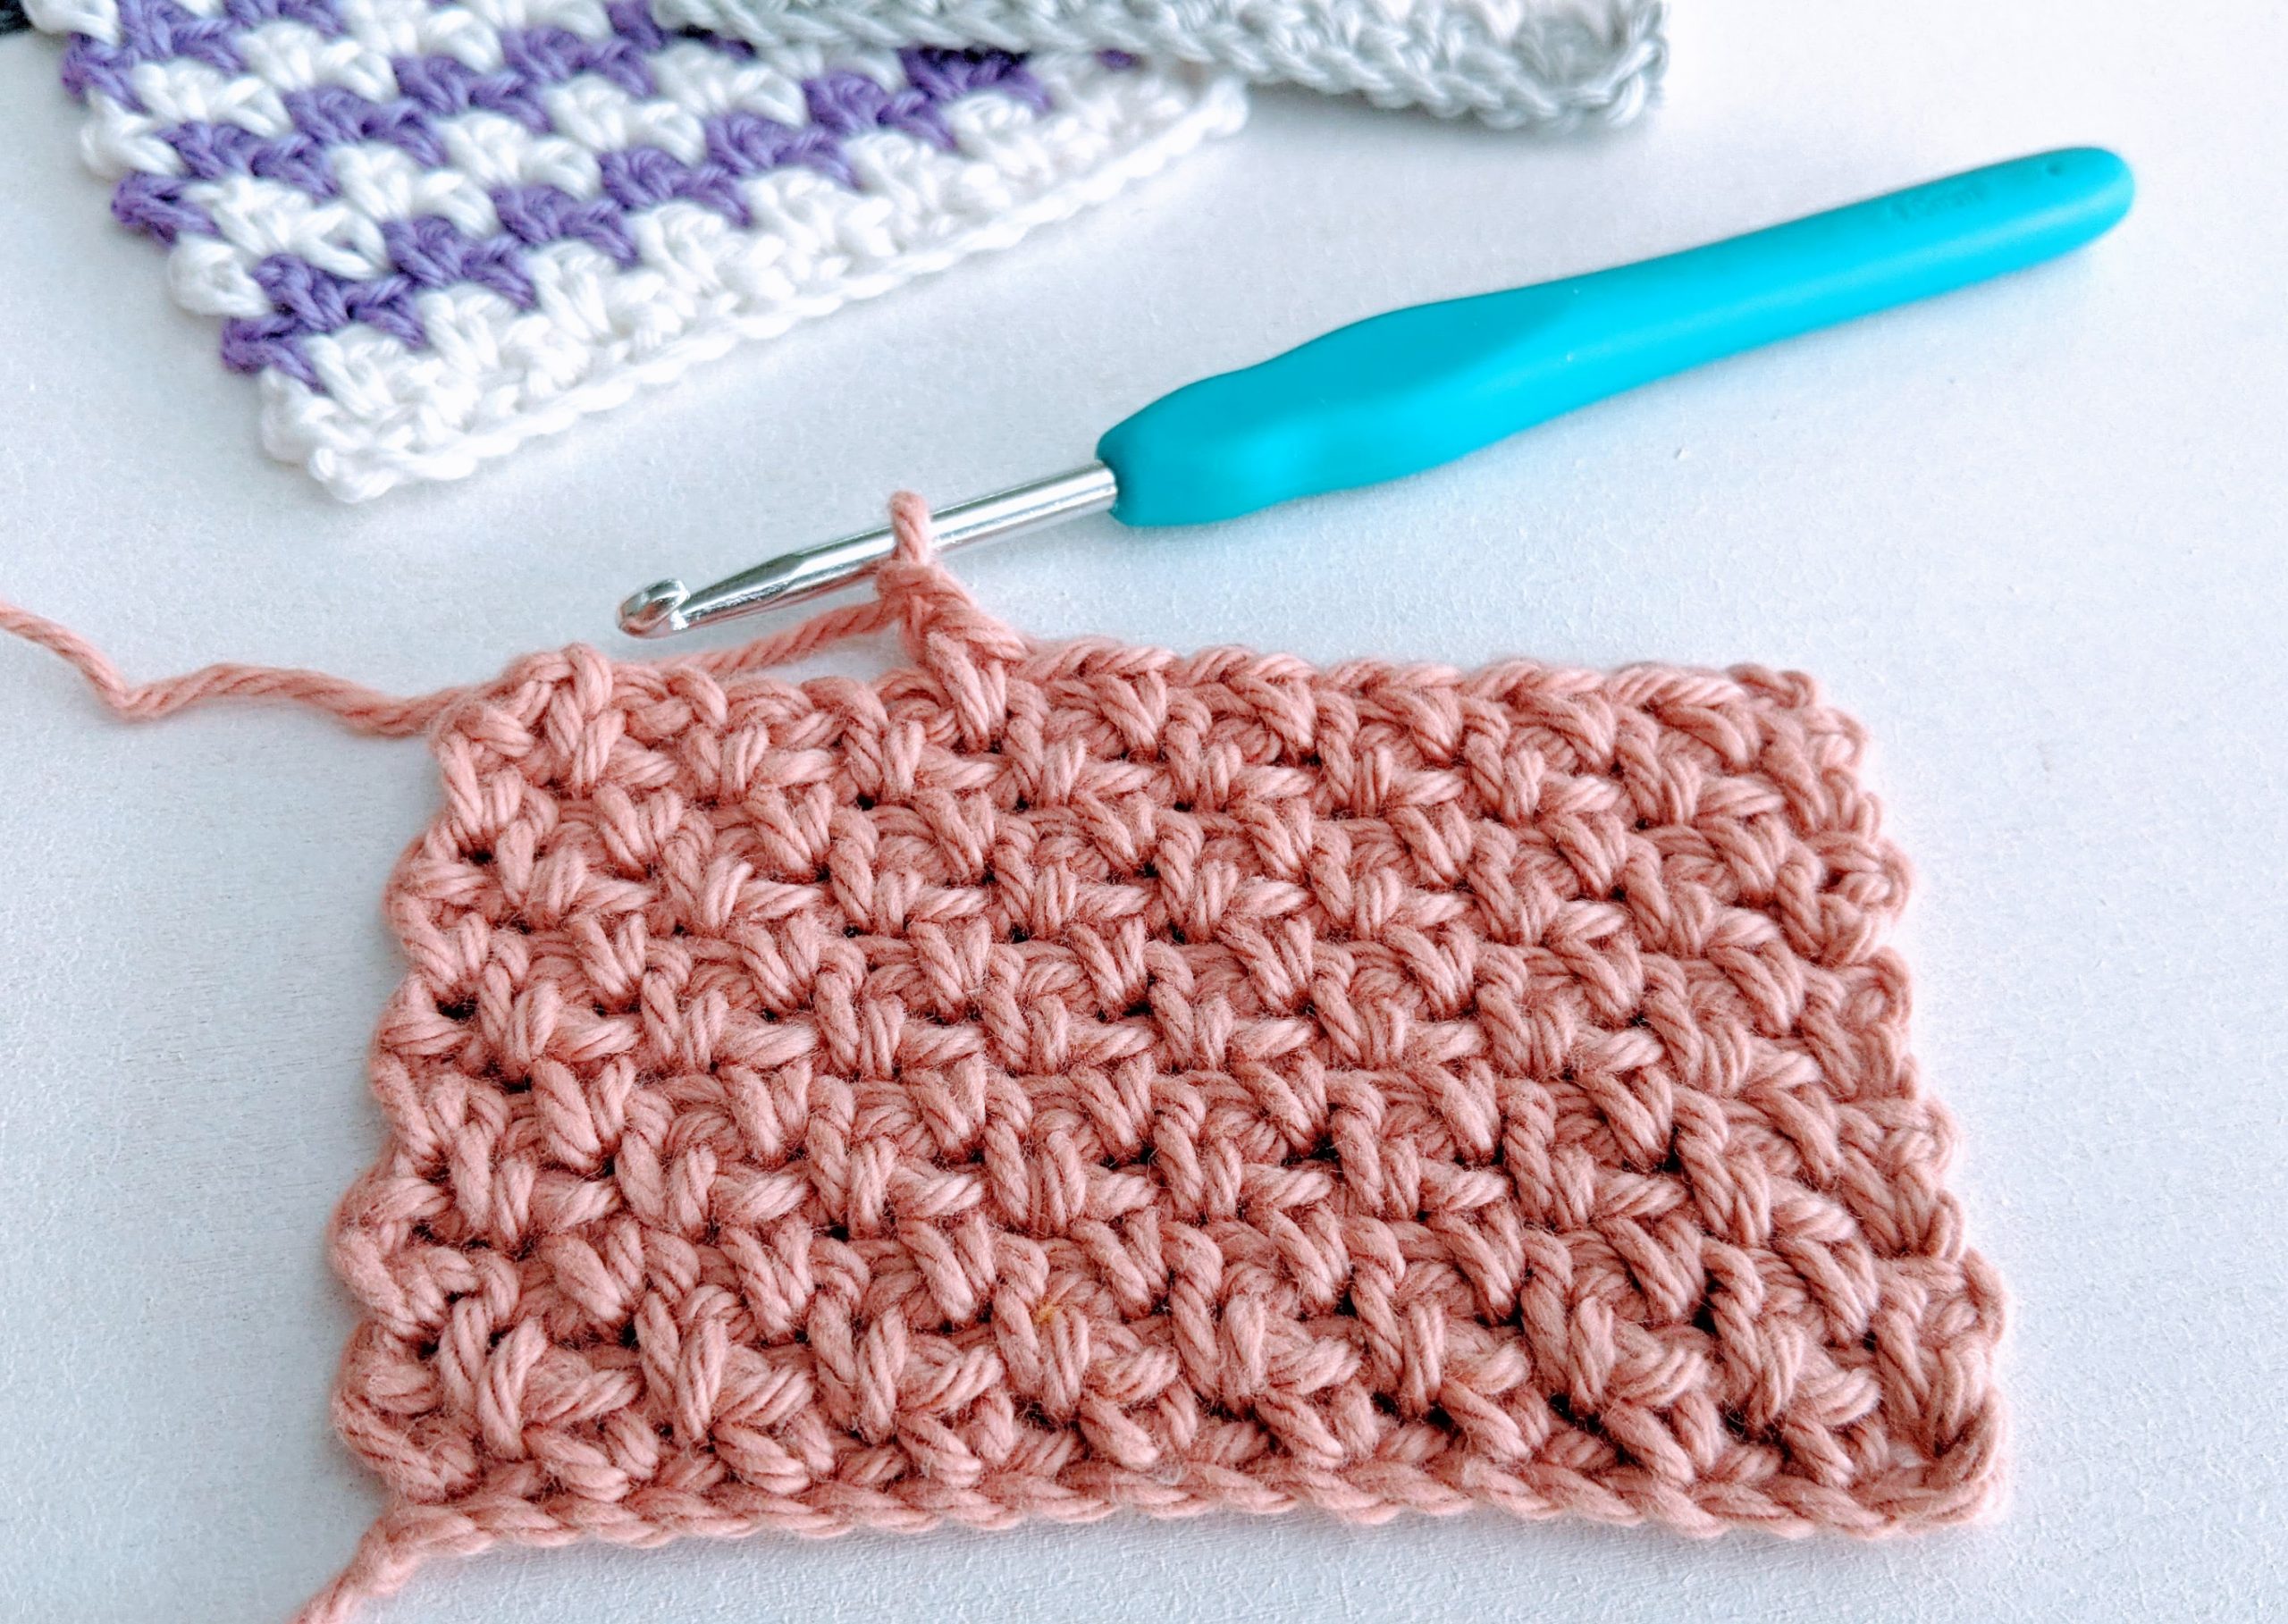
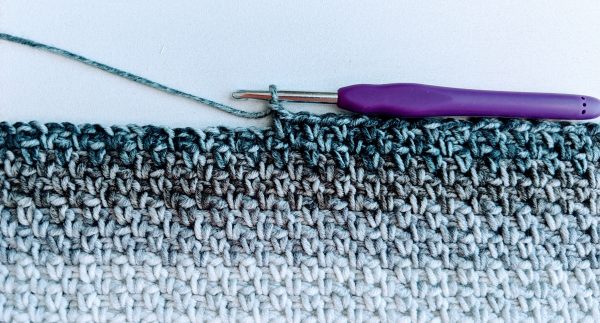
Some patterns and/or other crocheters will use Ch 1 in the beginning of the row instead of Ch 2. I am using both, depending on what I’m making. The Ch 1 will create a slightly straighter edge without the bumps, see sample below.
In the sample on the right side I have used Ch 1 in the beginning of each row and the sample on the left has slightly bumpier sides as I was chaining 2 in the beginning of each row.
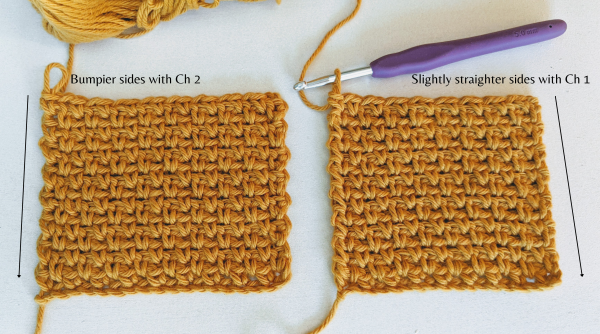
Ch 2 creates a bigger gap to crochet into so it’s much easier to find and I think it’s easier to practise this stitch. Either way is OK, it’s a matter of preference and the project you’re working on. It also depends on the type of yarn you’re using and your yarn tension. Try both ways and see which way you like better 🙂
How to Crochet the Moss Stitch Video Demonstration
Crochet Moss Stitch – How to Change Colour
When changing colours we need to think one stitch ahead. And this is not just when using the Moss stitch. Normally, if you are planning to change colour in the next row, you’ll need to do the change in the middle of the last stitch just before you want the new colour to start.
So before starting on the last single crochet in the row before, prepare the new yarn as we are going to use it in the middle of this stitch.
And here is how:
Step 1
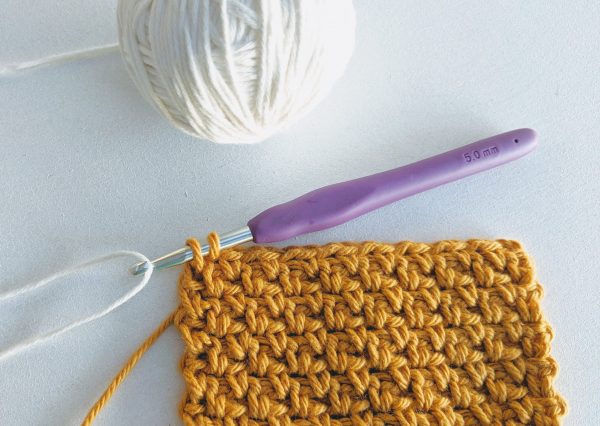
Start the last single crochet as normal: Insert your hook in the space between the turning chain and the stitch, yarn over and pull up a loop. You’ll have 2 loops on your hook.
Step 2
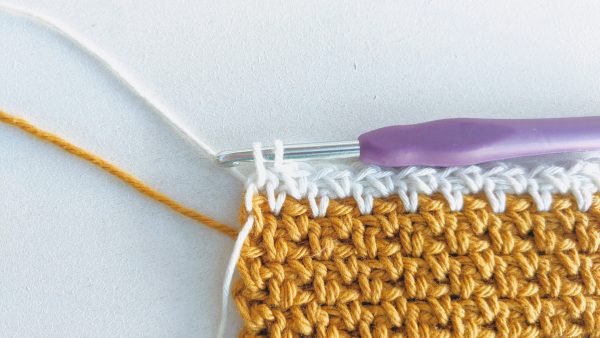
Joining new colour: Loop new yarn over hook and pull up a loop to finalise the single crochet with the new yarn.
Step 3
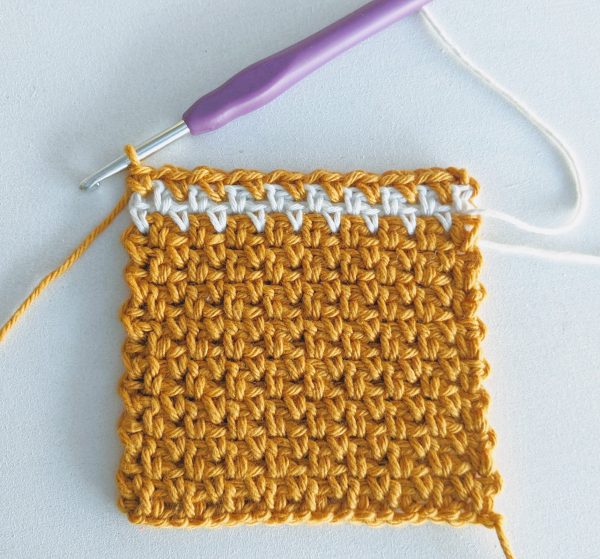
Chain 2 with the new colour and turn.
If you are planning to switch to the previous colour in a couple of rows leave the other yarn where it is until you switch back to it. If you don’t want to use the previous colour in future rows then you can cut the yarn about 6″ long and weave in the ends when you finish your project.
Continue with the new colour.
If you want to switch back to the previous colour here, do the same steps as before.
You can crochet a border around to hide the strings of yarn on the side or you can cut the yarn each time and weave in the ends. I prefer to just carry it up a couple of rows.
Crochet Moss Stitch in the Round
When working the Moss stitch in the round I have tried many different ways to make the transition between the rounds look smooth and minimise the seam. So I found crocheting in spiral rounds being the best way for me as it eliminates the seam altogether.
When working in spiral rounds you don’t have a beginning or an end of the round. There are no slip stitches or chaining in the beginning of the round involved (apart from the very first round) that normally create that seam. In spiral rounds you just keep working on top of the stitches of the previous round seamlessly. I would like to share it with you here in case you don’t know how to start and interested to try it for yourself.
Moss Stitch in the Round Step by Step
Step 1
Chain any even number of chains and connect with a slip stitch to make a circle. Chain 2.
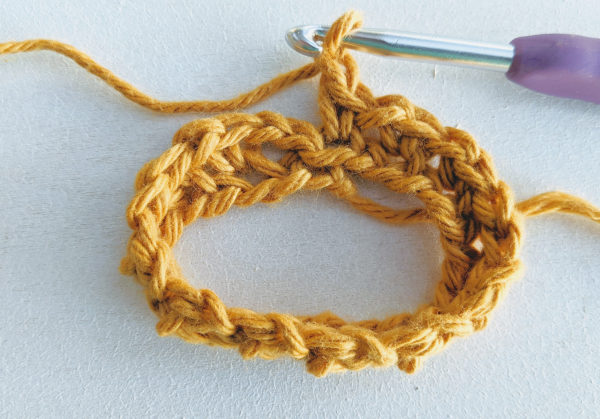
Step 2
Skip one chain and work a single crochet in the next chain.
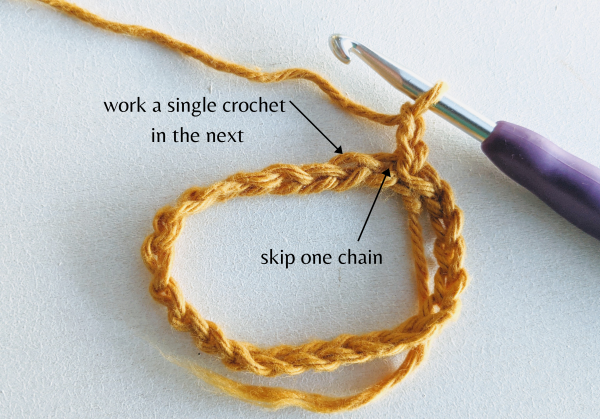
Skip 1, chain 1 and work another single crochet in the next after that. Continue to the end of the round.
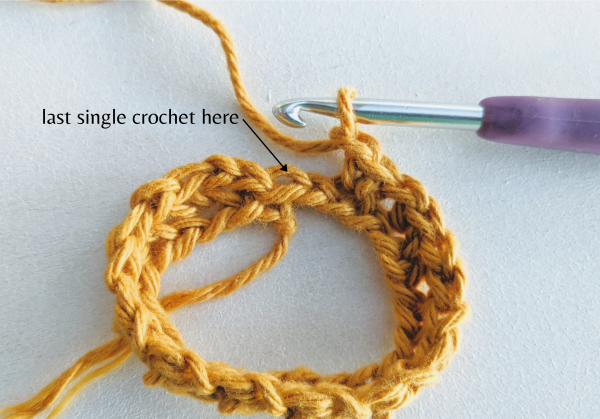
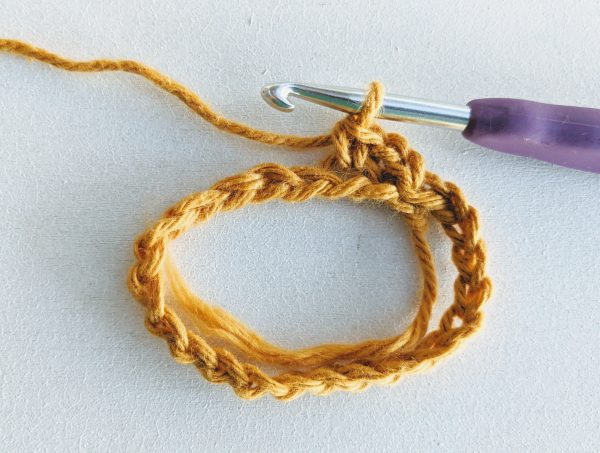
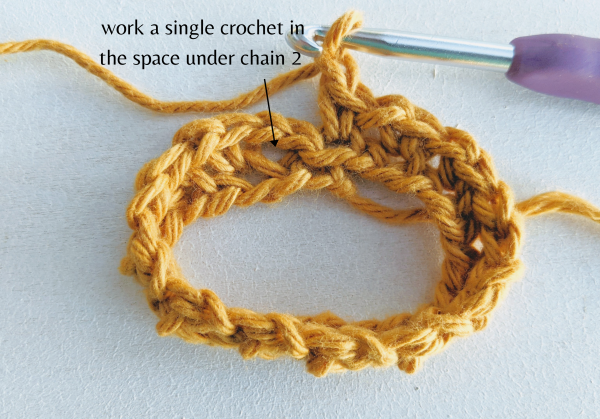
Step 3
When you reach the end of the round, don’t connect it with a slip stitch as you normally would. Simply insert your hook in the space under the Chan 2 from the previous round, work a single crochet and continue with the Moss stitch until you reach the desired size of your project.
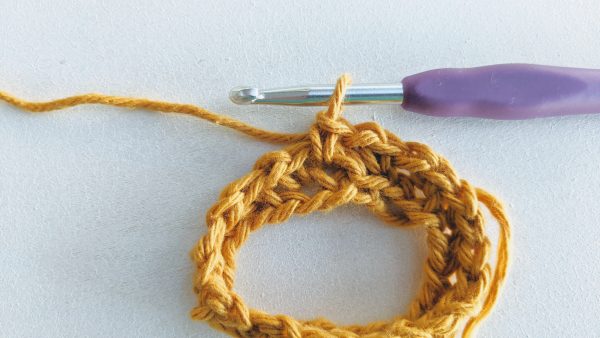
Step 4
When you reach the desired size, continue with Moss stitch until the approximate end of the round. You can see the start/end of the round by locating the tail of the yarn from the starting chain.
After your last single crochet, chain 1, skip 1 and work a slip stitch in the next stitch. The slip stitch will help even out the height of the project and secure the end of the yarn.
Step 5
Fasten off and weave in ends.
Let me know how you liked working in the spiral rounds!
Free Crochet Patterns using the Moss Stitch
- Beginner Crochet Washcloth Pattern
- Crochet Moss Stitch Scarf
- Fireside Crochet Neck Warmer Pattern
- Crochet Moss Stitch Blanket Square
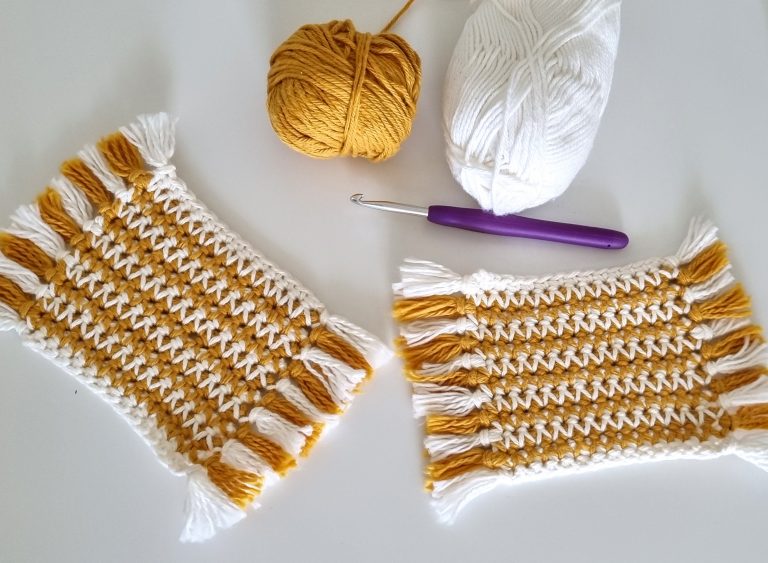
- Crochet Tea Towel
- Crochet Men’s Scarf Cool Ombre
How do you like the Moss Stitch?
Let me know in the comments below how you like the Moss Stitch and what would you make using this stitch!
I would love to see your projects! If you make some of my patterns and post it to Instagram, make sure to tag me @my_crochet_space
You can also follow me on Youtube where I share all my latest tutorials and patterns!
More Crochet Stitches
- Crochet Lemon Peel Stitch – Quick Tutorial
- How to Crochet the Crumpled Griddle Stitch
- Granny Stitch Crochet
- Crochet Thermal Stitch
- How to Make Crochet Flowers