Last updated: May 19, 2026
If you’ve mastered the single crochet from my previous tutorial, you’re ready to try the next stitch: the double crochet stitch, or DC for short. This basic crochet stitch is used in many crochet projects.
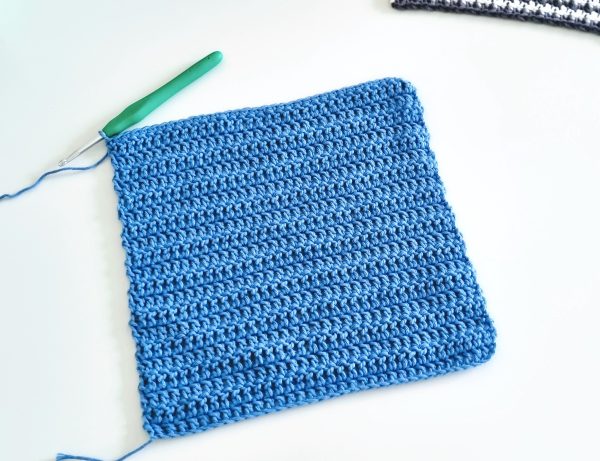
The double crochet stitch is taller than the single crochet, which means there are a few more steps involved. With double crochet, you’ll notice small gaps between the stitches due to their height, adding a nice texture to your work. It’s perfect for a variety of projects, like shawls, scarves, and blankets.
Learning how to crochet the double crochet stitch is easy. I’ve put together a detailed tutorial with a video demonstration to help you learn this stitch step-by-step. So, grab your crochet hook and yarn, and let’s get started!
In this Double Crochet Stitch Tutorial you’ll find:
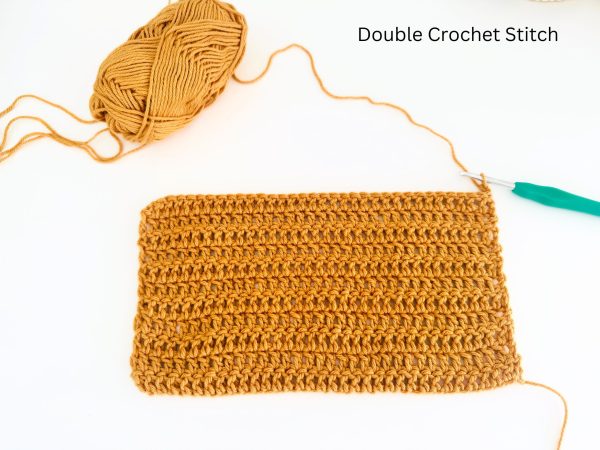
Take a look below at the double crochet rows, worked back and forth. They look different from single crochet rows because they create a less dense fabric.
The stitches are taller and have small spaces between them, which creates a lighter, lacy appearance – perfect for shawls. One of my favorite aspects of double crochet is how quickly your project grows, thanks to the height of the stitches.
This post may include affiliate links, view my disclosure policy for details.
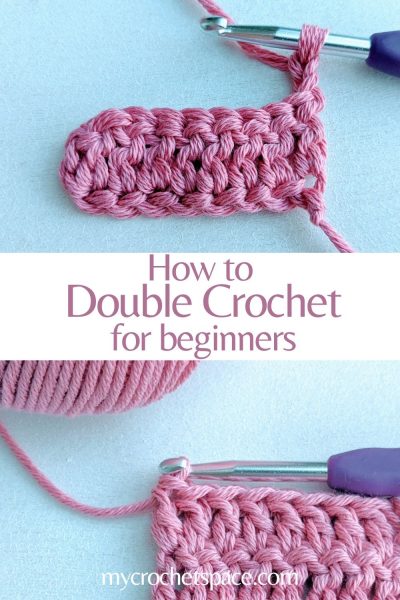
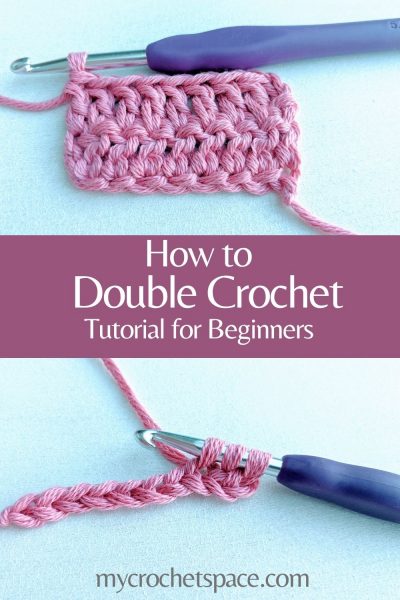
How to Double Crochet for Beginners
Follow the written instructions below or scroll down to watch a video tutorial 🙂
Abbreviations (US terms):
Ch = chain
YO = yarn over
St = stitch
DC = double crochet
Materials
- Any medium worsted weight yarn – or whatever yarn you have on hand
- Crochet hook 5mm (H) – or match your hook size to the yarn you’re using (as stated on the yarn label)
- Scissors, yarn needle
Double Crochet Stitch Instructions
Yarn over (YO) and insert your hook into the specified stitch. YO and pull up a loop. You should now have three loops on your hook. YO and pull through the first two loops on the hook. YO again and pull through the last two loops on your hook. That completes one double crochet stitch (DC). See the detailed photo tutorial below!
How to Double Crochet Stitch (DC) Step-by-Step Photo Tutorial
- Chain any number of chains. For the purpose of learning and practising this stitch – chain 10. (If you are an absolute beginner, you can learn how to make a foundation chain and the first basic stitch Single Crochet in this post here)
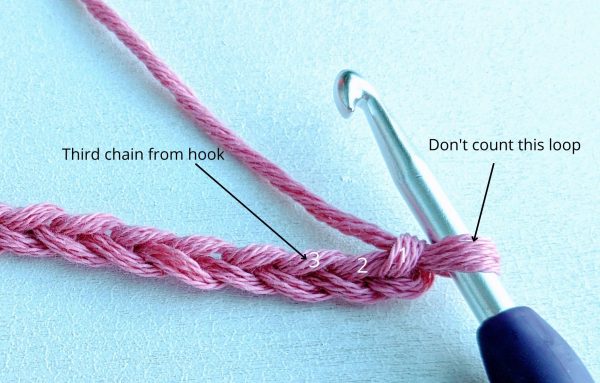
2. Yarn over (YO) and insert your hook into the 3d chain from your hook.
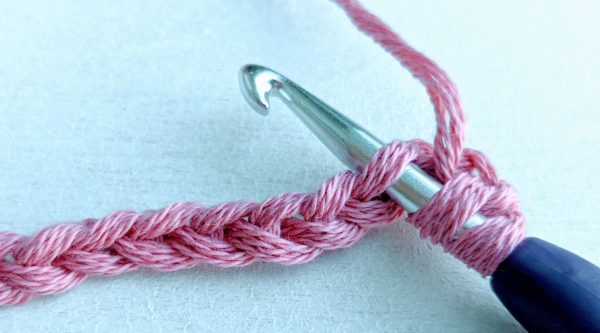
3. YO again and pull up a loop. You will have three loops on your hook now.
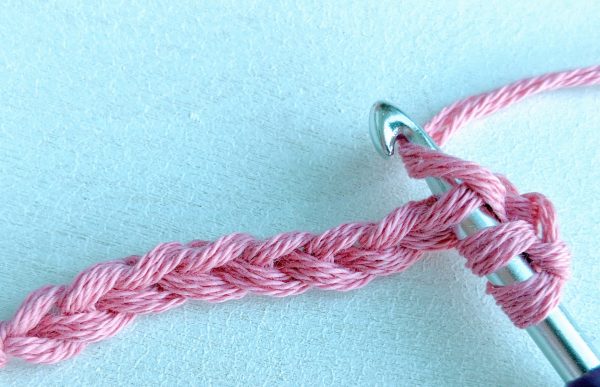
4. YO again and pull through the first two loops on the hook. You’ll have two loops on the hook left.
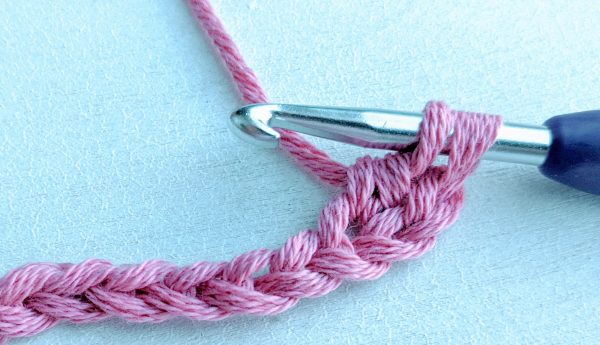
5. YO and pull through the last two loops on your hook.

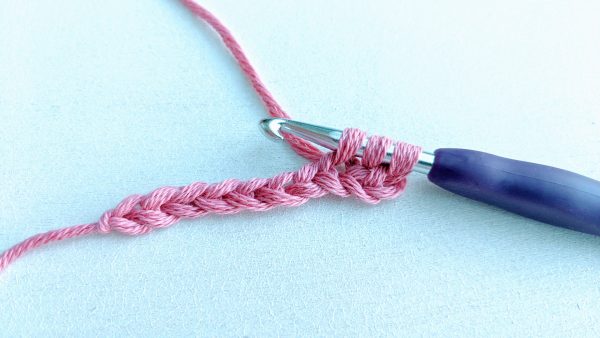
This is one Double Crochet stitch (DC).
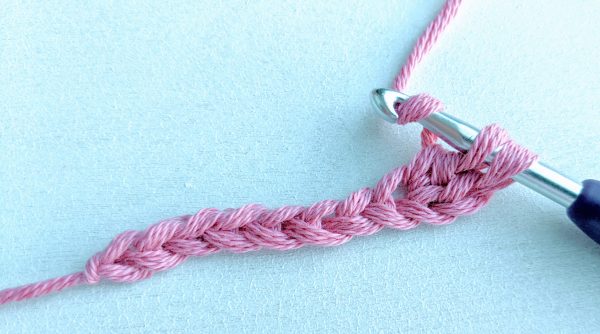
To make the second stitch, continue in the same way: YO and insert your hook into the next chain. YO and pull up a loop. YO, pull through two loops, then YO and pull through the last two loops on your hook.
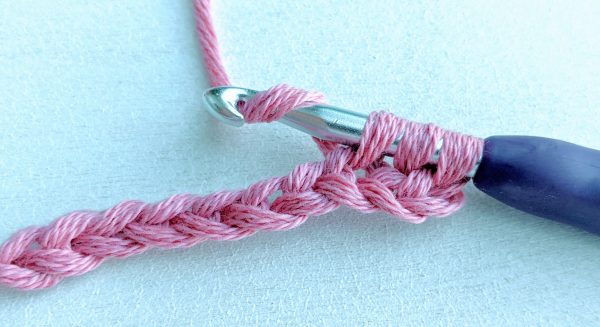
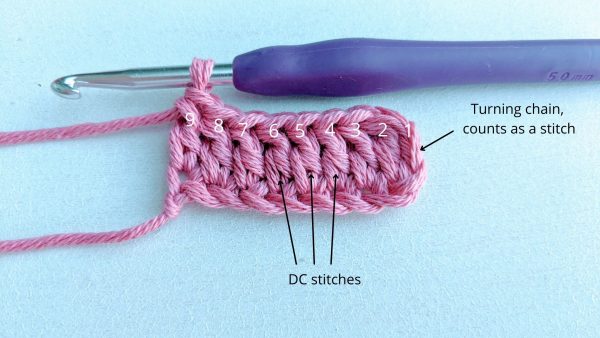
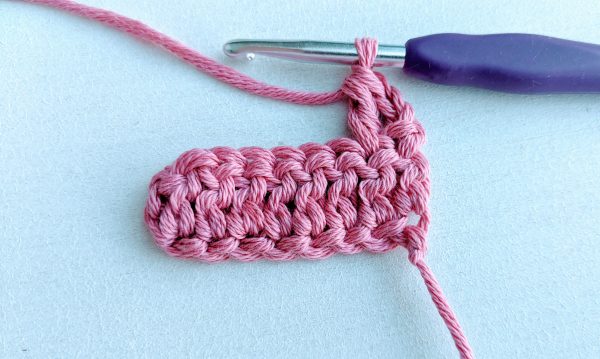
Continue working double crochets in every stitch until the end of the chain. You should have eight double crochet stitches plus the turning chain, which counts as one DC stitch.
Second Row of Double Crochet
Chain two (Ch2) and turn.
Note: Don’t get confused if you come across a pattern that requires you to chain 3 (instead of chain 2) at the beginning of a row when working with double crochet stitches. Chaining 3 at the start creates a taller first stitch and, as a result, a larger gap between the first and second stitches.
I usually chain 2 when working double crochet stitches in straight rows, like in scarves, blankets, or anything shaped like a rectangle or square. There’s no right or wrong here; it really depends on the pattern you’re following. Feel free to experiment and see what works best for you! 🙂
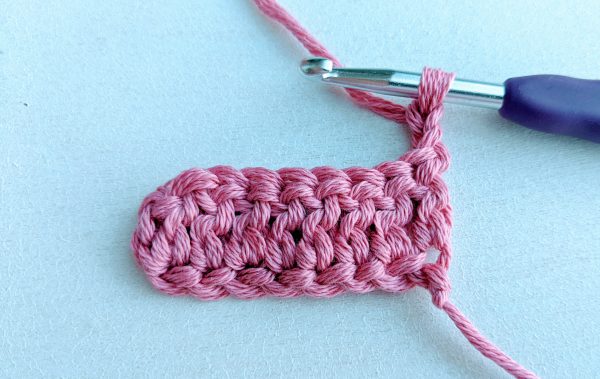
The Ch2 counts as the first double crochet stitch. To work the next double crochet stitch, insert your hook into the next stitch and work a DC as you did in the previous row. Continue working DC stitches into each stitch until the end of the row.
The last DC should be worked into the top loop of the turning chain from the previous row.
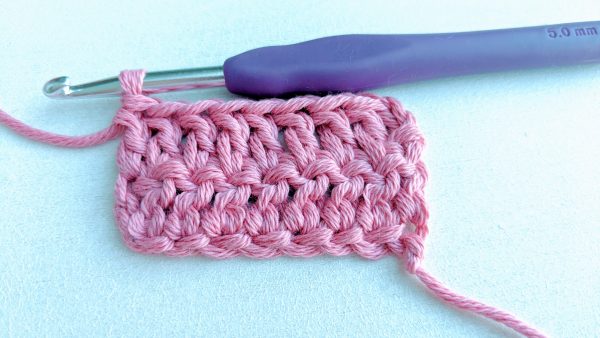
You should have the same number of double crochet stitches in every row. In this case, each row should have a total of 9 stitches (8 double crochet stitches plus the turning chain, which counts as the first stitch).
Note: Always chain 2 at the beginning of a new row, as this counts as the first stitch.
Video Demonstration – How to Double Crochet for Beginners
Fastening off
At the end of your project, you will need to cut the yarn at some point. After completing approximately 10 rows (or however many rows you’d like for your sample size), after completing the last double crochet stitch, chain one and then cut the yarn, leaving a 6-inch tail from the hook.
Next, draw the hook straight up, creating a very large loop until the cut end of the yarn comes out of the stitch. This will form a knot and secure your work, preventing it from unravelling.
Watch a video demonstration here.
Weaving in Ends
You don’t really need to weave in the ends on your sample piece, but if you’re up for a bit of practice, why not give it a go? 🙂
I like to use yarn needles for this, but you can totally use a crochet hook too. In fact, I used to weave in ends with my crochet hook all the time before I even knew yarn needles existed! 😄
If you decide to use your hook for that, choose a smaller size – it’s much easier, and the smaller hook won’t leave big holes in your project.
Then I discovered yarn needles (also known as tapestry needles), and honestly, I haven’t looked back. They just make the whole process smoother and quicker, and the finish looks super neat.
Weaving in your ends simply means hiding them neatly while also securing your final stitches. It keeps your project looking clean and, just as importantly, stops all that hard work from coming undone.
Here’s how to do it: Grab your yarn needle and thread the tail of your yarn through it. Then, near where you finished off your work, gently weave the needle in and out of the fabric. Remember, you don’t need to go all the way through to the other side, especially if your fabric is on the thicker side.
The trick is to keep the yarn hidden by weaving it within the stitches. Just zigzag your way through the fabric for about an inch or so, changing directions now and then to really secure it. Once you’ve woven the end sufficiently, carefully snip off the extra yarn close to the fabric.
And there you have it – your end is neatly tucked away, and your beautiful work stays perfect! Essentially, by weaving in the ends, we’re hiding the yarn end and securing our project’s final knot!
I really hope you find this double crochet stitch tutorial useful. And if you’re feeling inspired to create something with this stitch, check out the double crochet patterns and beginner-friendly options below. Happy crocheting! 🙂
Double Crochet Stitch Uses
- Blankets / Baby blankets / Afghans / Throws
- Washcloths / Dishcloths
- Bags / Market bags / Tote bags
- Scarves / Cowls / Infinity Scarves
- Shawls / Wraps
Double Crochet Stitch Patterns
- Crochet Market Bag (main stitches: double crochet)
- Crochet Triangle Shawl – Aquamarine Joy (main stitches: double crochet)
- Crochet Waffle Stitch Washcloth (main stitches: modified double crochet)
- Double Waffle Crochet Baby Blanket (main stitches: modified double crochet)
Easy Free Patterns for Beginners
Here are some easy patterns where you can practise double crochet and single crochet stitches:
- Easy Crochet Dishcloth Pattern (main stitches: single crochet and double crochet)
- Crochet Moss Stitch Scarf (main stitches: single crochet)
- Crochet Men’s Scarf Cool Ombre (main stitches: single crochet)
- Crochet Tea Towel – Free Pattern (main stitches: single crochet)
More Easy Stitch Tutorials for Beginners
- How to Crochet – a Step by Step Guide
- How to Half Double Crochet
- Granny Stitch Crochet
- Crochet Lemon Peel Stitch – Quick Tutorial
- Moss Stitch Crochet Tutorial
4 replies on “How to Double Crochet Stitch for Beginners (US Terms)”
A very therapeutic teaching video. Thank you for being so thorough & precise. Next I’m going to share you with my friends who are attending an MS Knit & Natter through Zoom.
Smiles Hayley x
Hi Hayley, thank you so much for your feedback! Really appreciate it and glad you liked it! 🙂 XX
A lady who recently had a stroke asked me to teach her to crochet and although I had been crocheting for many years I did not know where to begin. Thanks for this tutorial I am sure she will have fun starting.
That’s wonderful! It’s great to hear the tutorial was helpful. Happy crocheting to both of you! 💗